

Procedure Overview
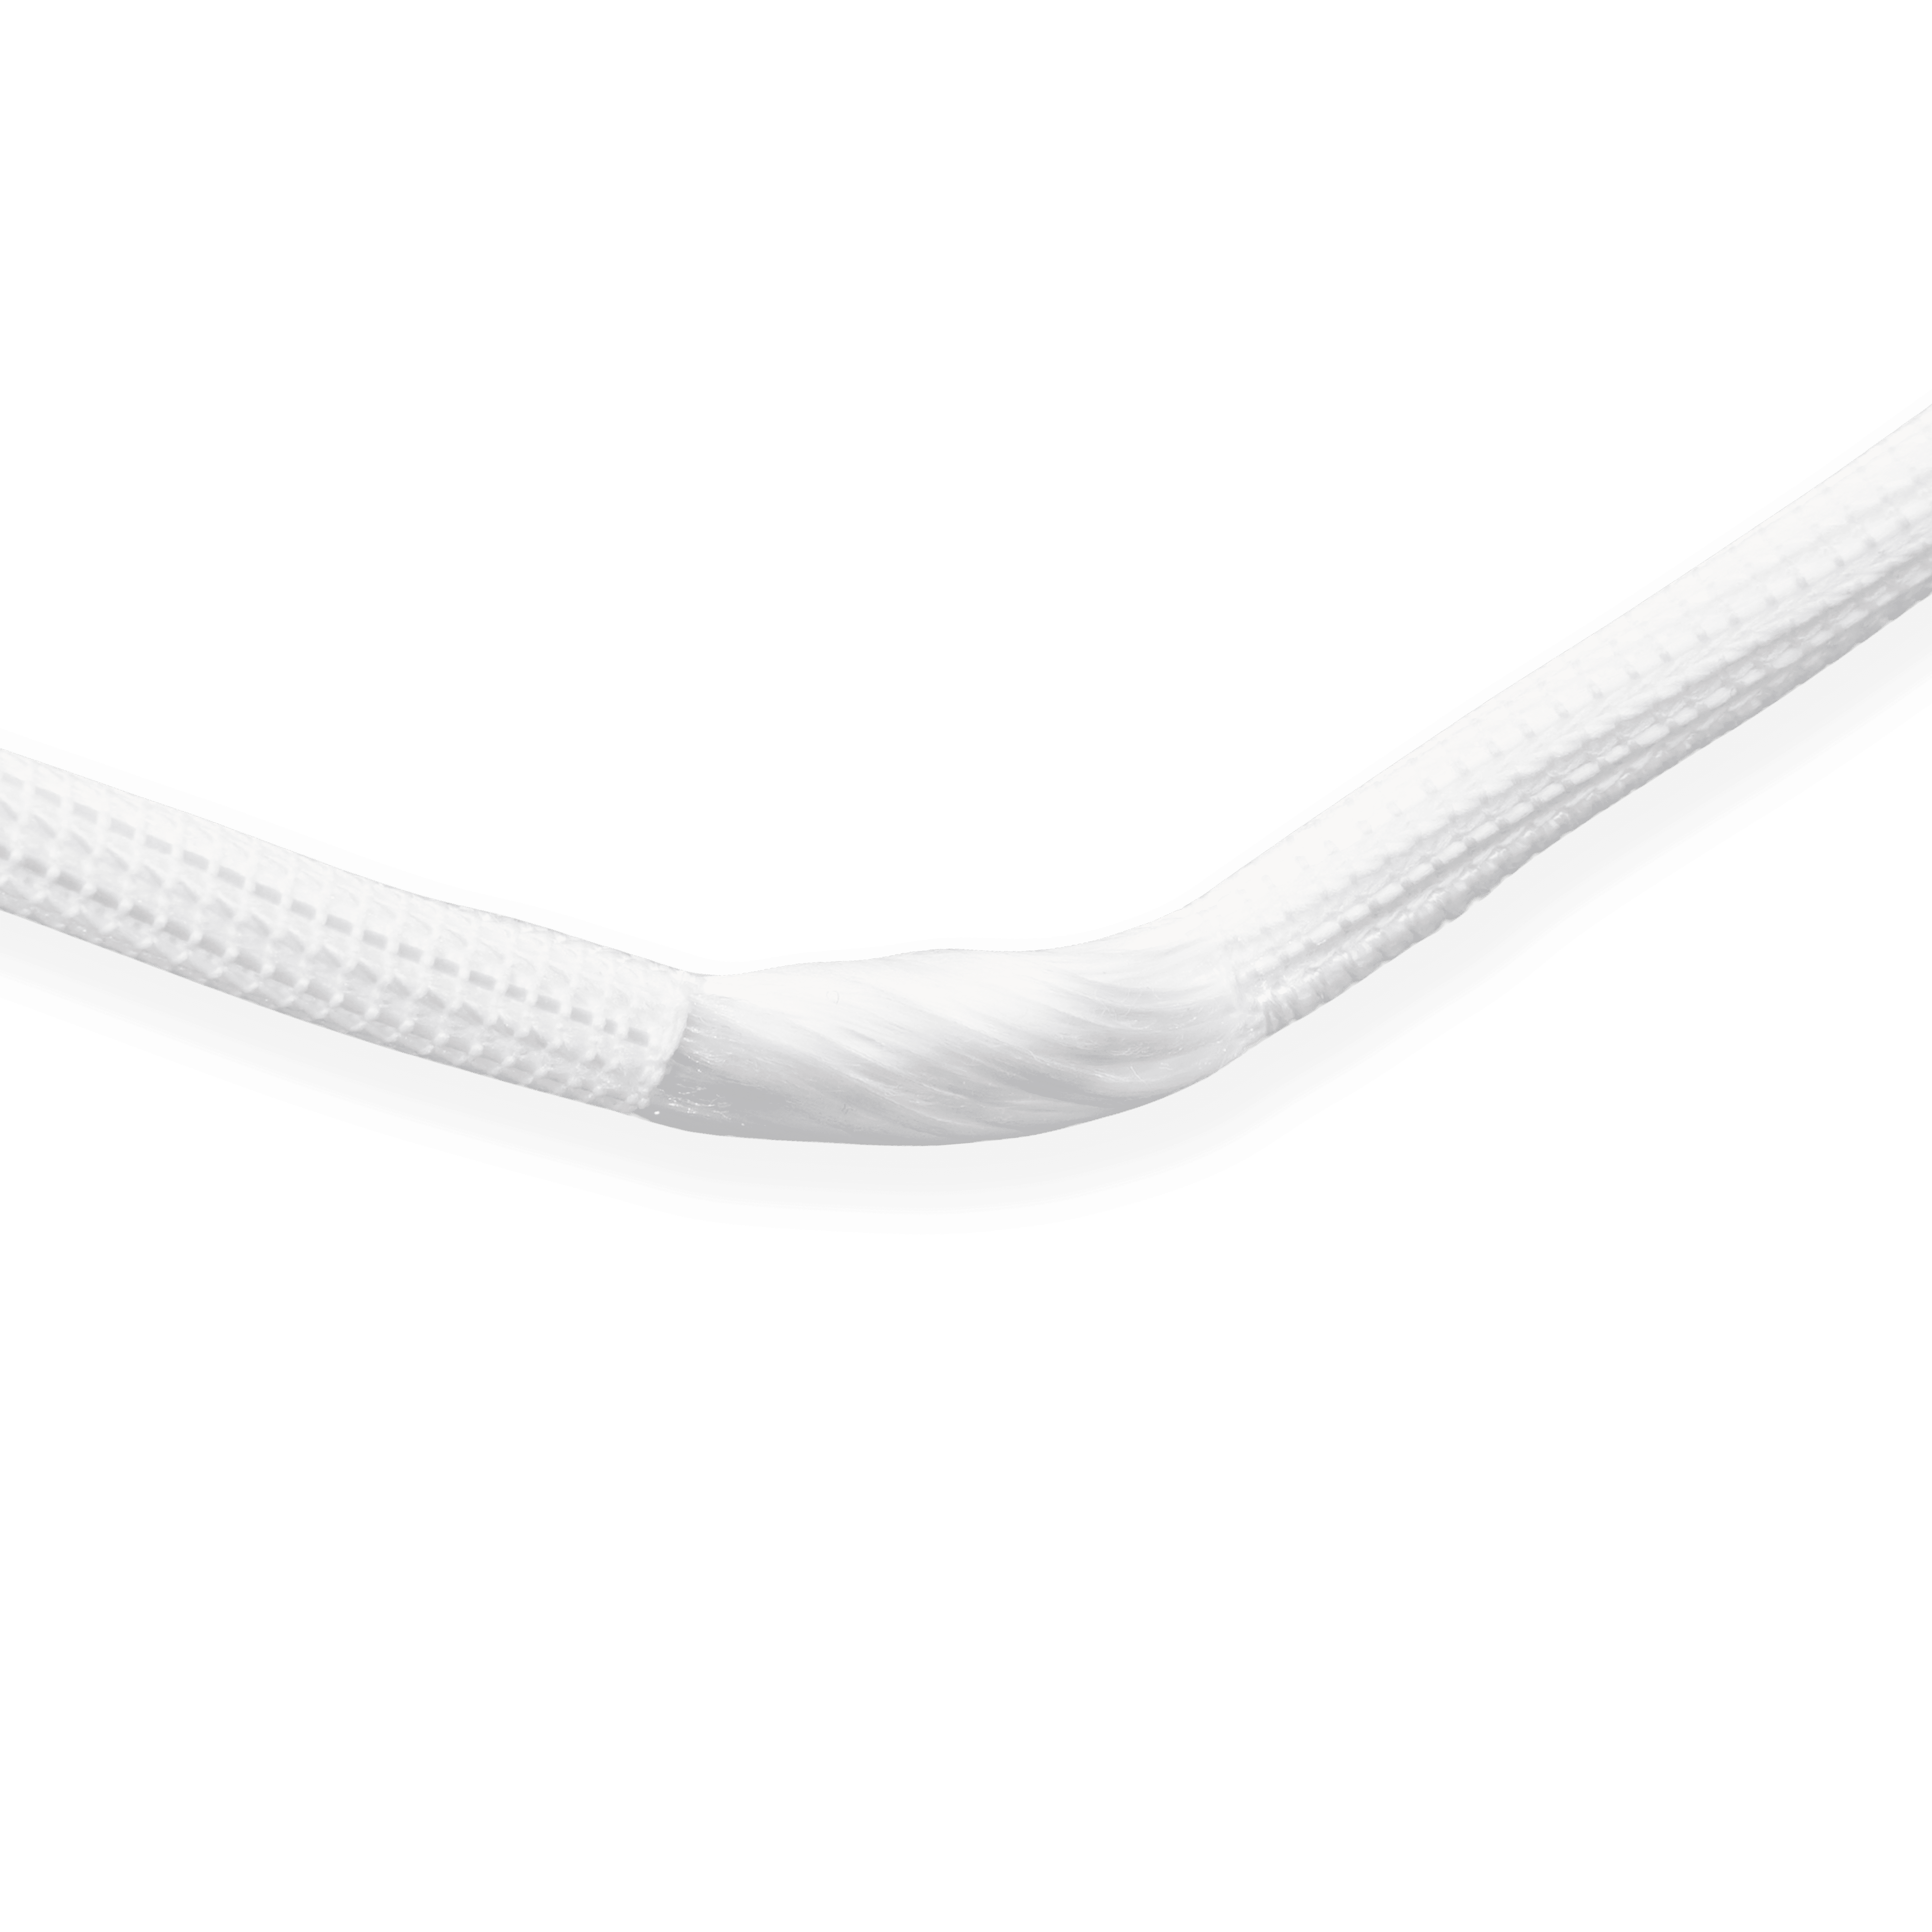
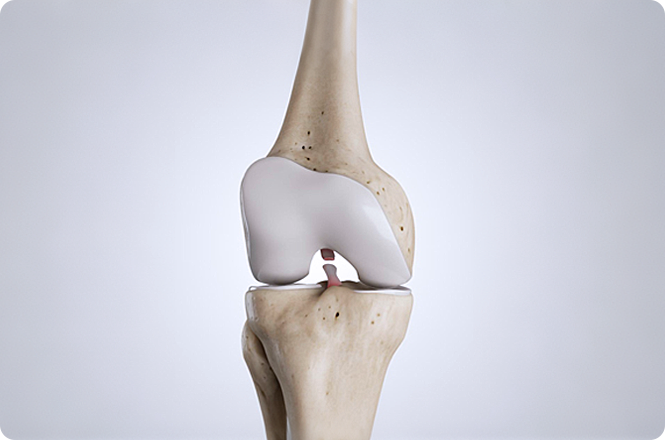
Using an artificial ligament to reconstruct the ACL enables faster recovery, early rehabilitation, and quick functional recovery. Intraoperatively, artificial ligament ACL reconstruction must achieve "isometric" or "near-isometric" reconstruction while preserving the ACL remnant as much as possible.
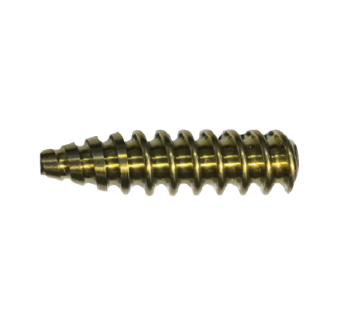
After creating the femoral and tibial tunnels and pulling the artificial ligament into the bone tunnels, both sides are fixed with metal interference screw cortical compression fixation, and the excess ligament at both ends is trimmed to complete the procedure.
Core Value

Minimally invasive

High strength

Recovery faster

Avoid Tendon Harvesting Risks
Operation Process
01
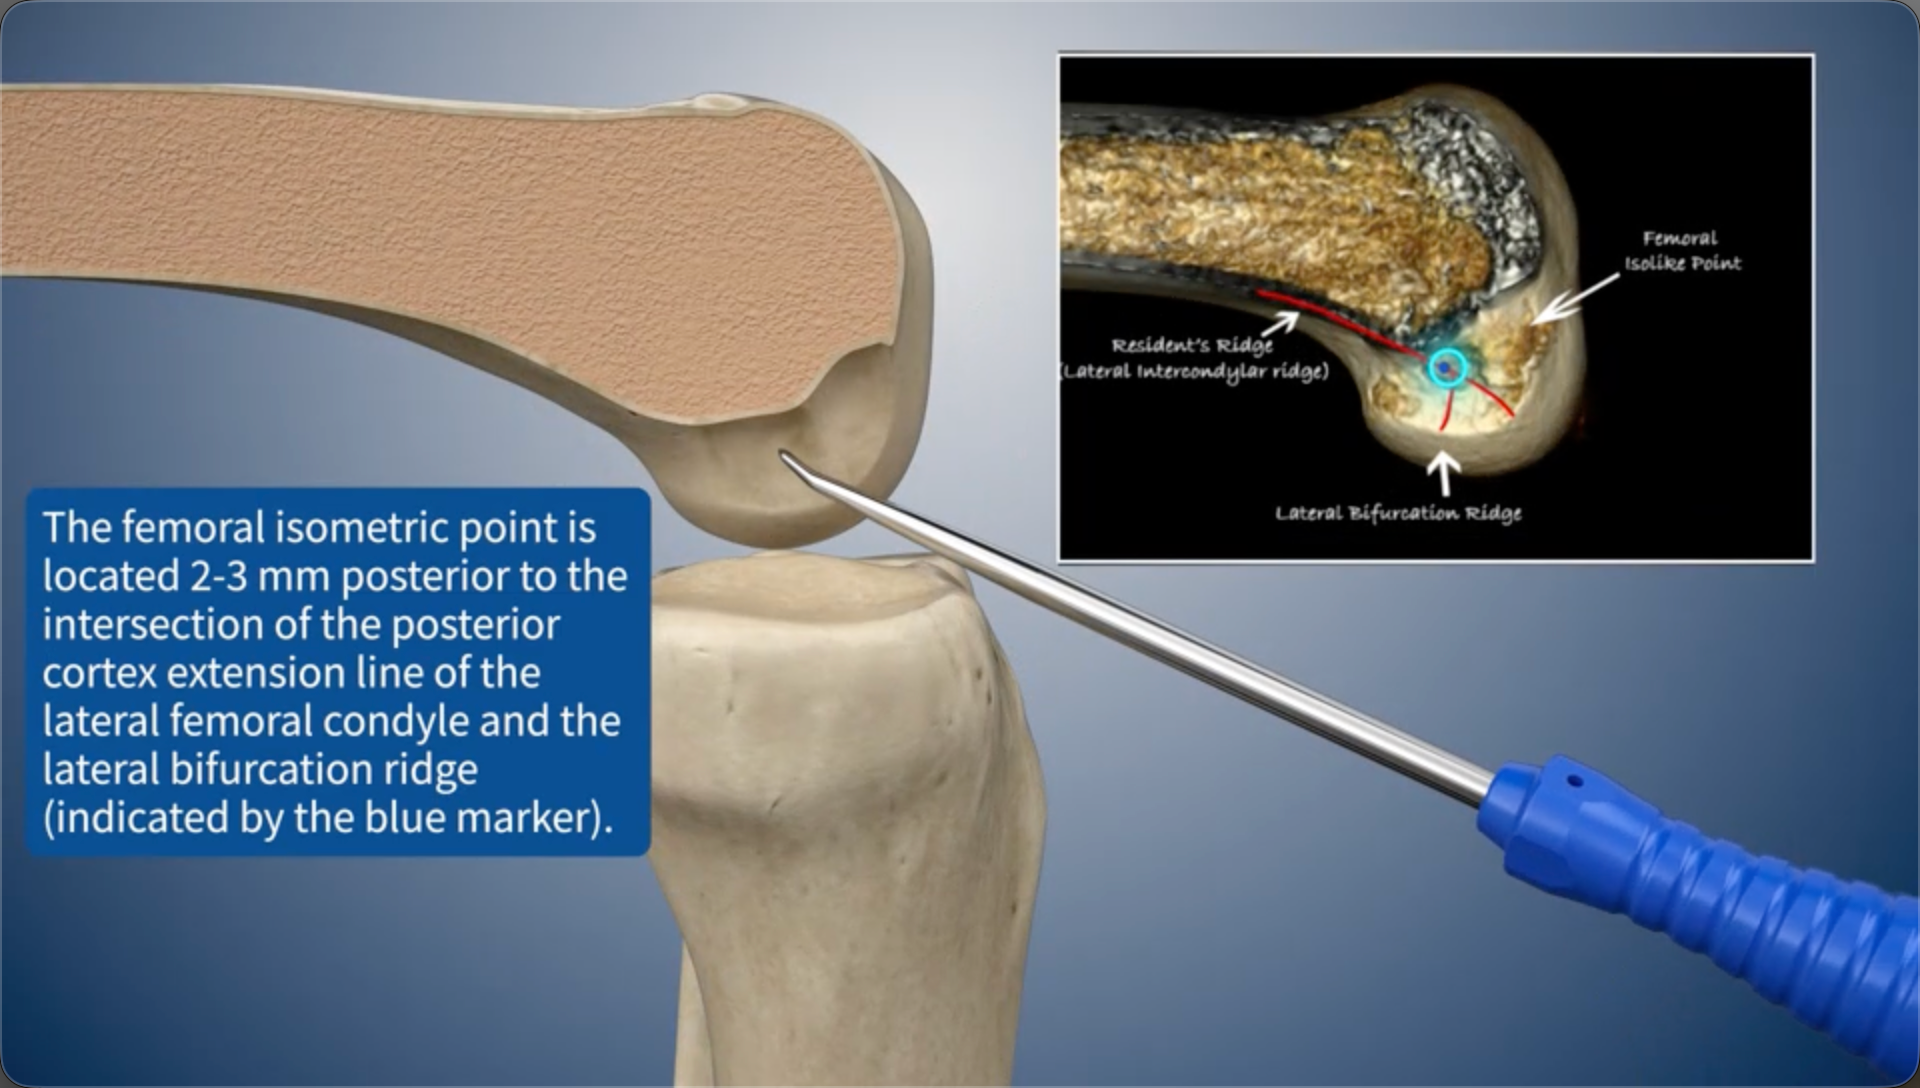
The femoral isometric point is located 2-3 mm posterior to the intersection of the posterior cortex extension line of the lateral femoral condyle and the lateral bifurcation ridge (indicated by the blue marker).
02
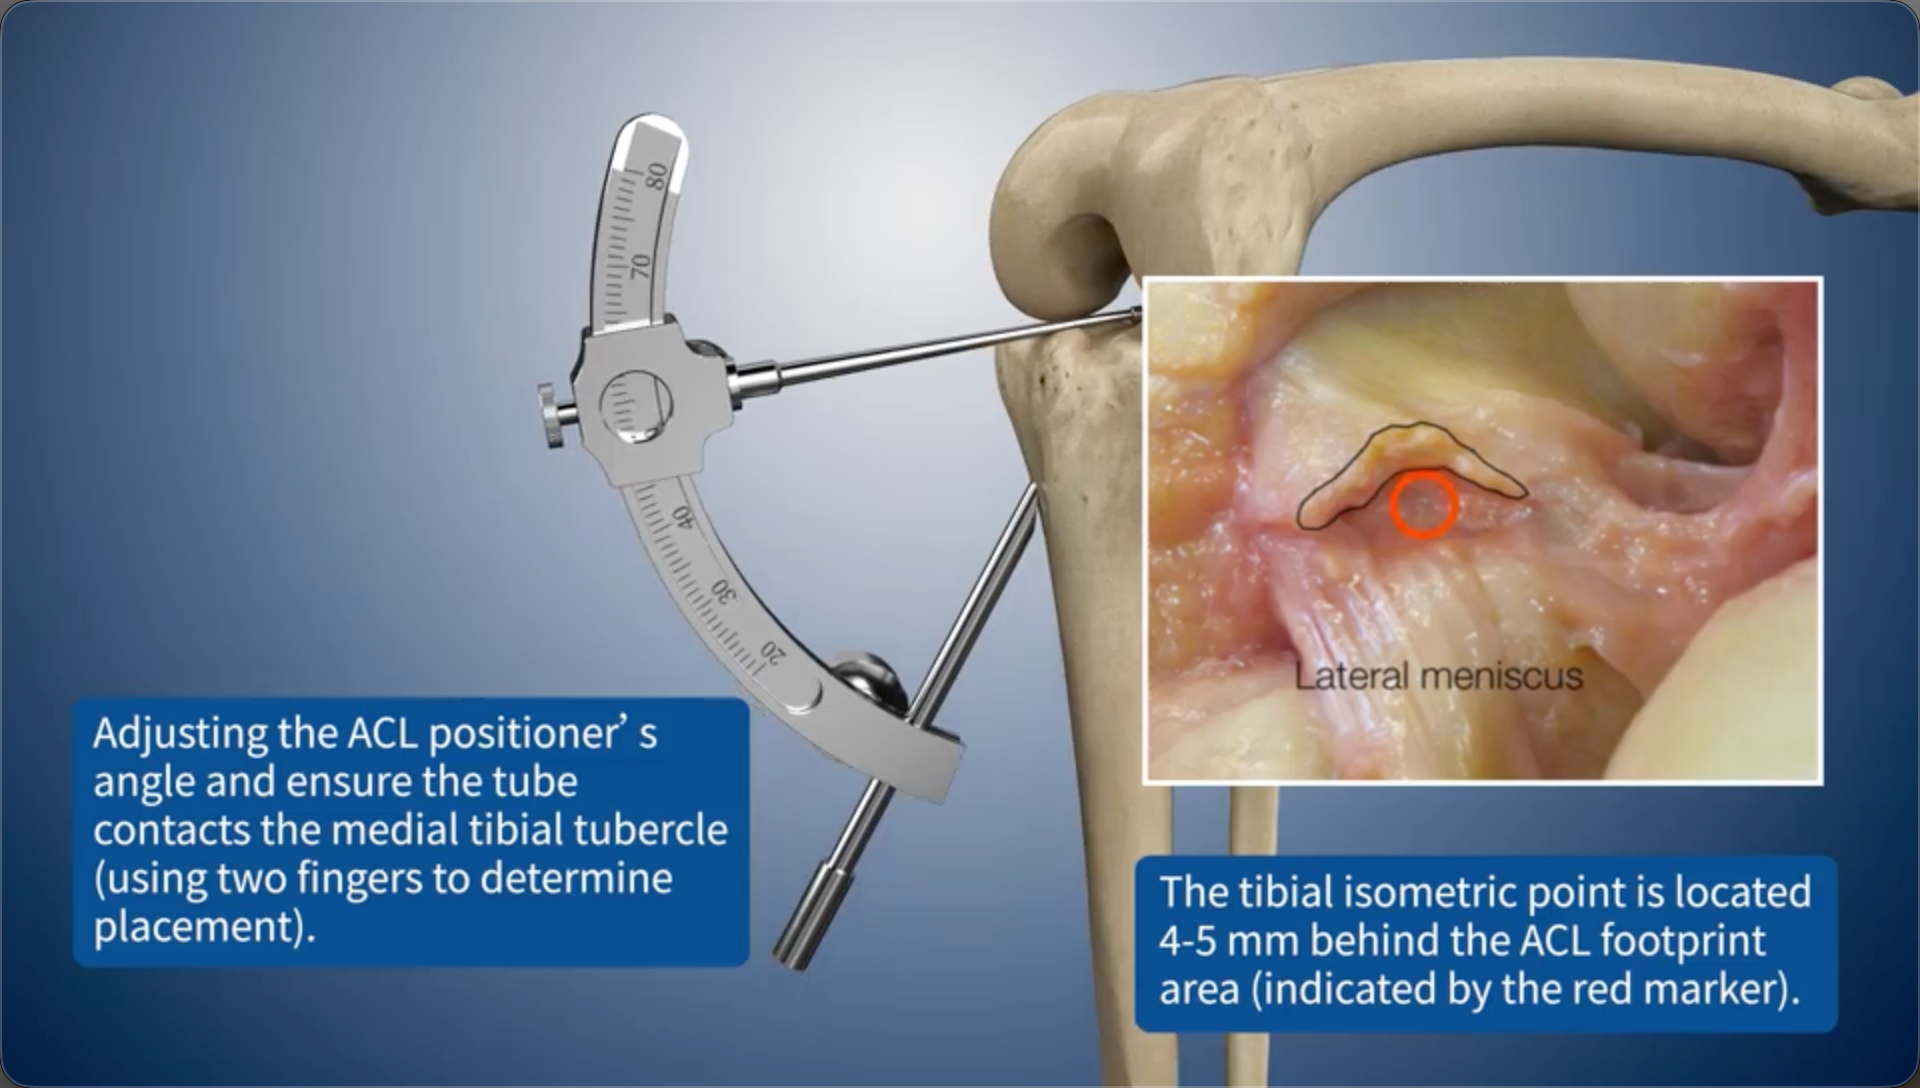
Adjusting the ACL positioner's angle and ensure the tube contacts the medial tibial tubercle (using two fingers to determine placement).The tibial isometric point is located 4-5 mm behind the ACL footprint area (indicated by the red marker).
03
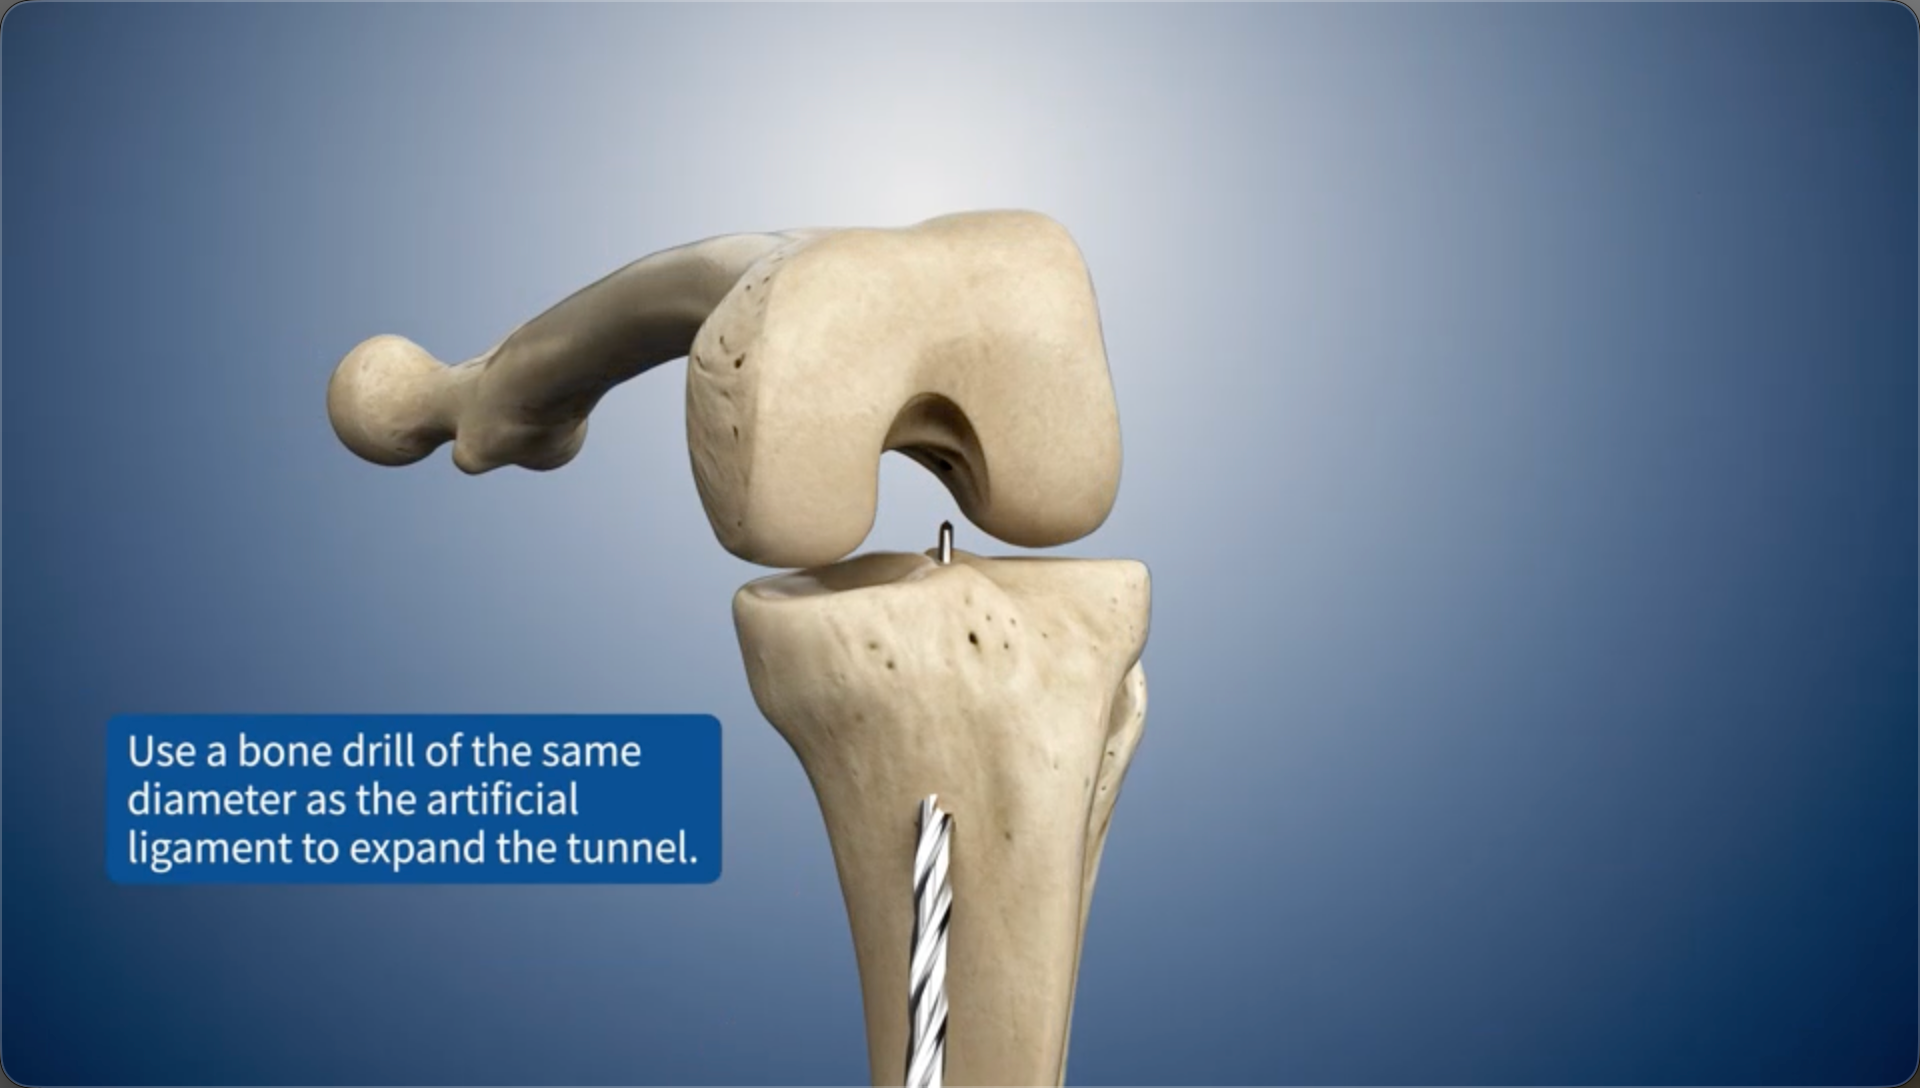
Use a bone drill of the same diameter as the artificial ligament to expand the bone tunnel.
04
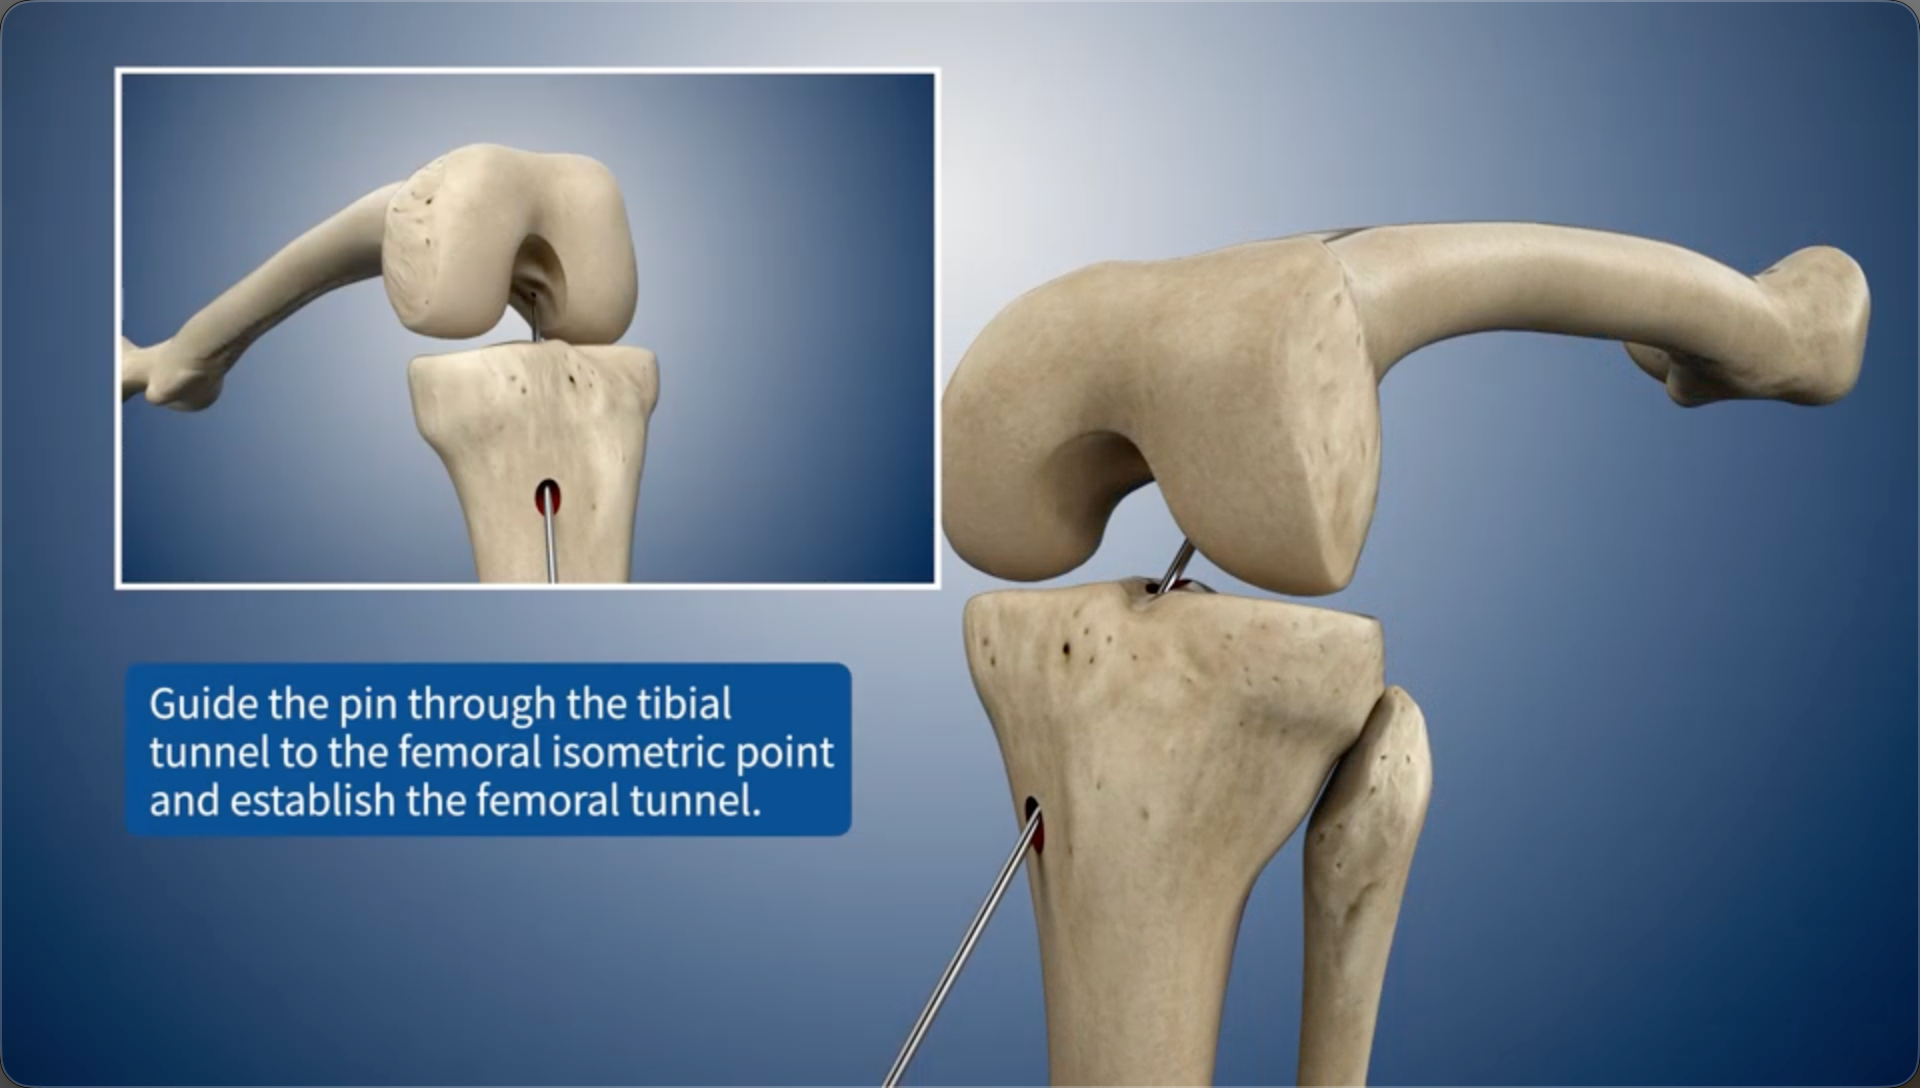
Guide the pin through the tibial bone tunnel to the femoral isometric point and establish the femoral bone tunnel.
05
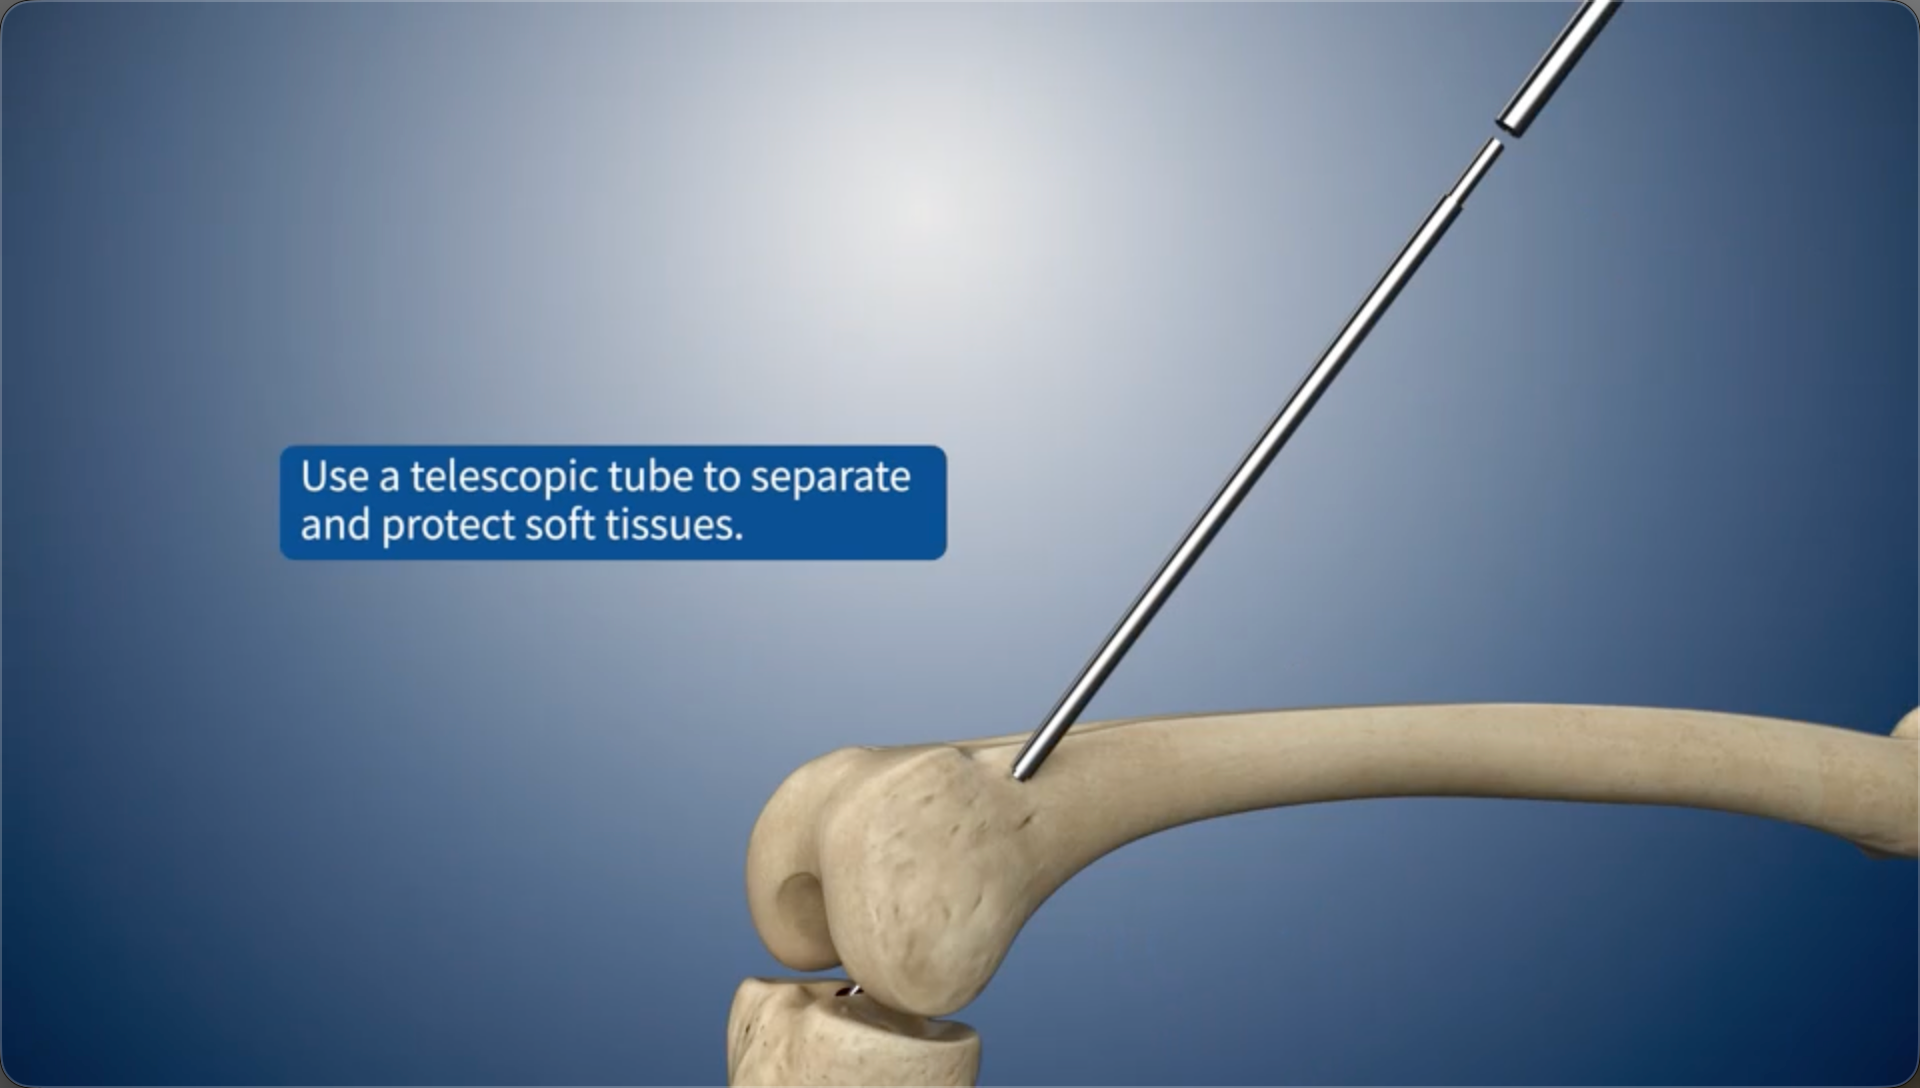
Use a telescopic tube to separate and protect soft tissues.
06
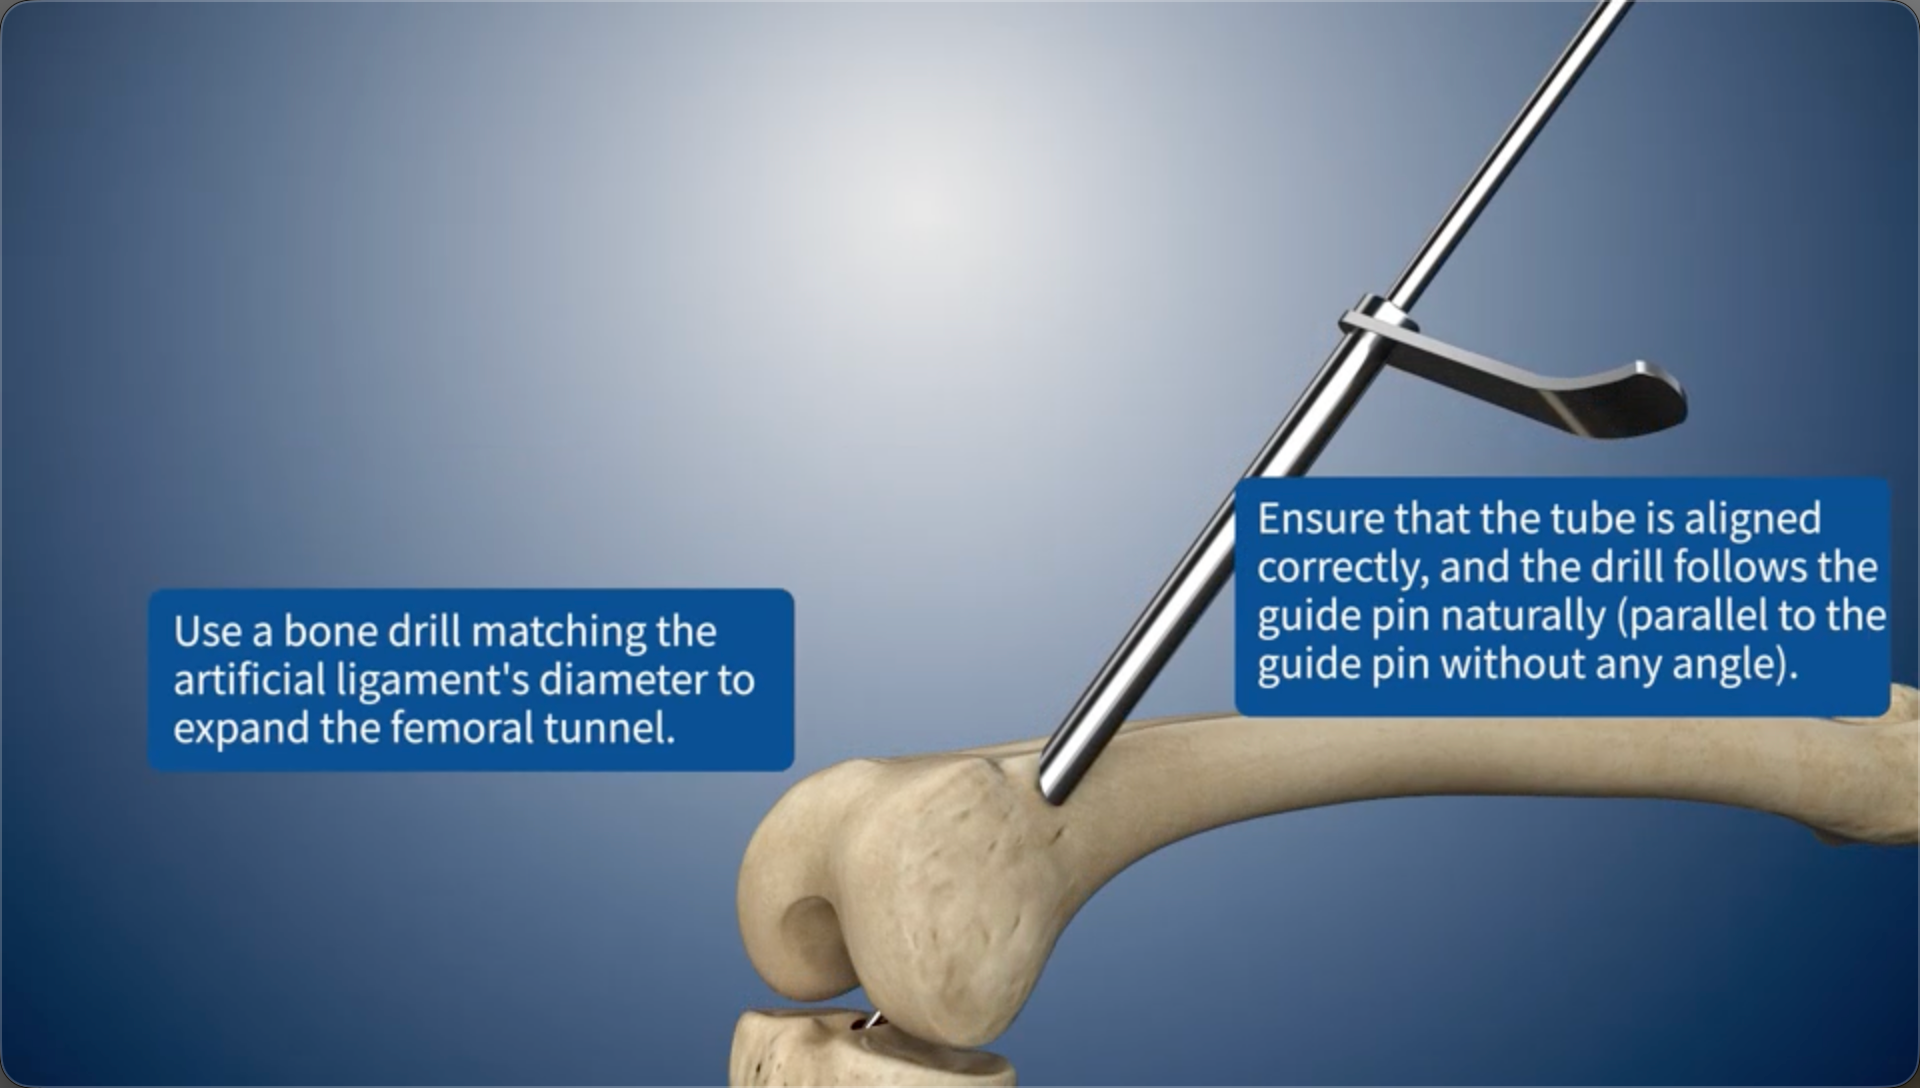
Use a bone drill matching the artificial ligament's diameter to expand the femoral bone tunnel.Ensure that the tube is aligned correctly, and the drill follows the guide pin naturally (parallel to the guide pin without any angle).
07
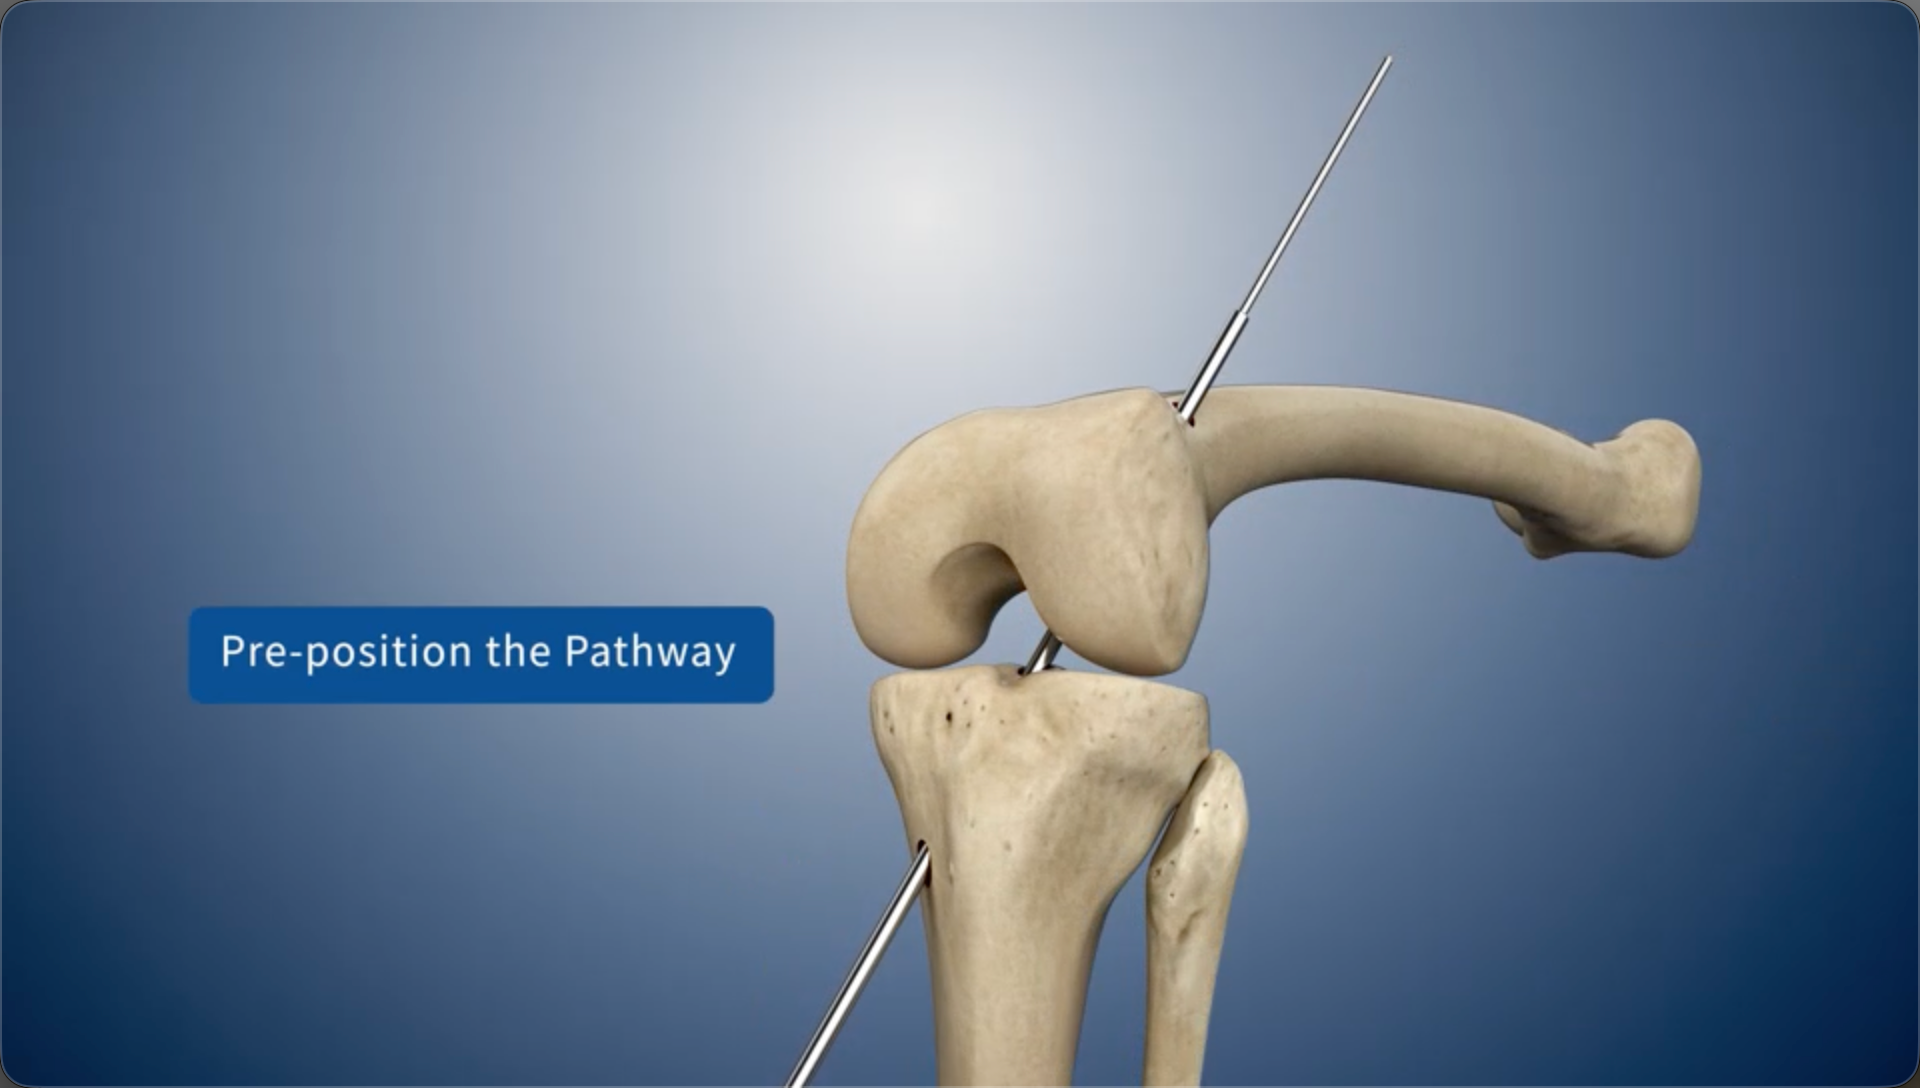
Pre-position the Pathway
08
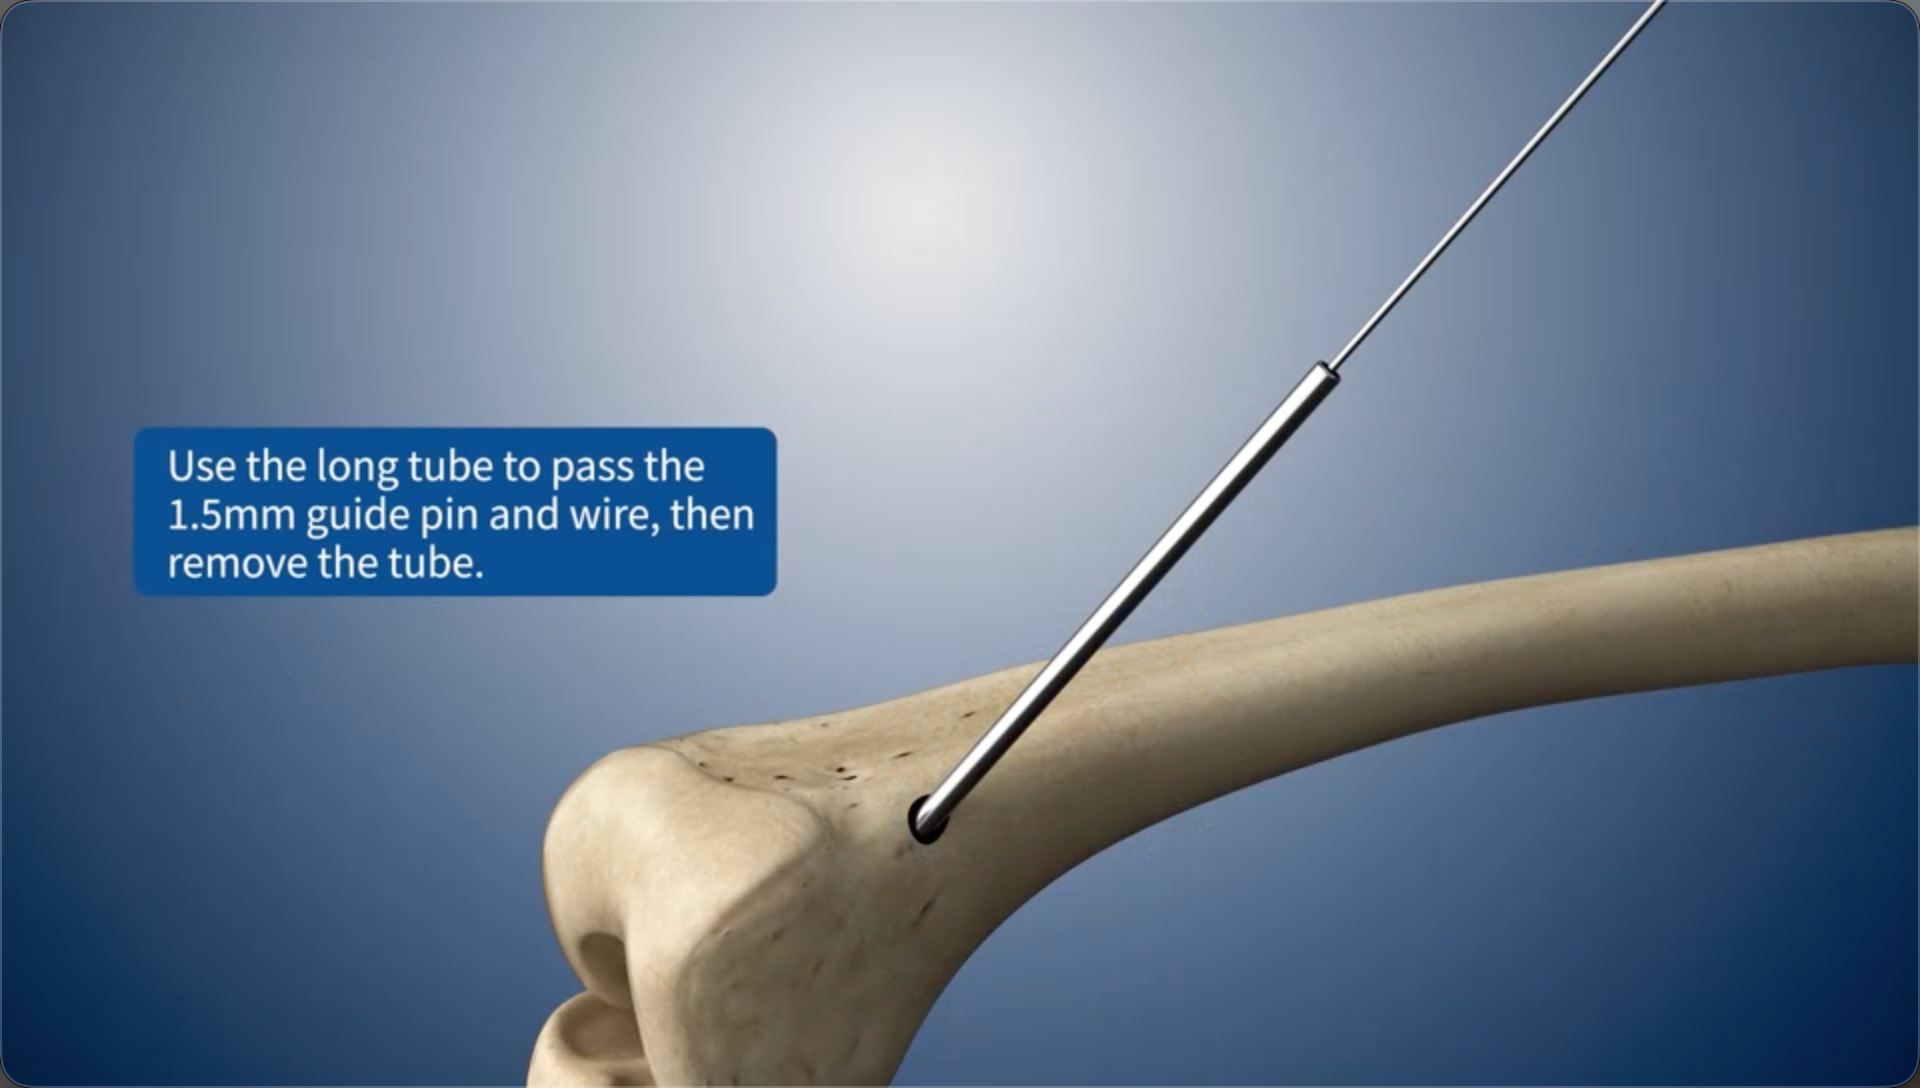
Use the long tube to pass the 1.5mm guide pin and wire, then remove the tube.
09
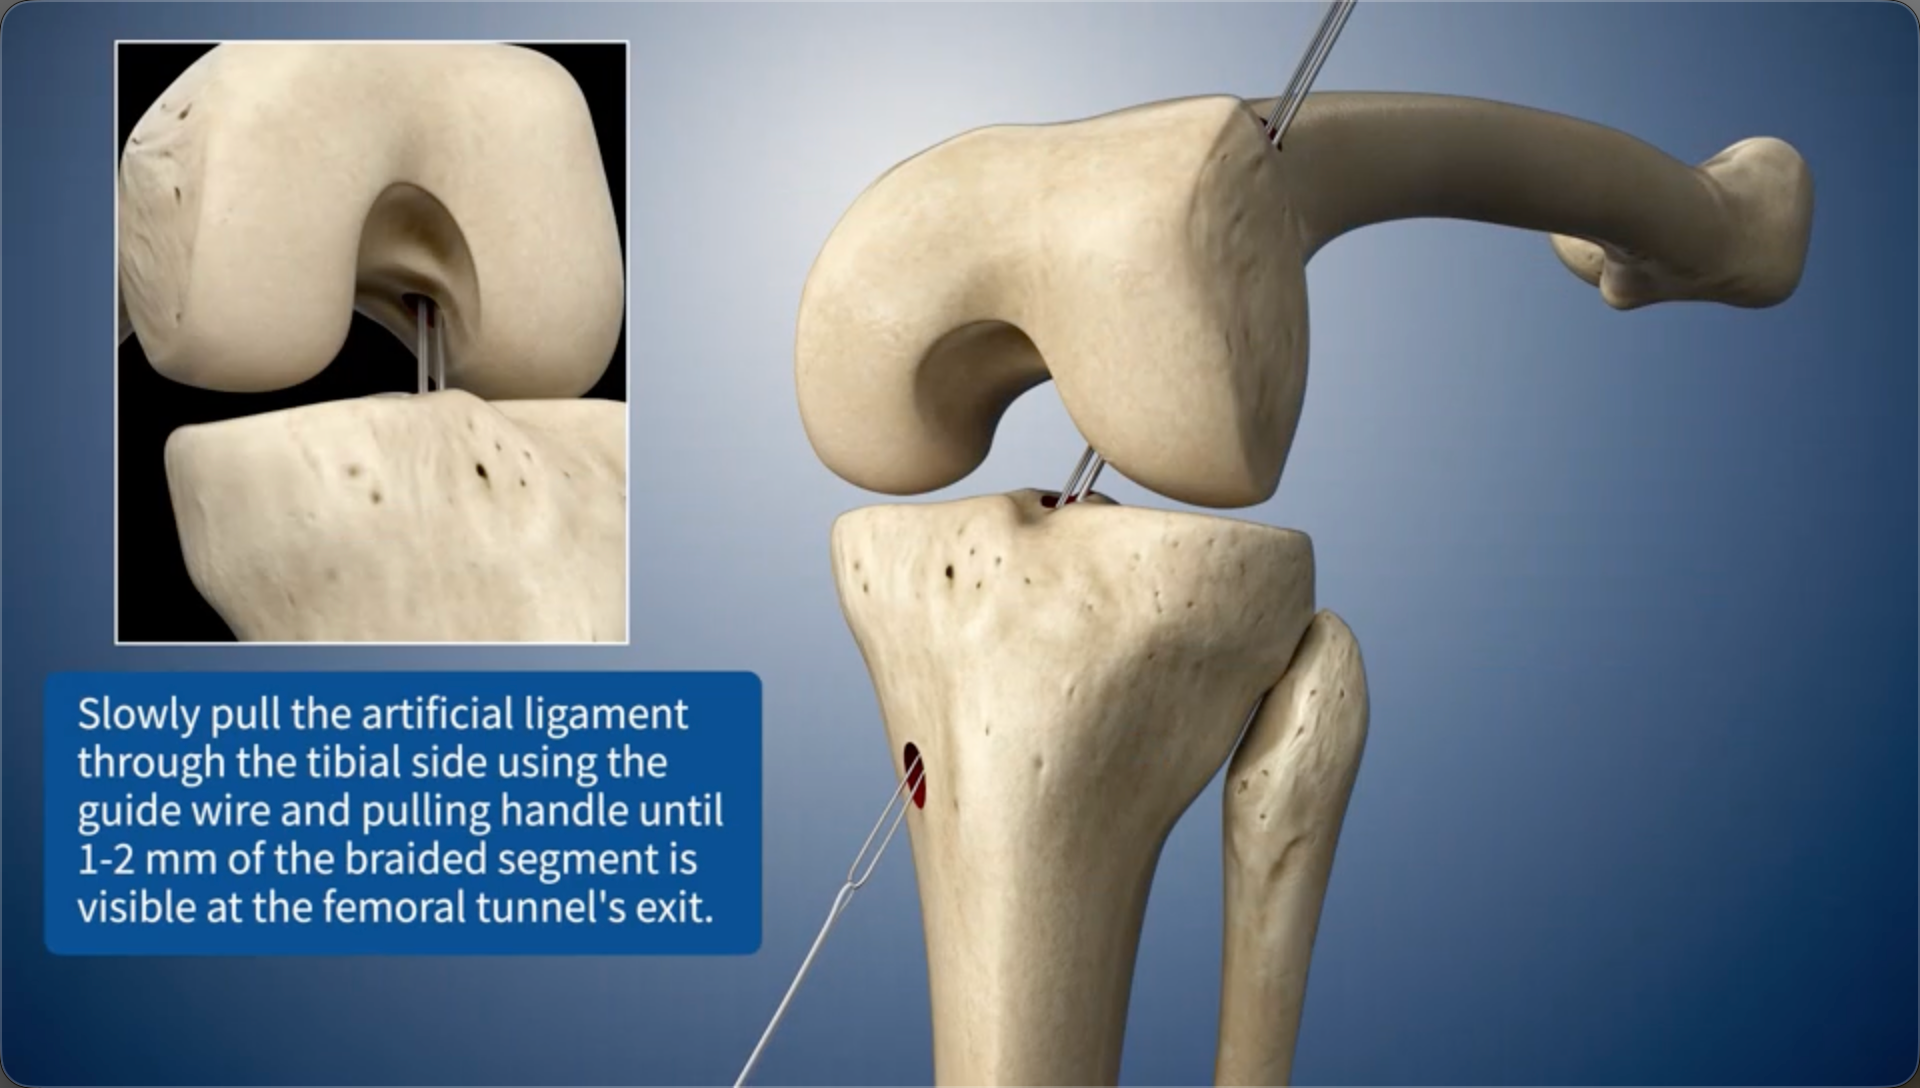
Slowly pull the artificial ligament through the tibial side using the guide wire and pulling handle until 1-2 mm of the braided segment is visible at the femoral bone tunnel's exit.
10
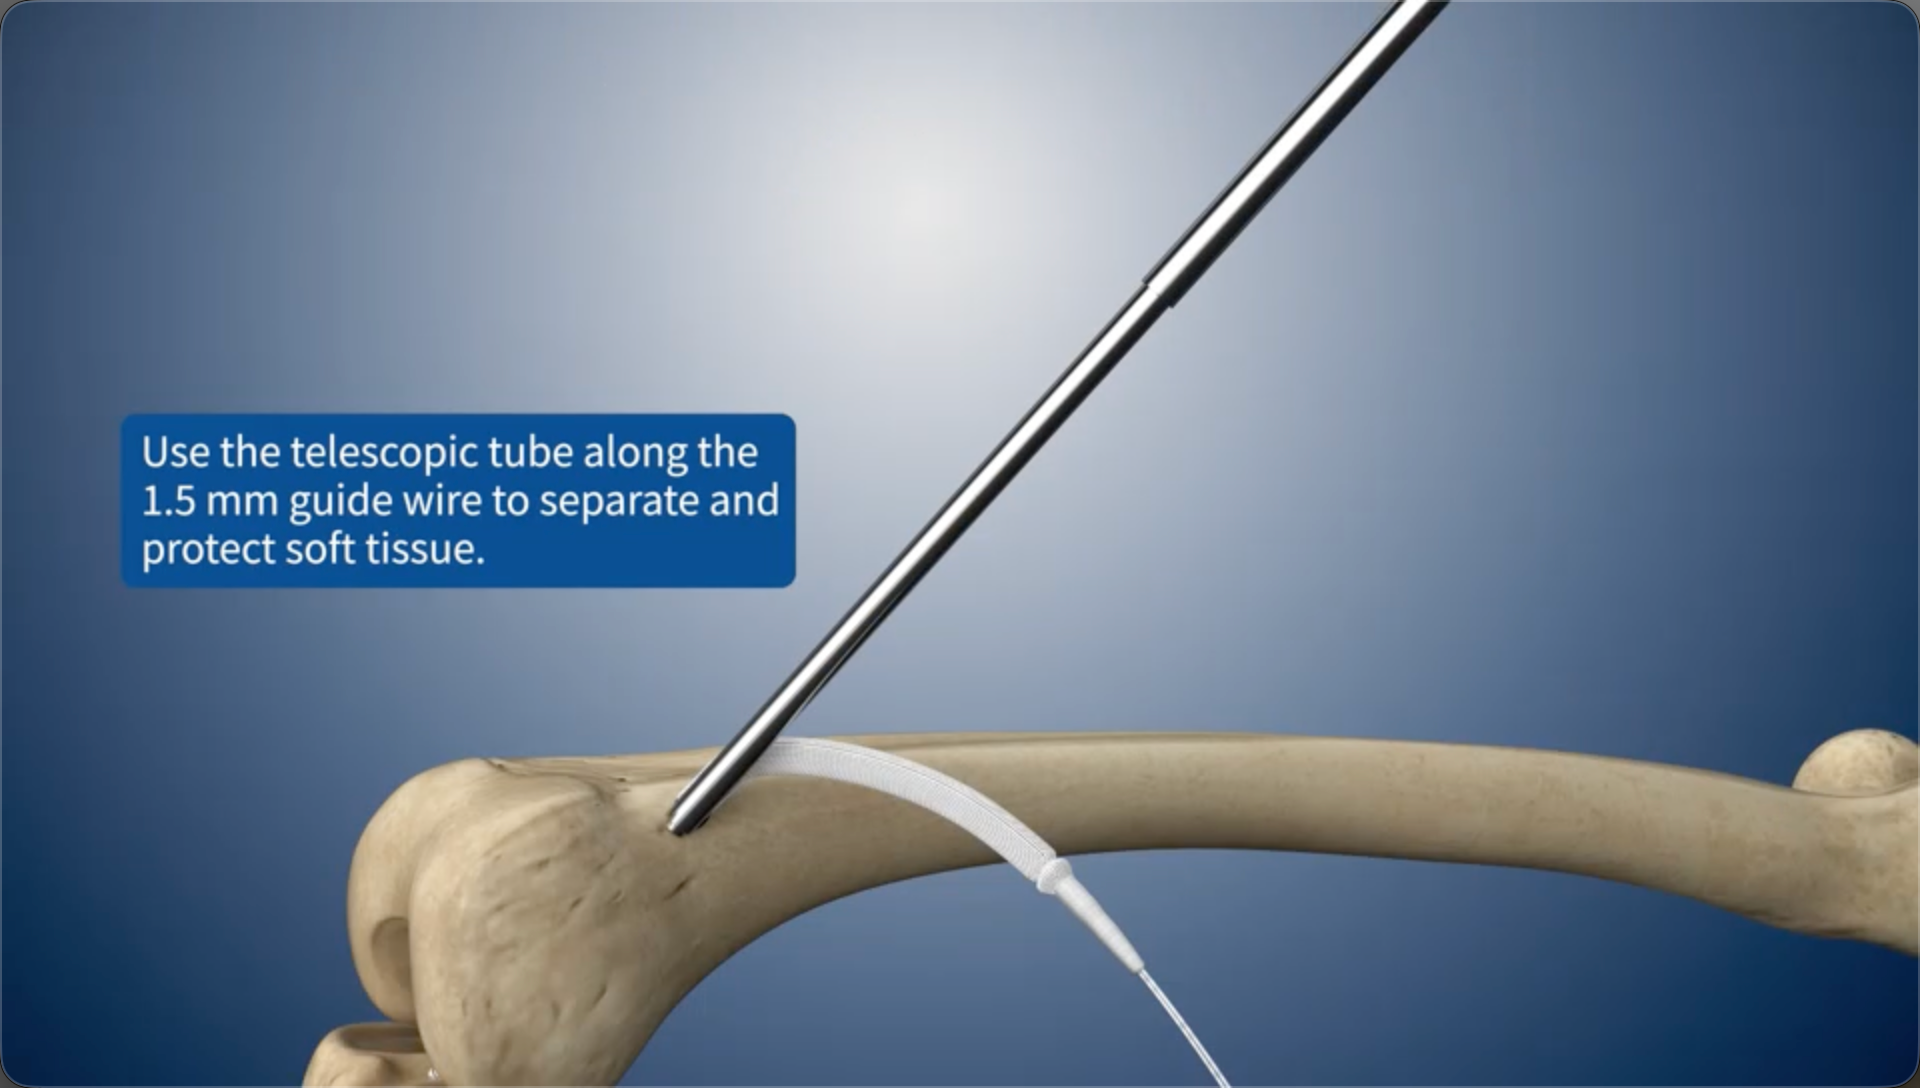
Use the telescopic tube along the 1.5 mm guide wire to separate and protect soft tissue.
11
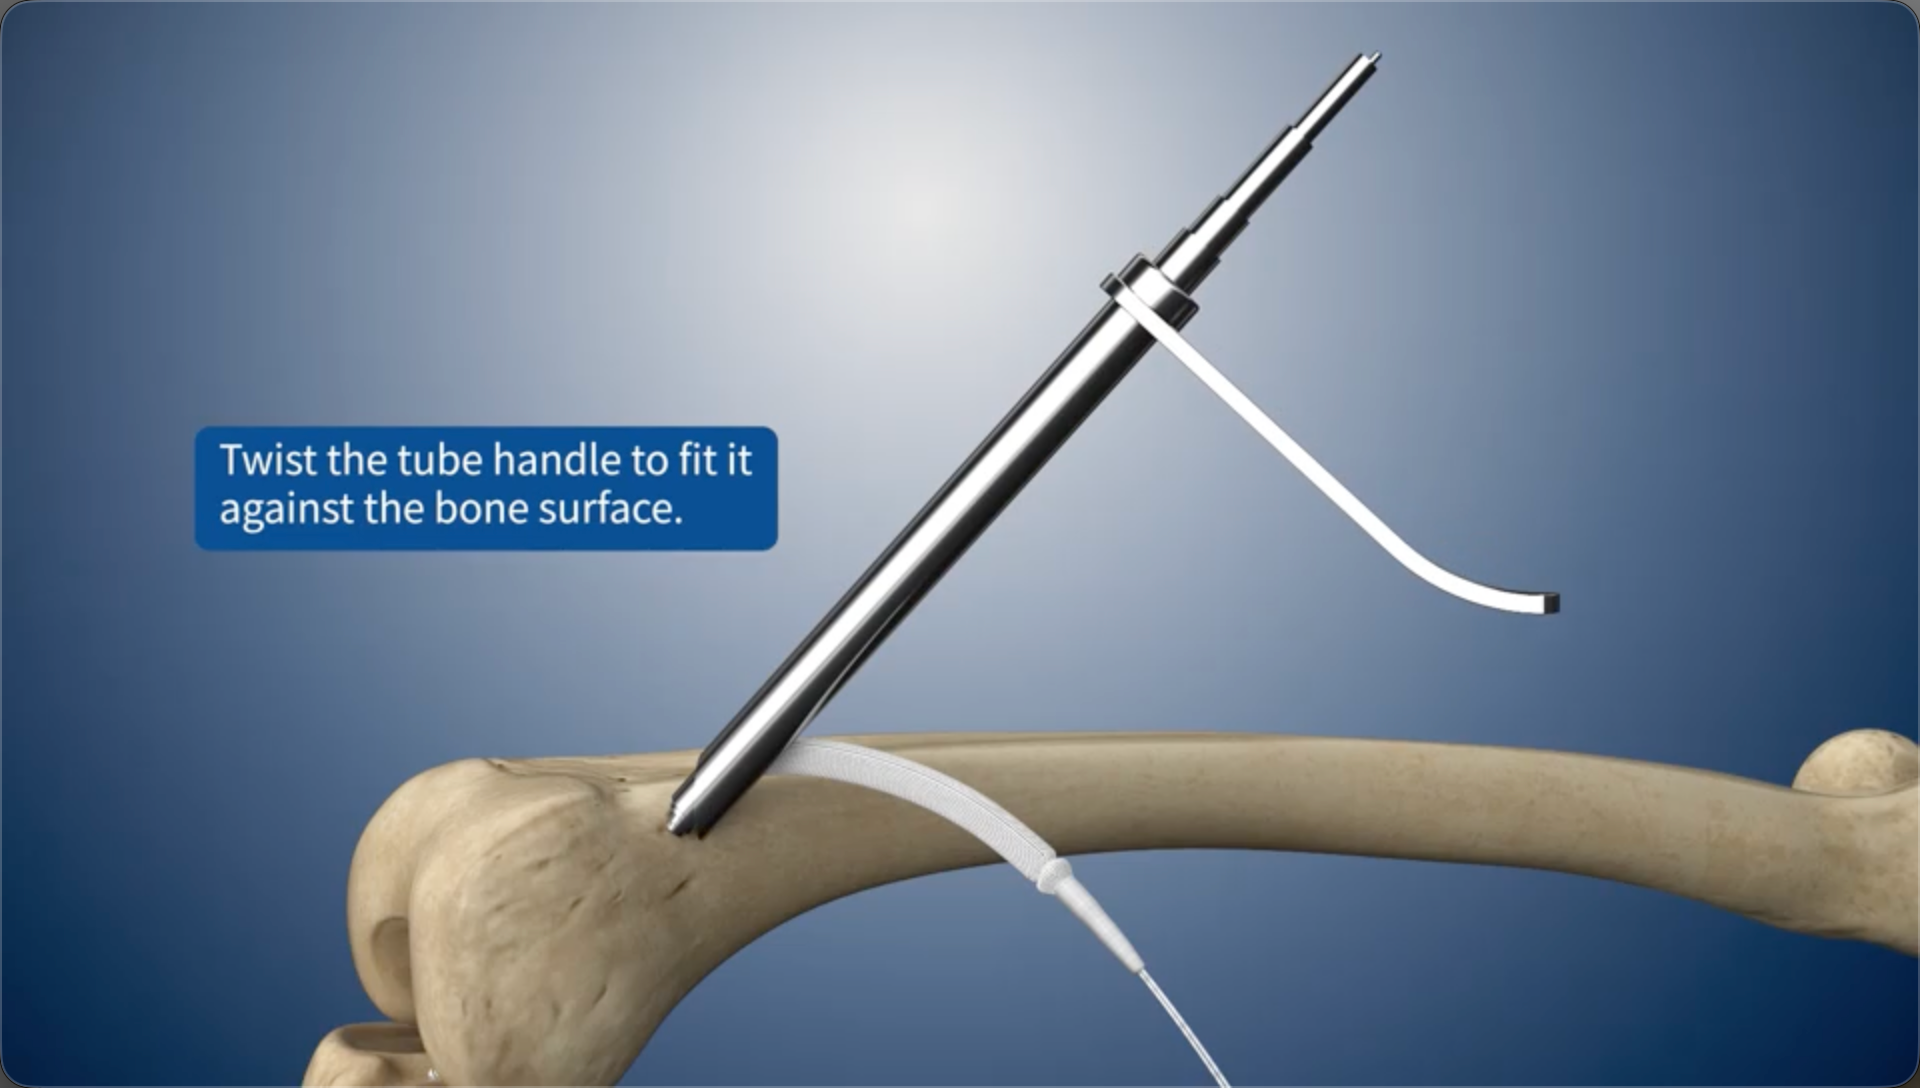
Twist the tube handle to fit it against the bone surface.
12
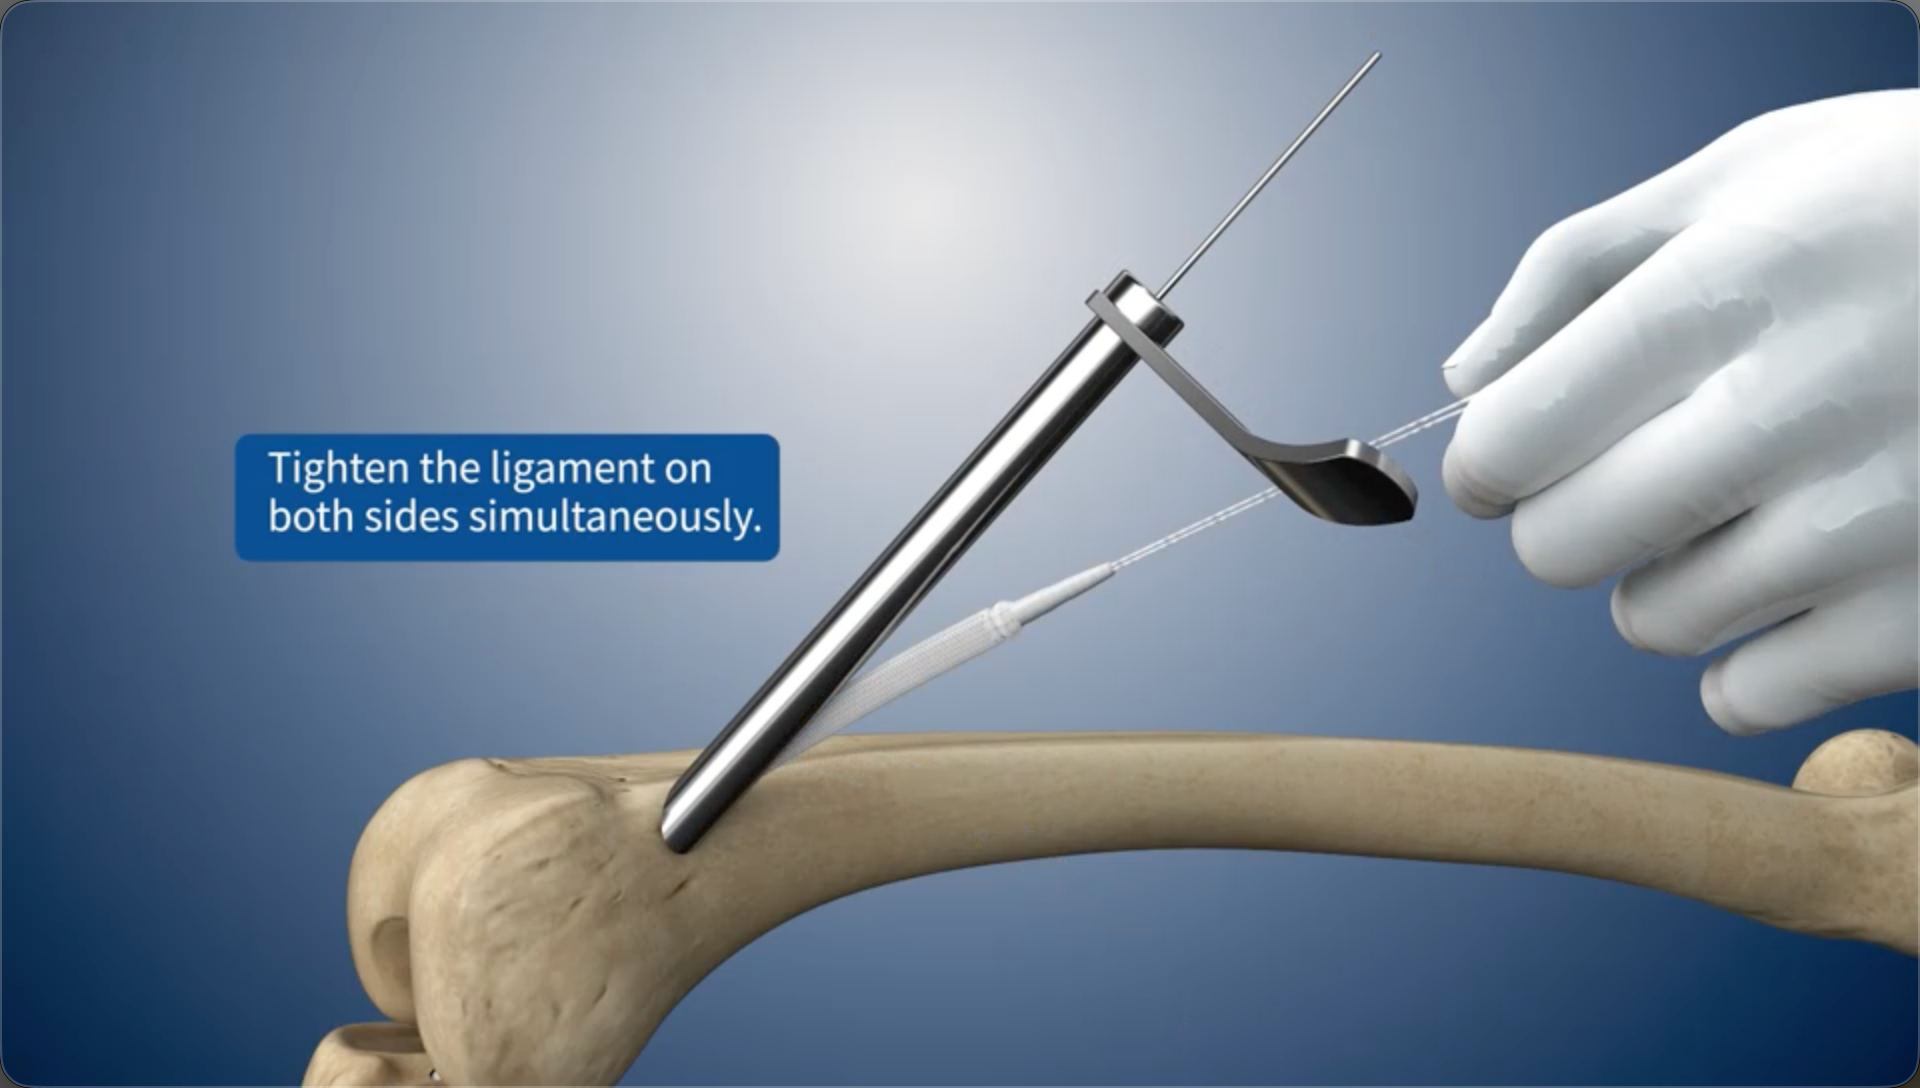
Tighten the ligament on both sides simultaneously.
13
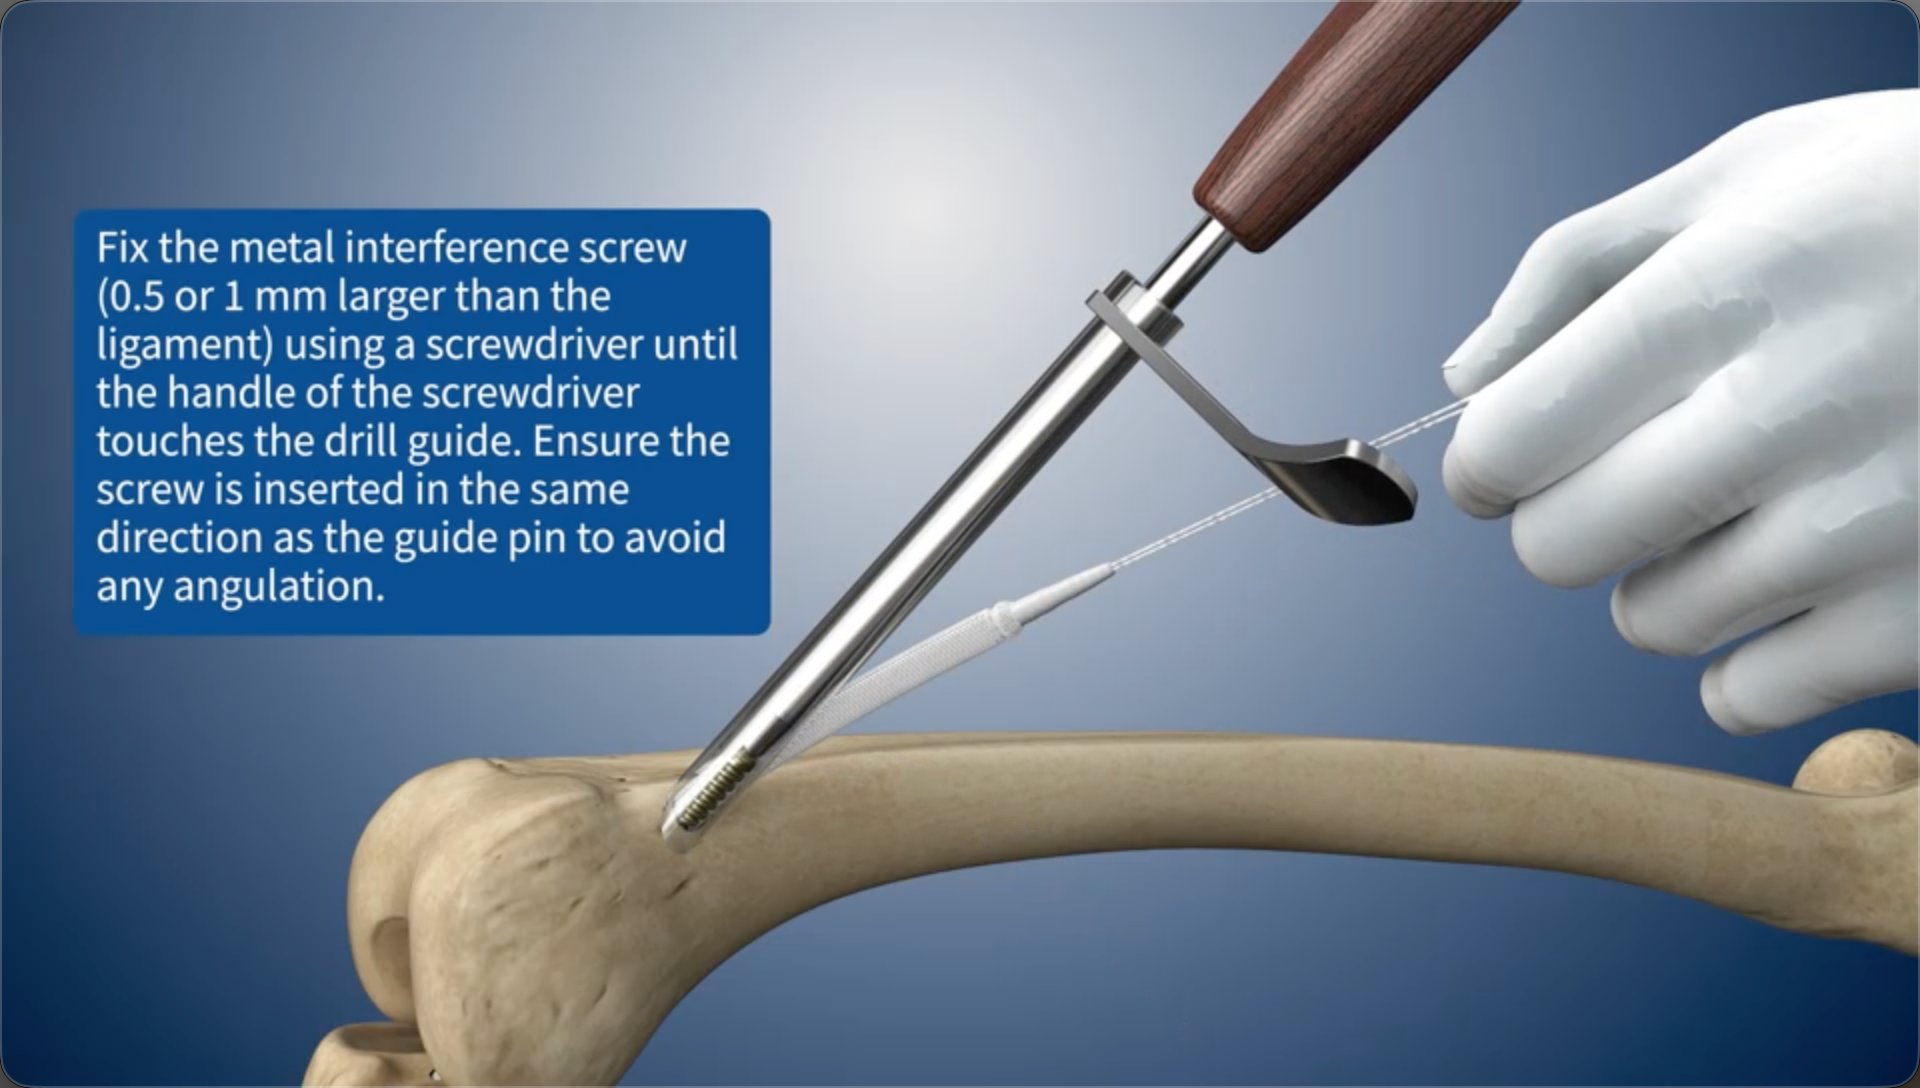
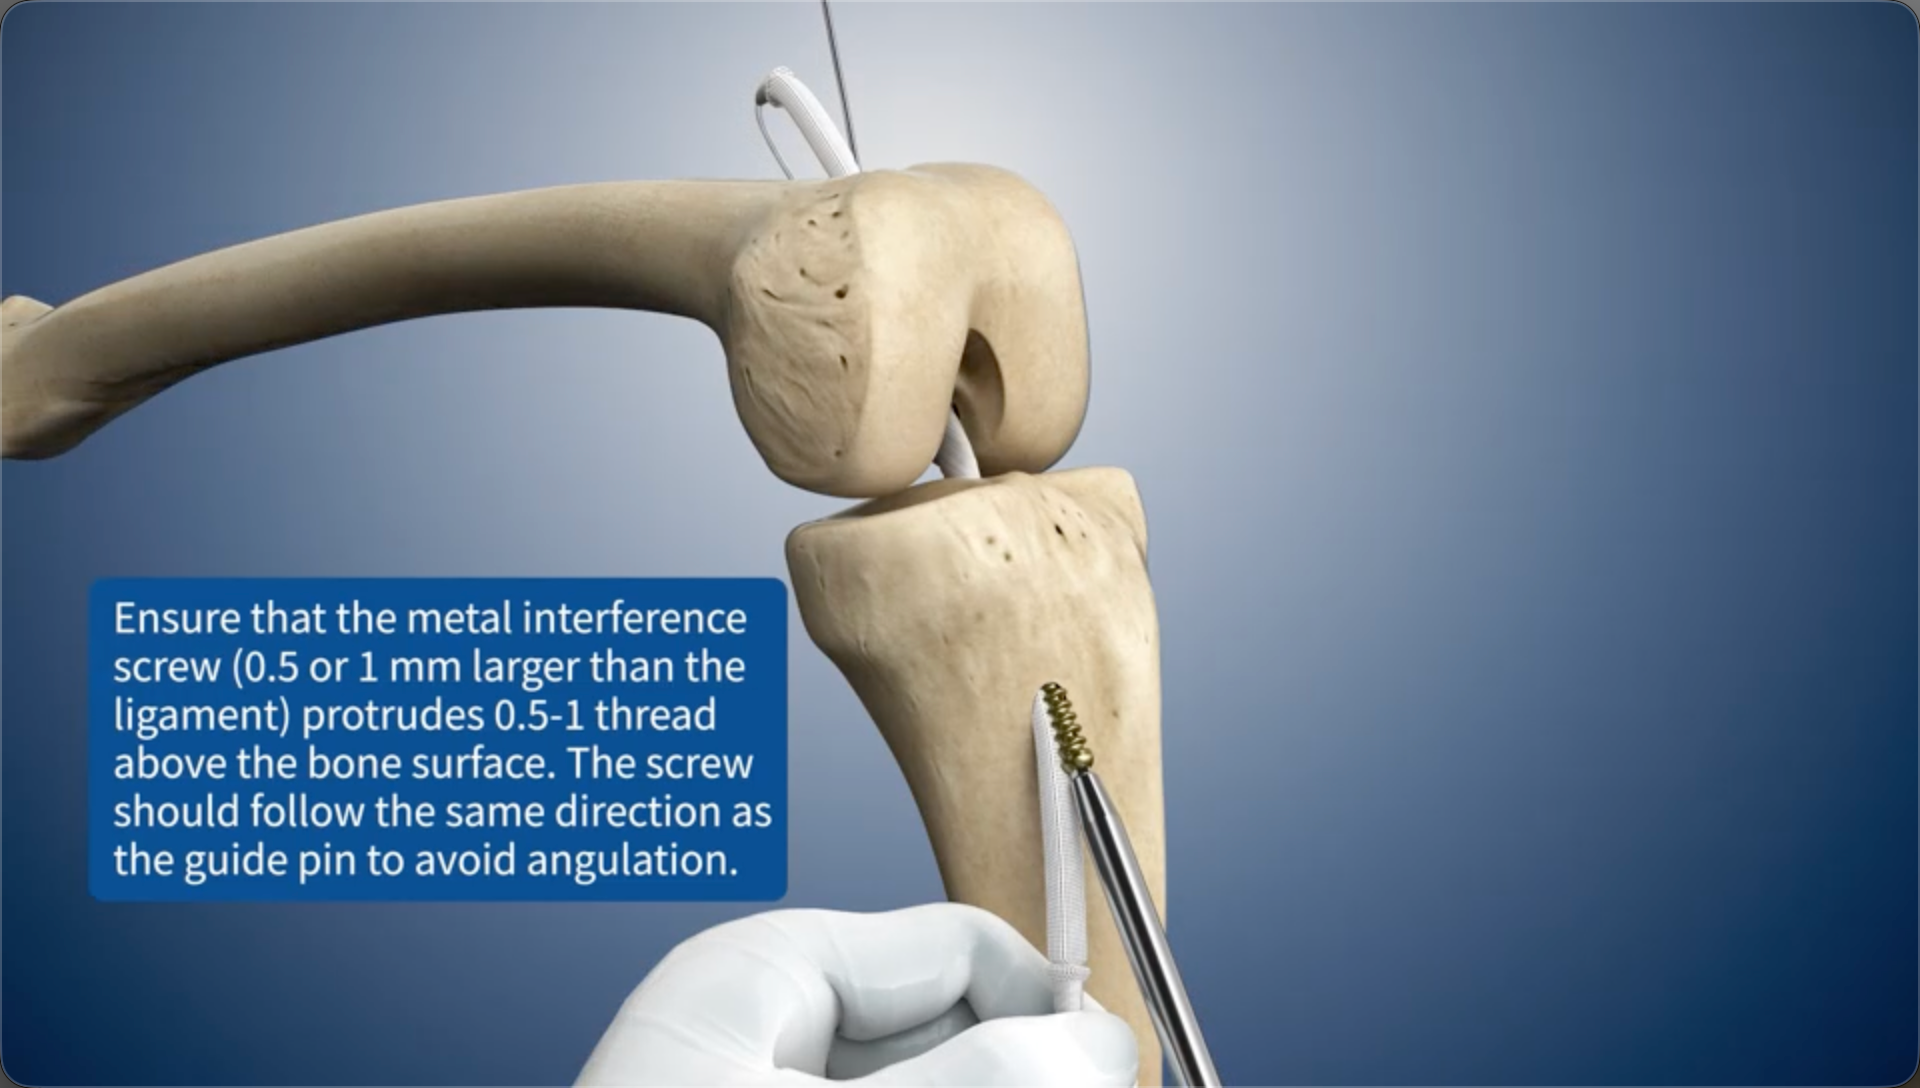
Fix the metal interference screw (0.5 or 1 mm larger than the ligament) using a screwdriver until the handle of the screwdriver touches the drill guide. Ensure the screw is inserted in the same direction as the guide pin to avoid any angulation.
14
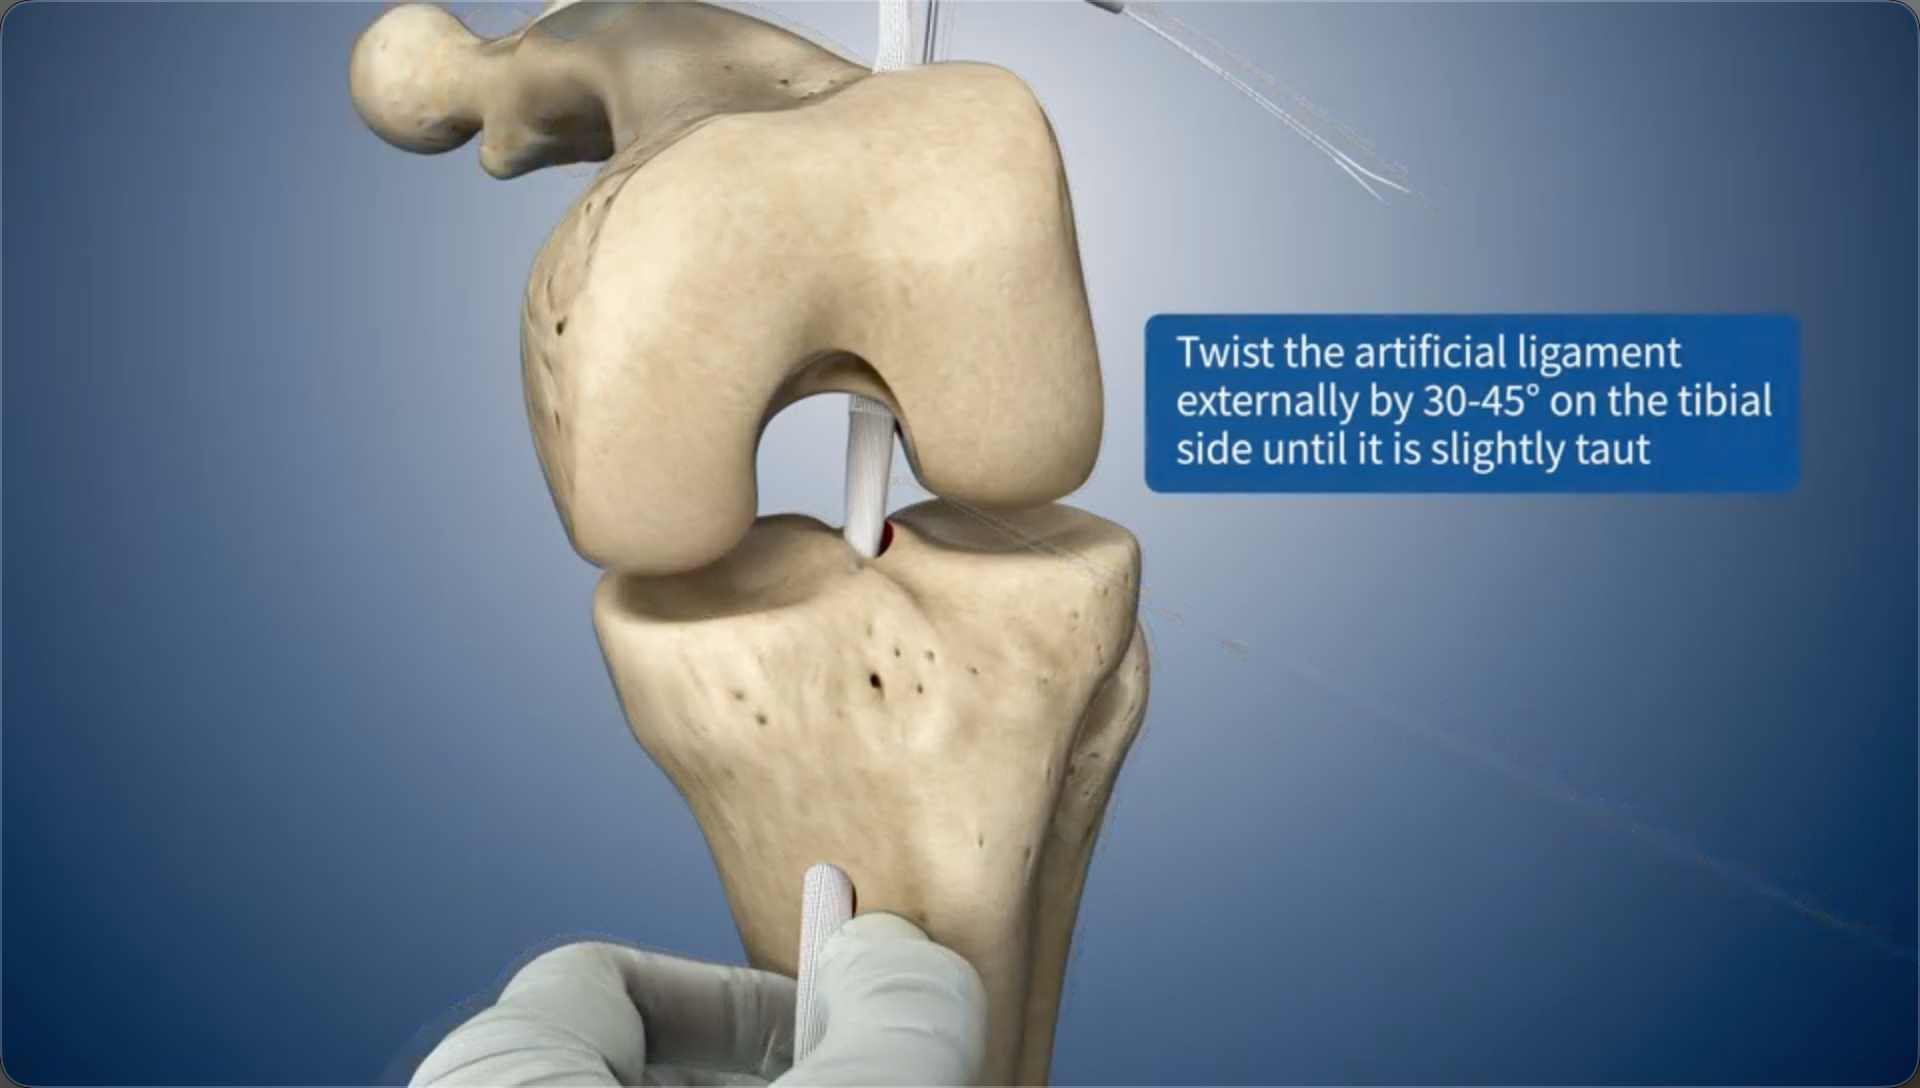
Twist the artificial ligament externally by 30-45° on the tibial side until it is slightly taut
15
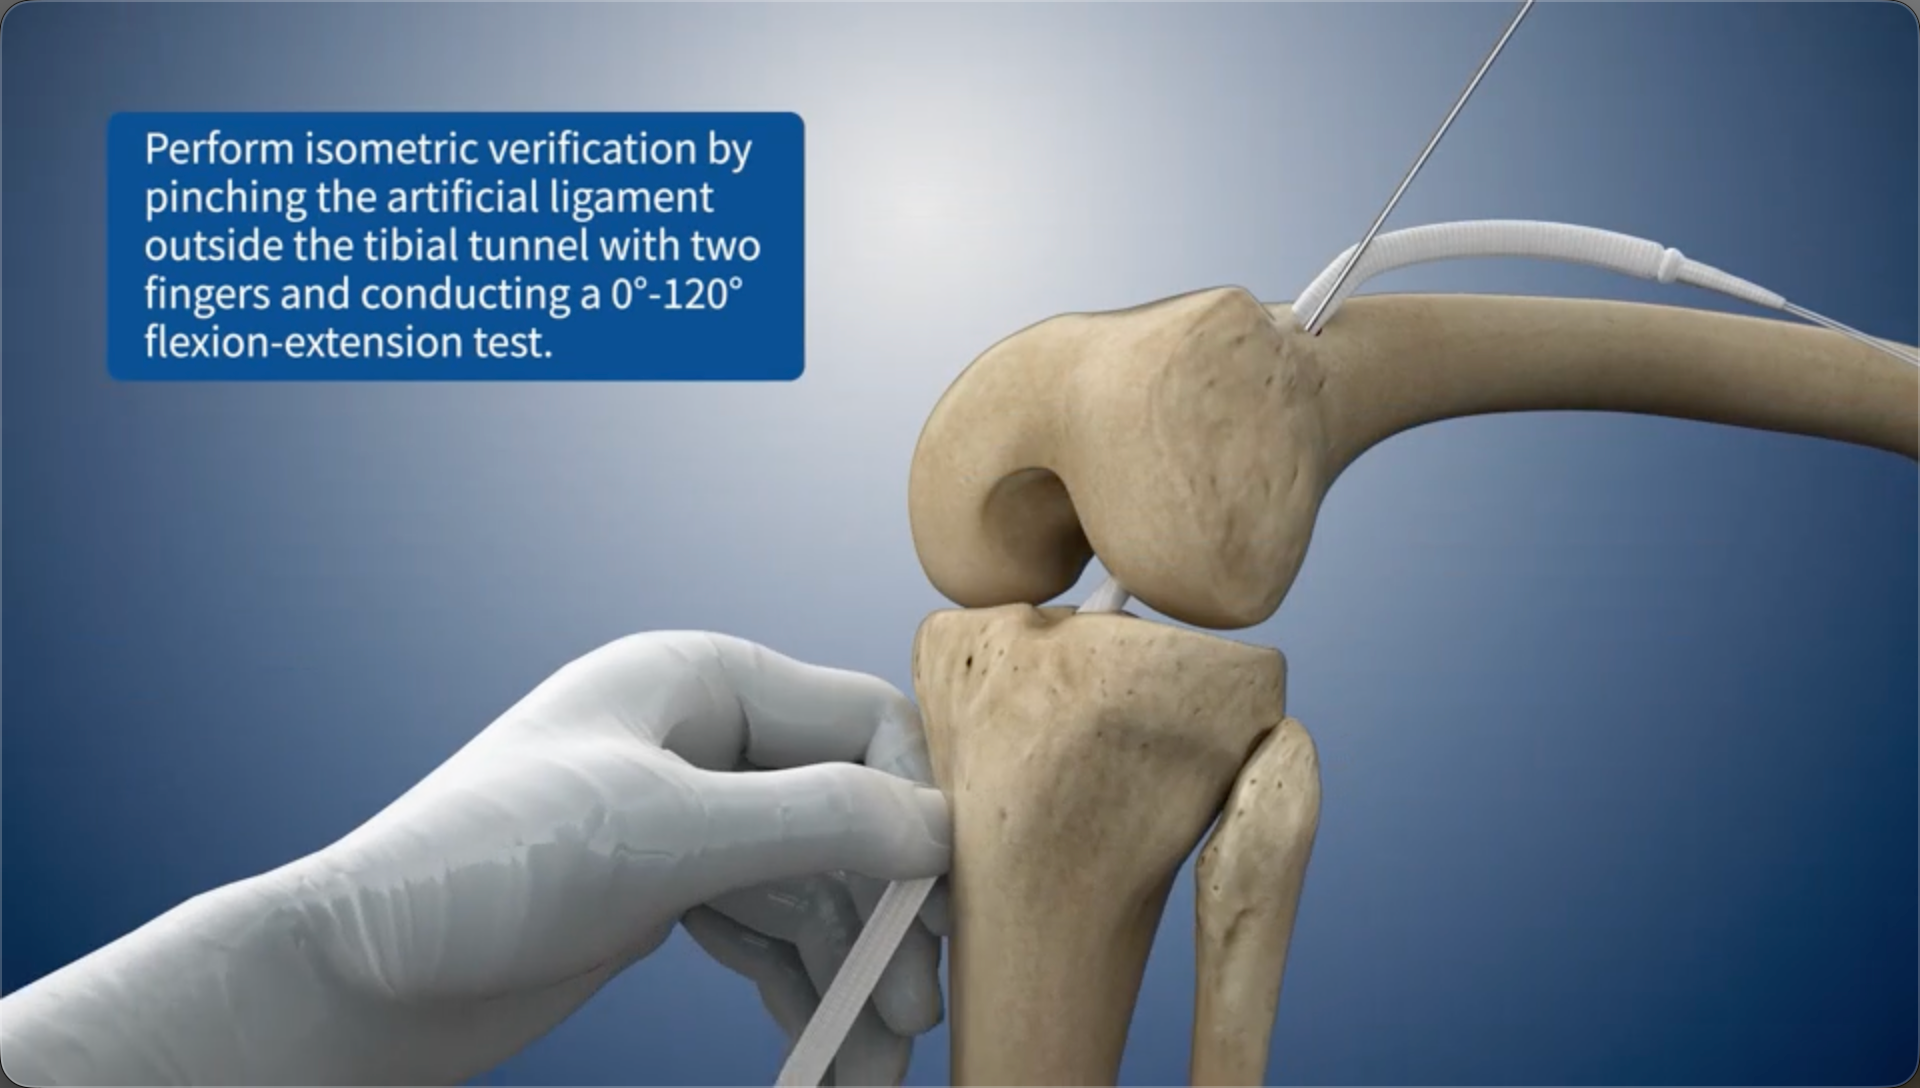
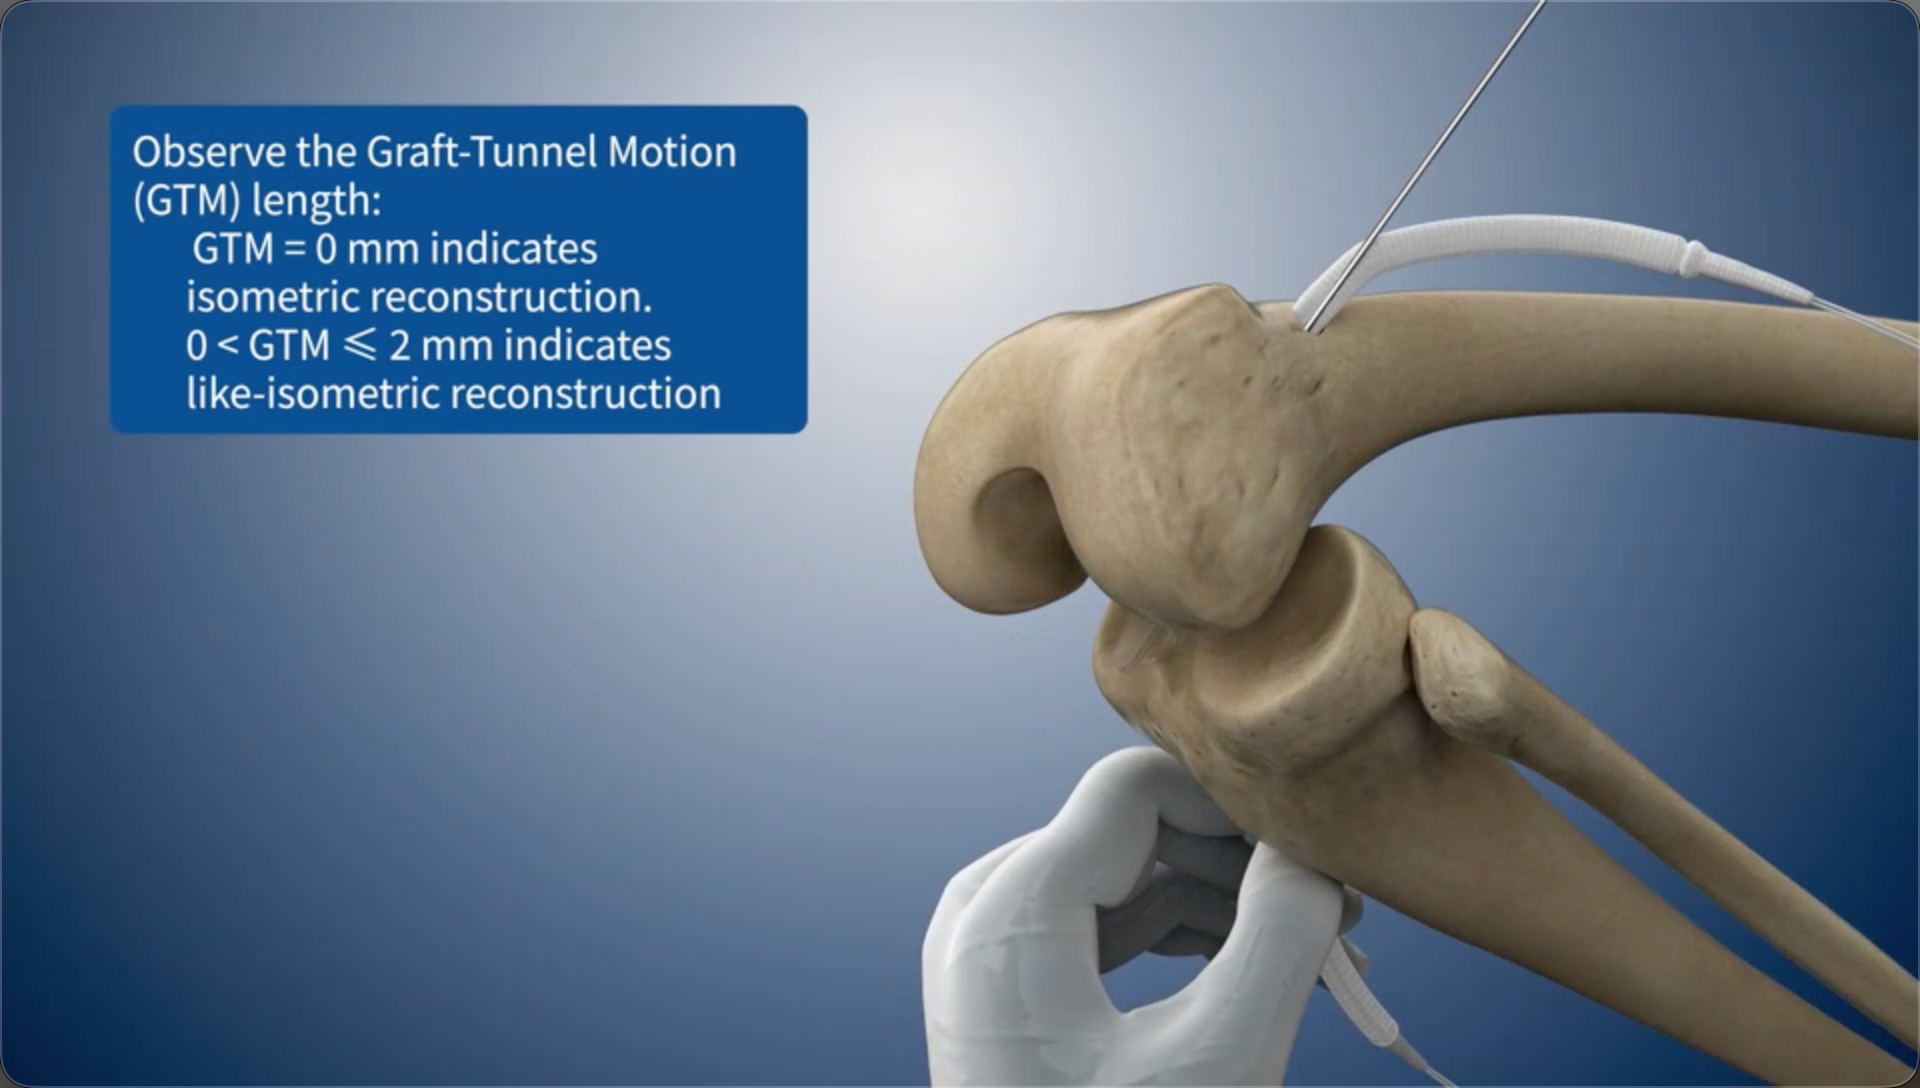
Perform isometric verification by pinching the artificial ligament outside the tibial bone tunnel with two fingers and conducting a 0°-120° flexion-extension test.
16
Observe the Graft-Tunnel Motion (GTM) length:GTM = 0 mm indicates isometric reconstruction.0 < GTM ≤ 2 mm indicates like-isometric reconstruction
17
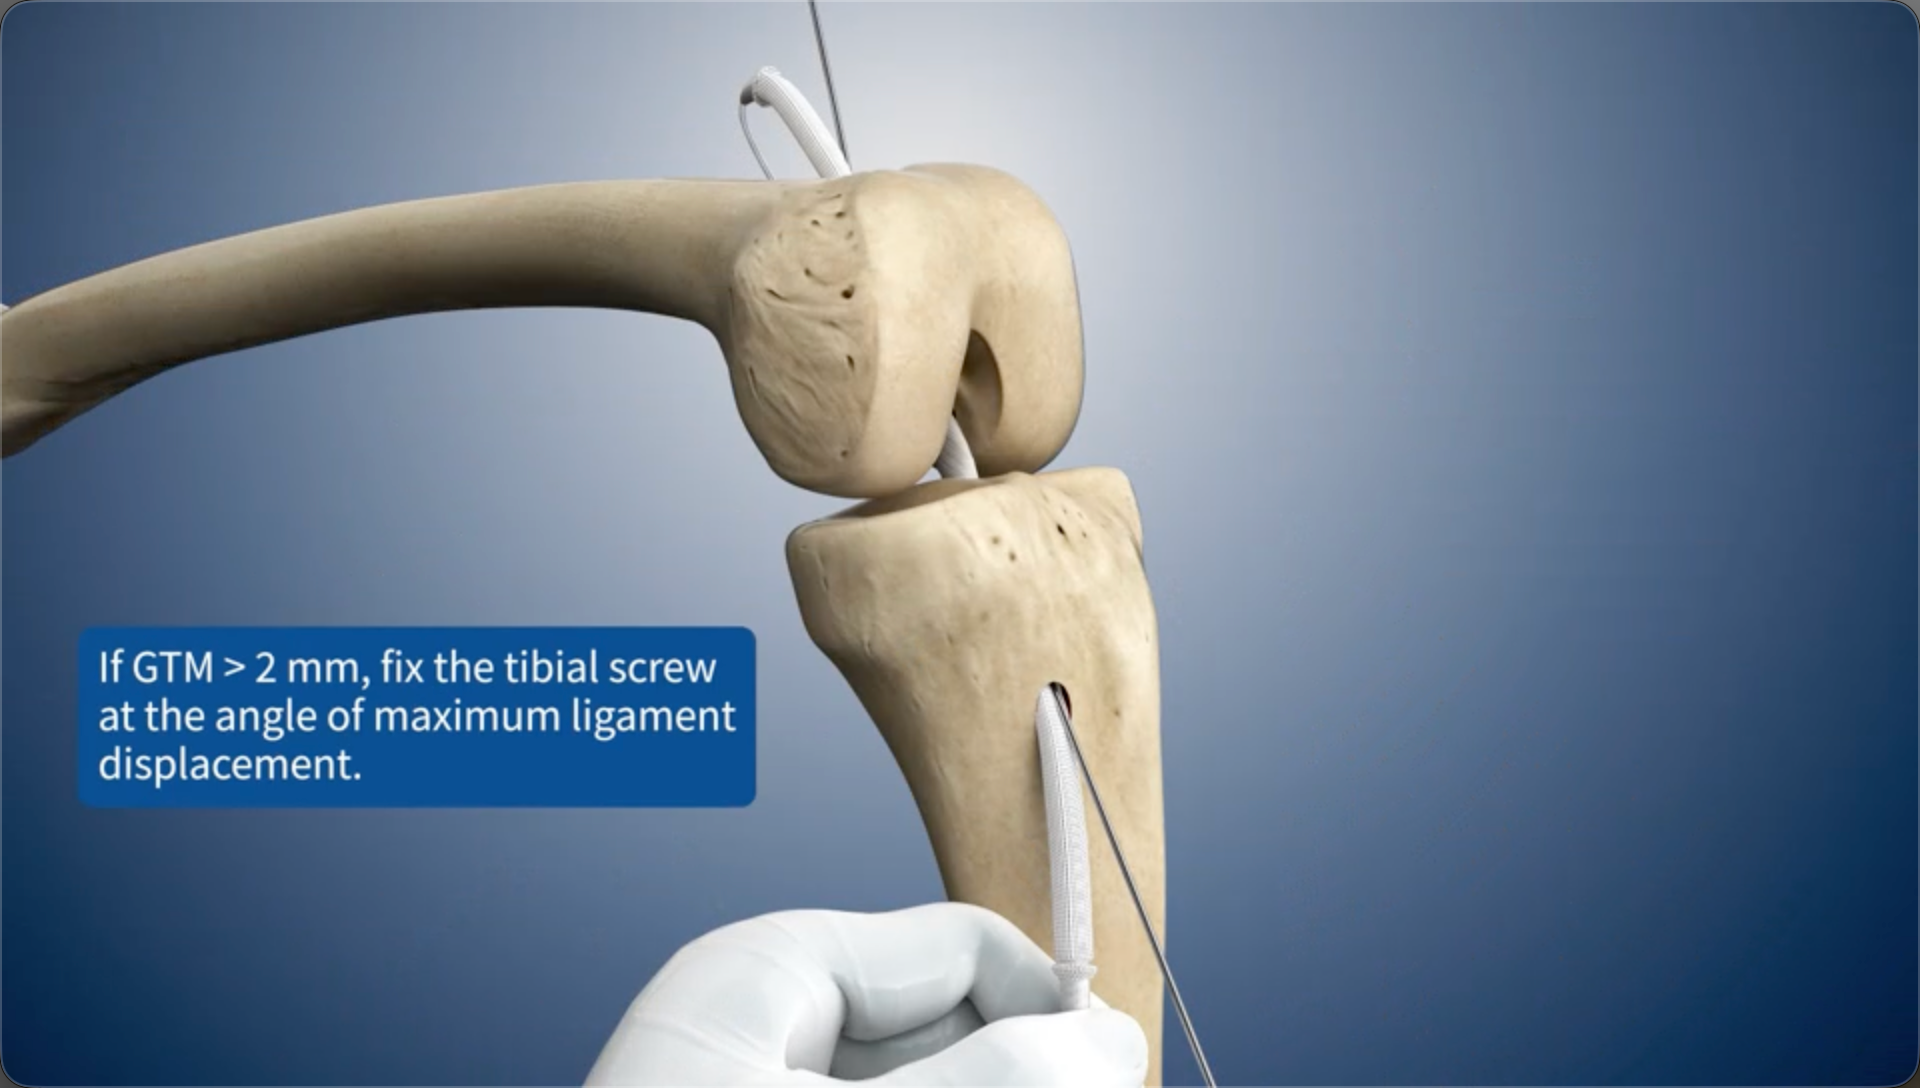
If GTM > 2 mm, fix the tibial screw at the angle of maximum ligament displacement.
18
Ensure that the metal interference screw (0.5 or 1 mm larger than the ligament) protrudes 0.5-1 thread above the bone surface. The screw should follow the same direction as the guide pin to avoid angulation.
19
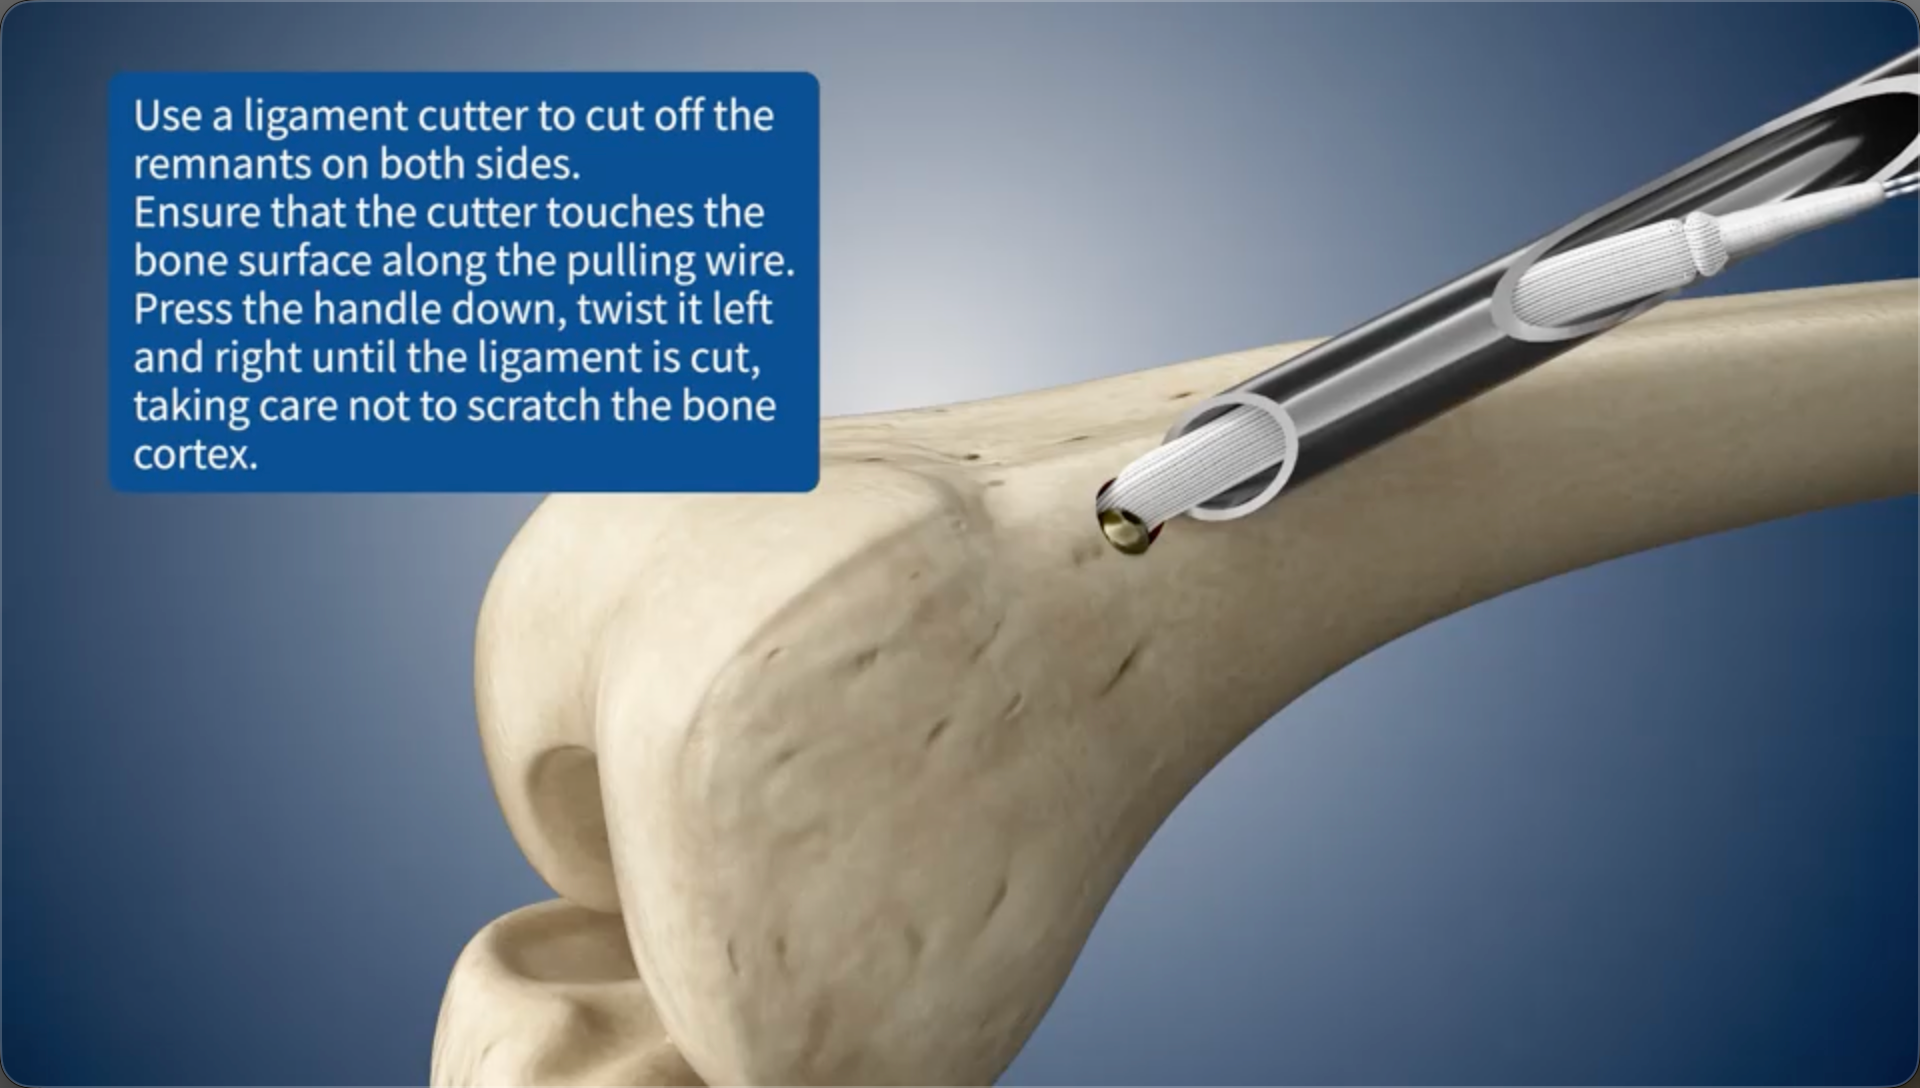
Use a ligament cutter to cut off the remnants on both sides.Ensure that the cutter touches the bone surface along the pulling wire. Press the handle down, twist it left and right until the ligament is cut, taking care not to scratch the bone cortex.