

Procedure Overview
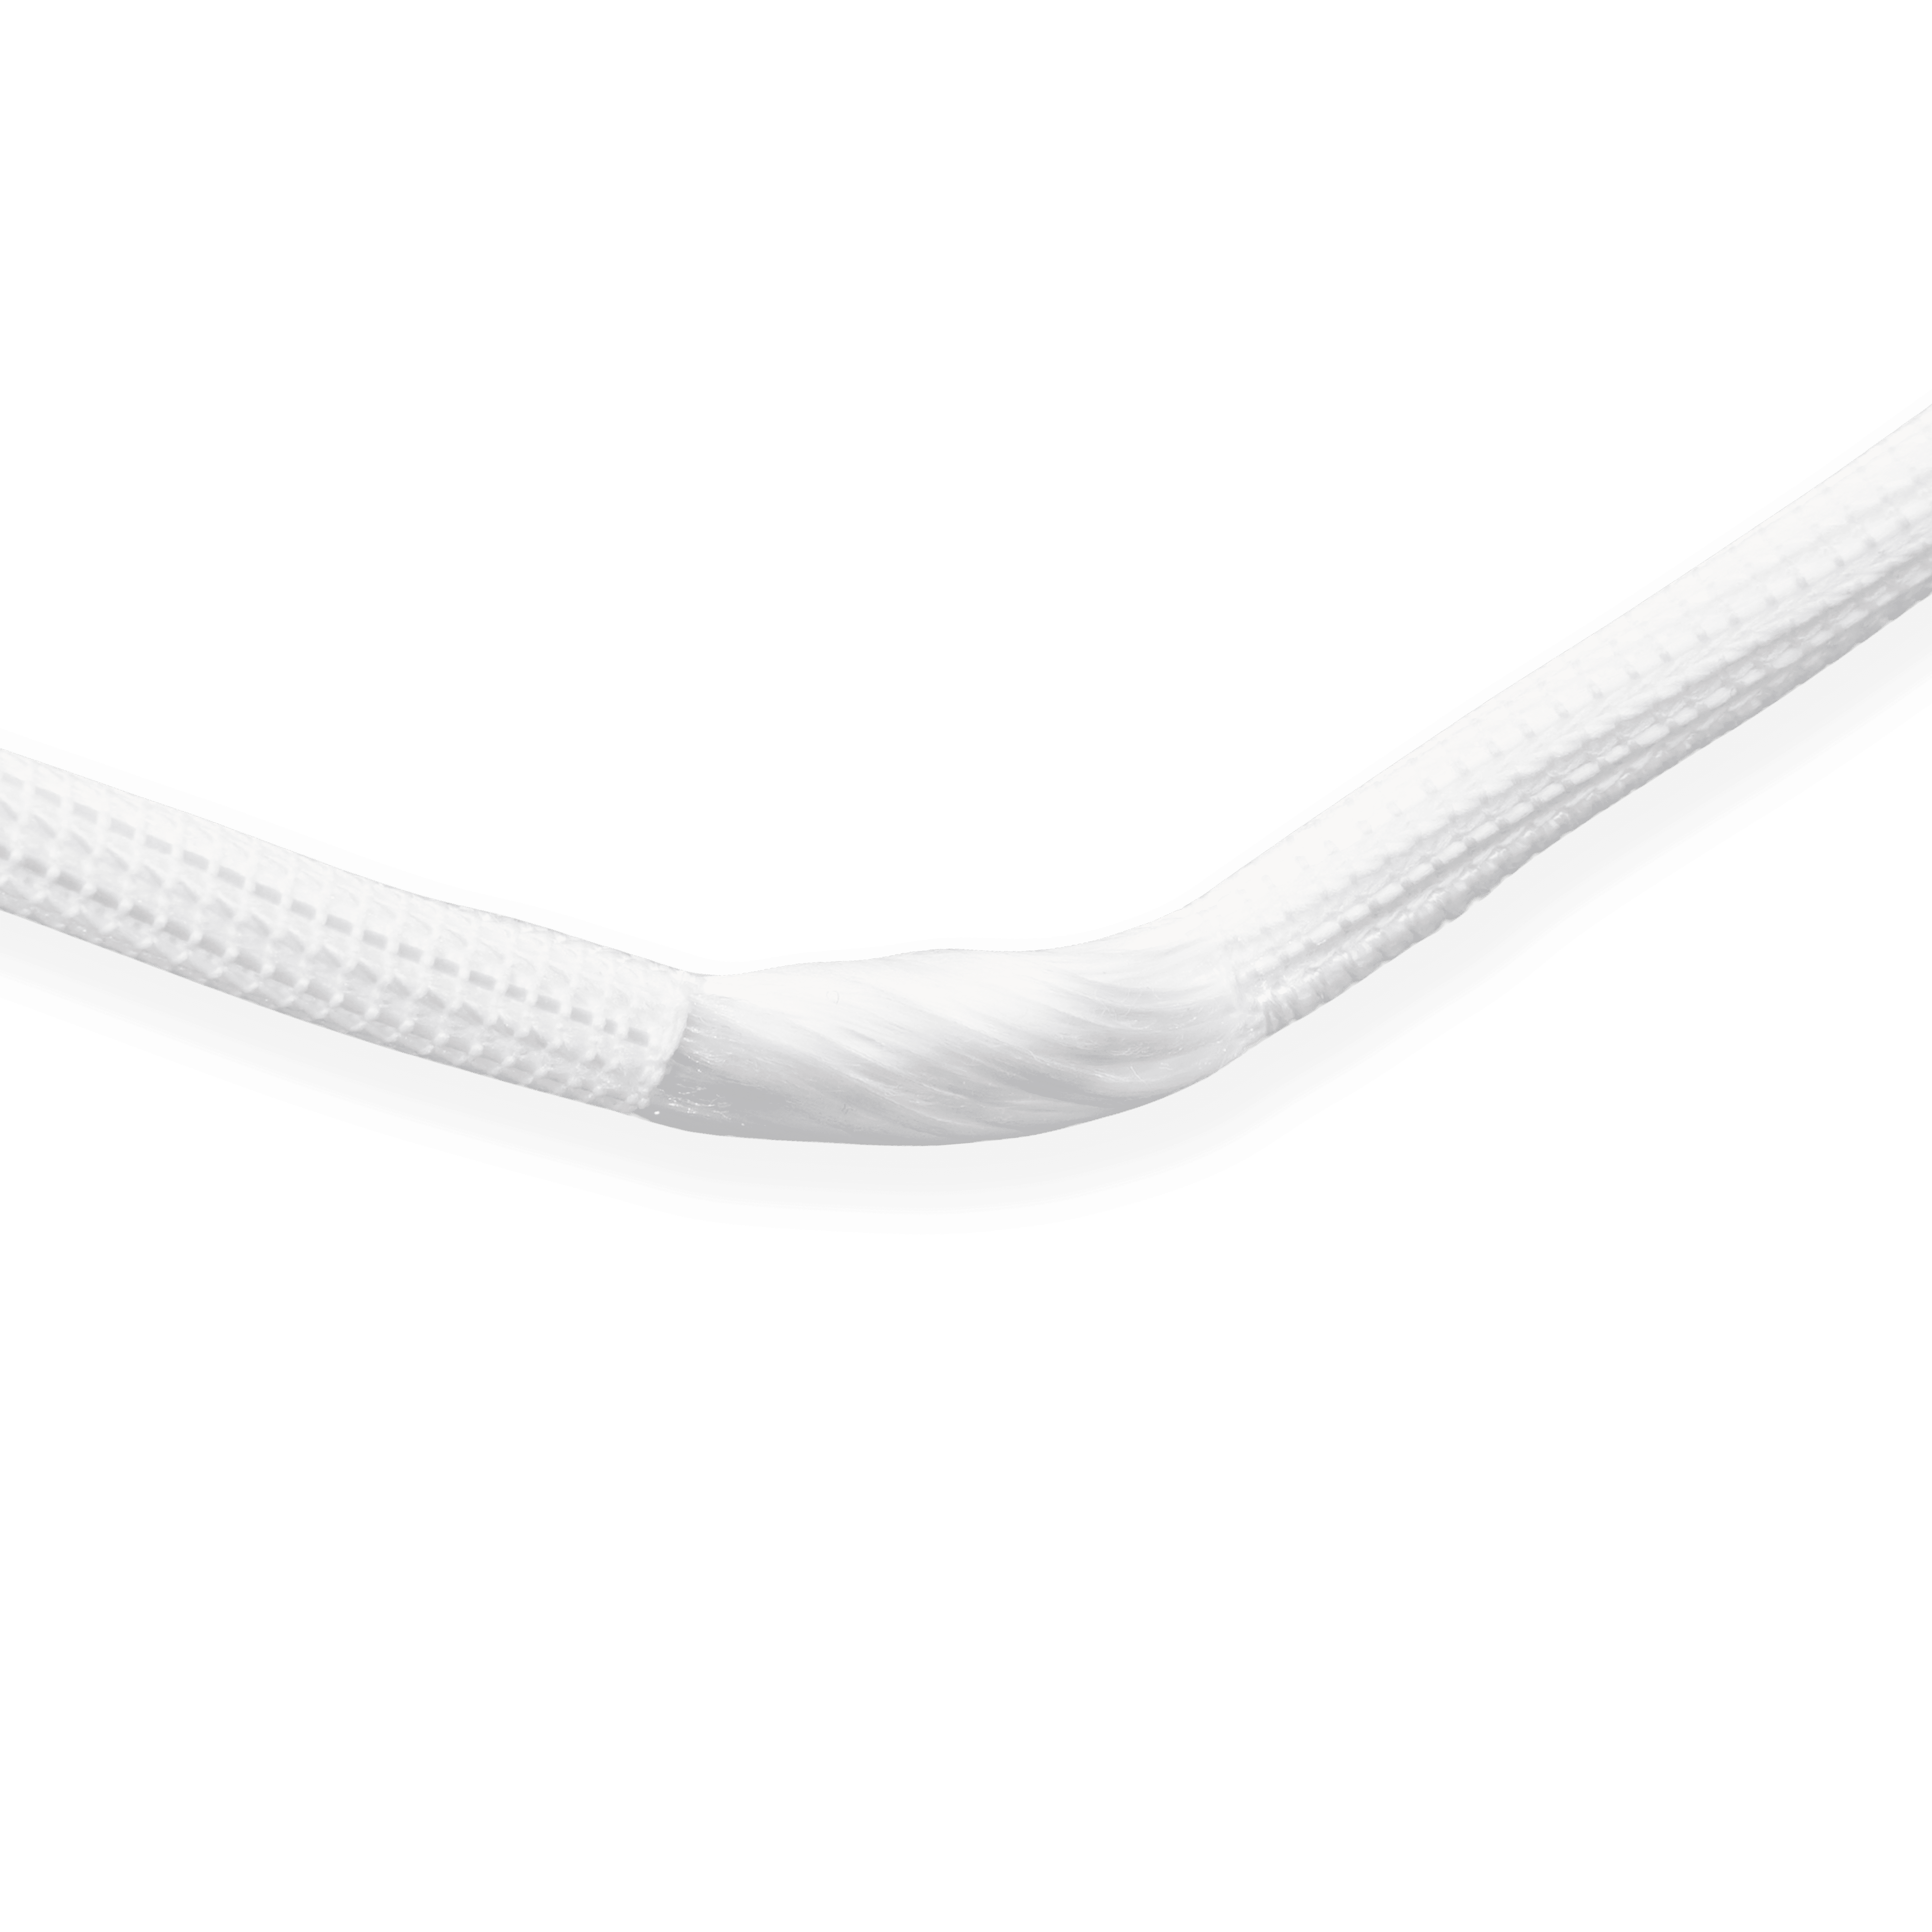
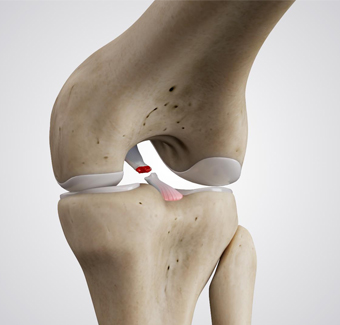
Using an artificial ligament to reconstruct the PCL eliminates the need for graft preparation during surgery and improves surgical efficiency. Patients recover quickly after surgery and can functional recovery early.
After creating the femoral and tibial tunnels, the two ends of the artificial ligament are pulled into the tibial and femoral bone tunnels from within the joint cavity. Under anterior drawer reduction of the tibia, both sides are fixed with metal interference screw cortical compression fixation, and the excess ligament at both ends is trimmed to complete the procedure.
Operation Process
01
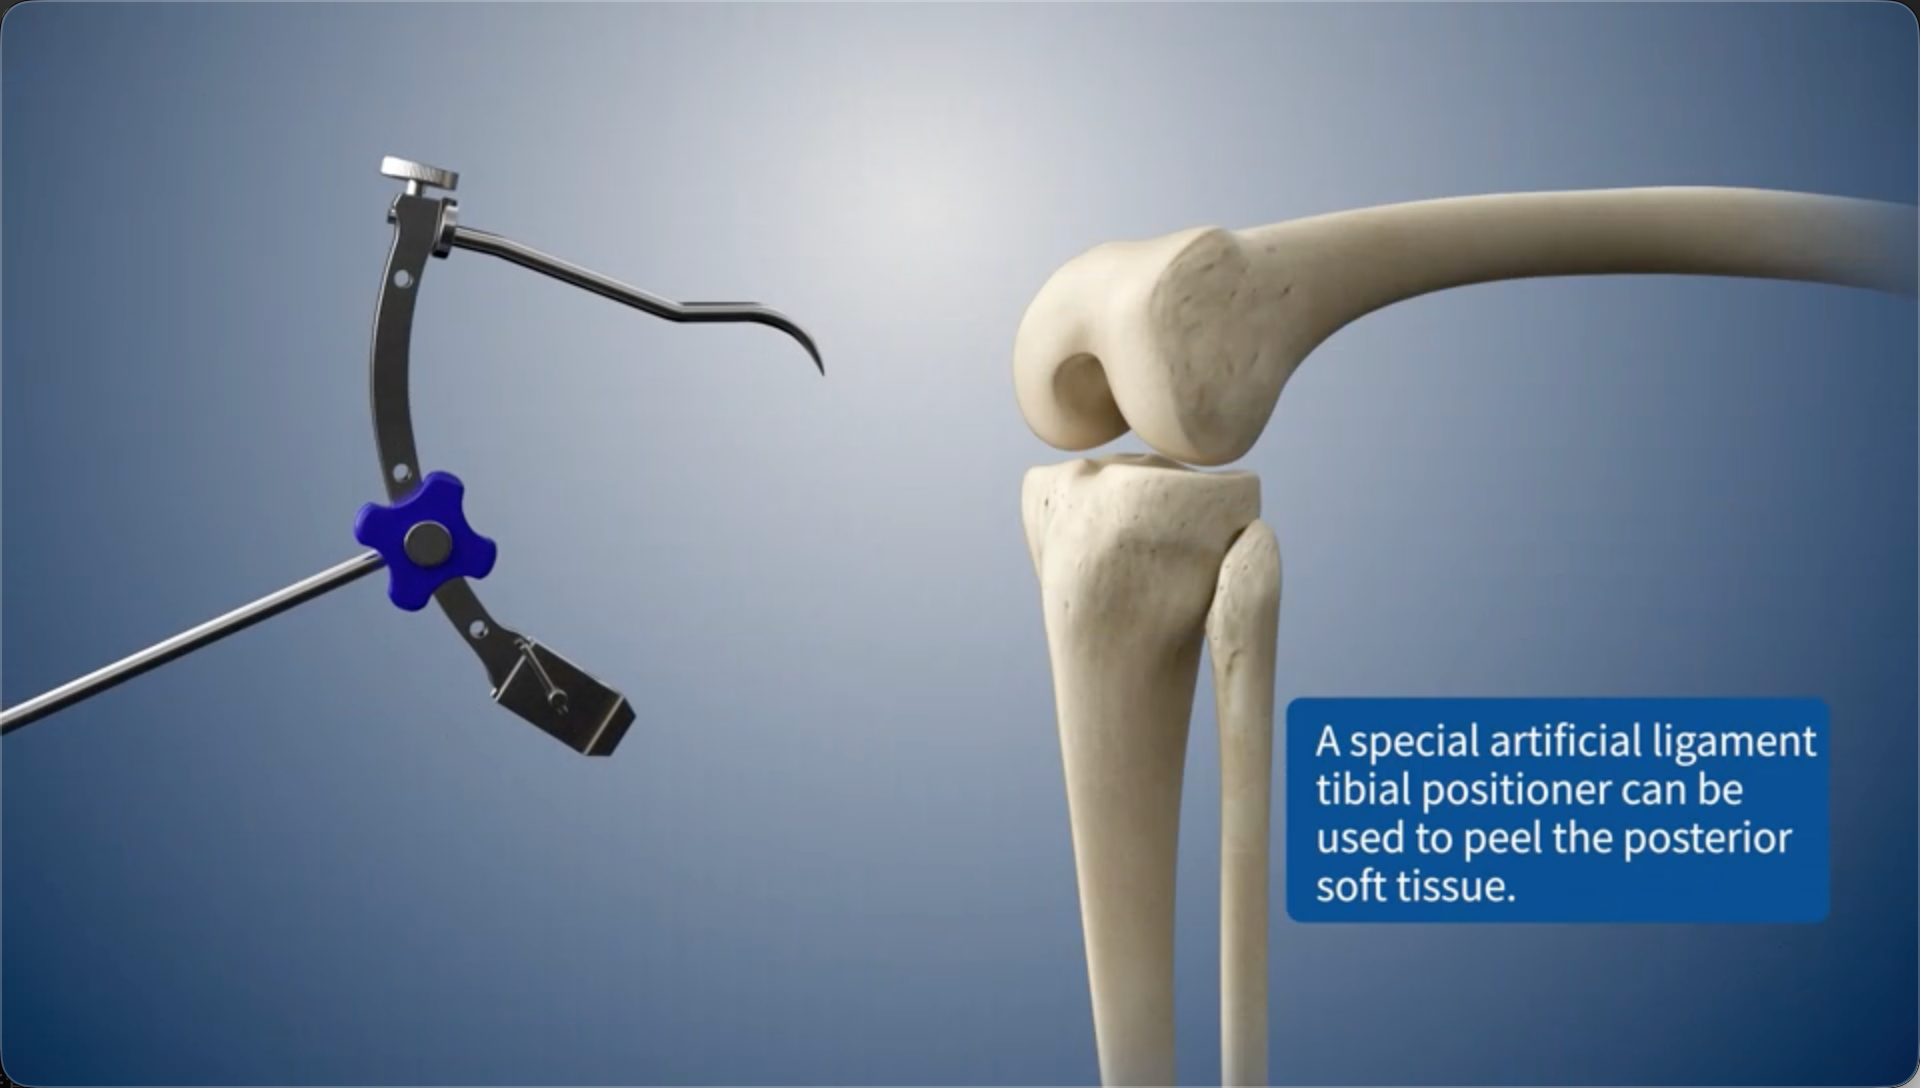
A special artificial ligament tibial positioner can be used to peel the posterior soft tissue.
02
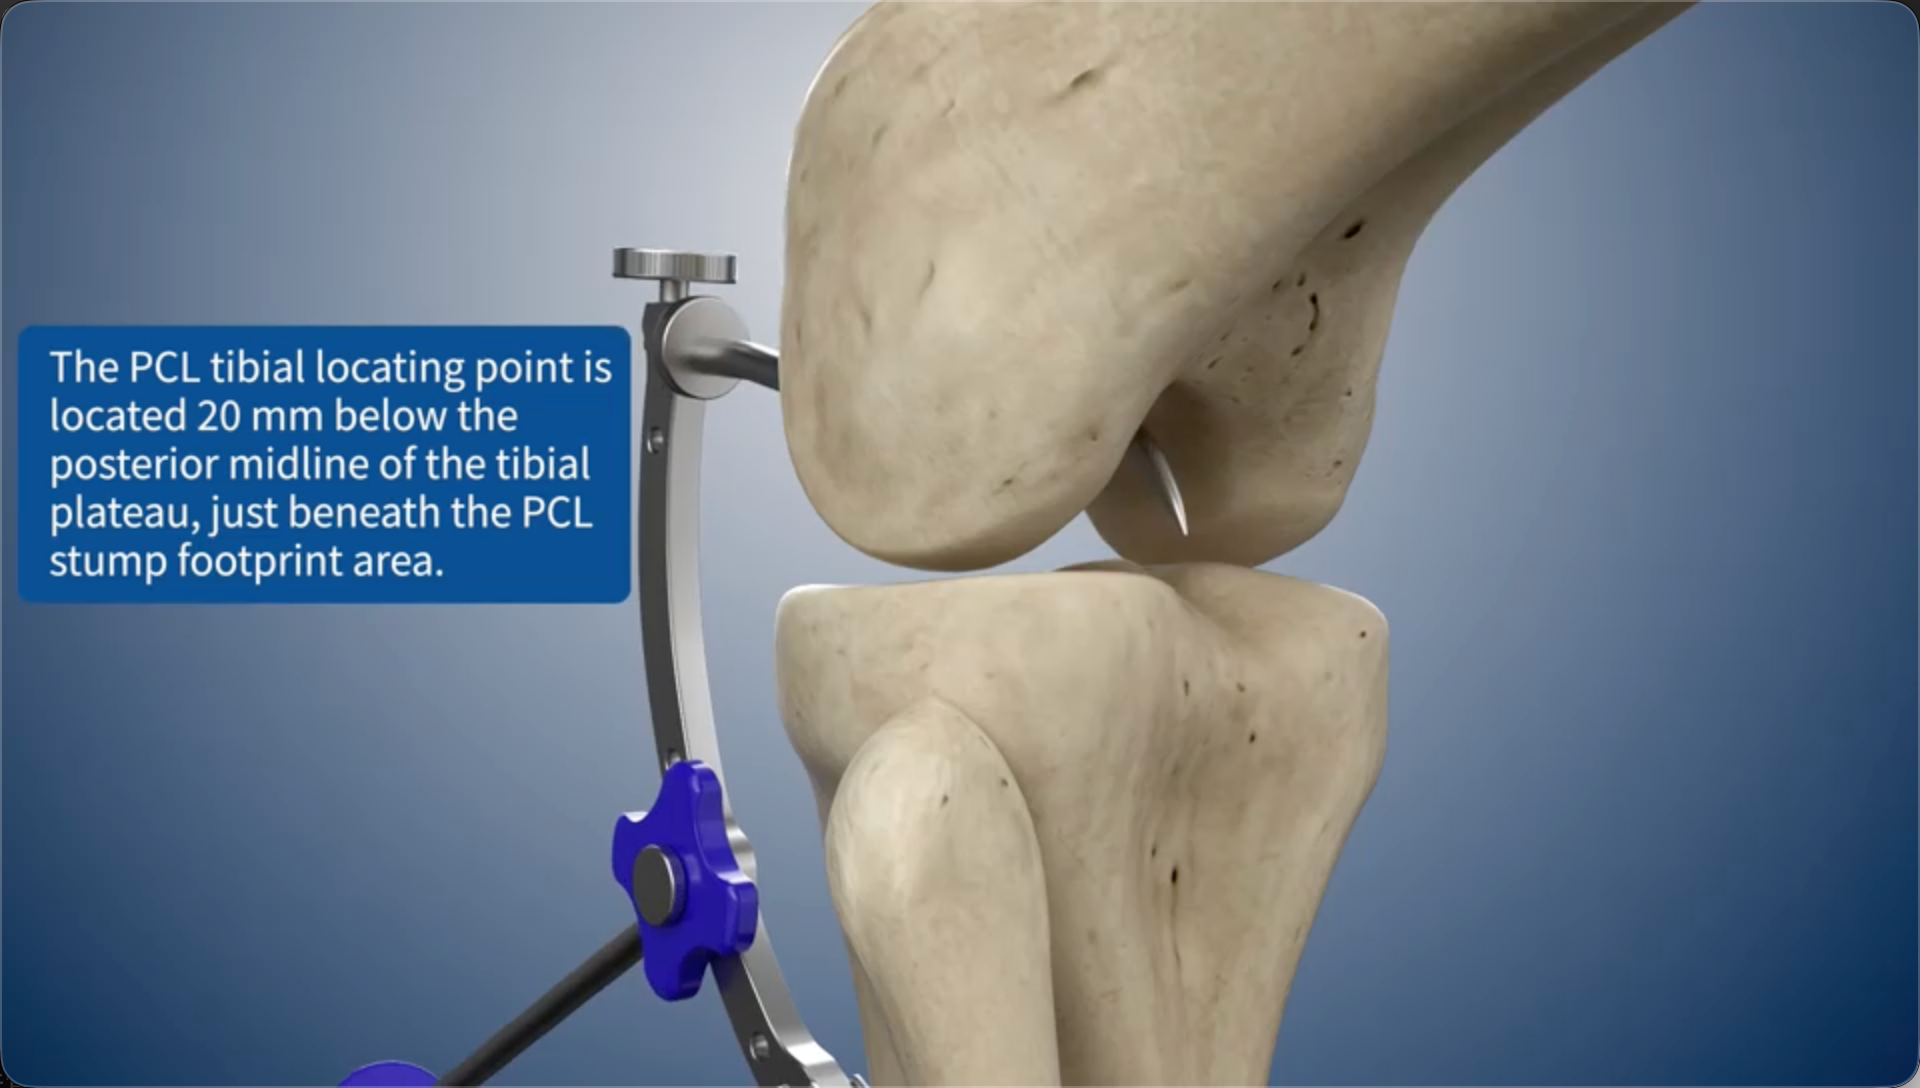
The PCL tibial locating point is located 20 mm below the posterior midline of the tibial plateau, just beneath the PCL stump footprint area.
03
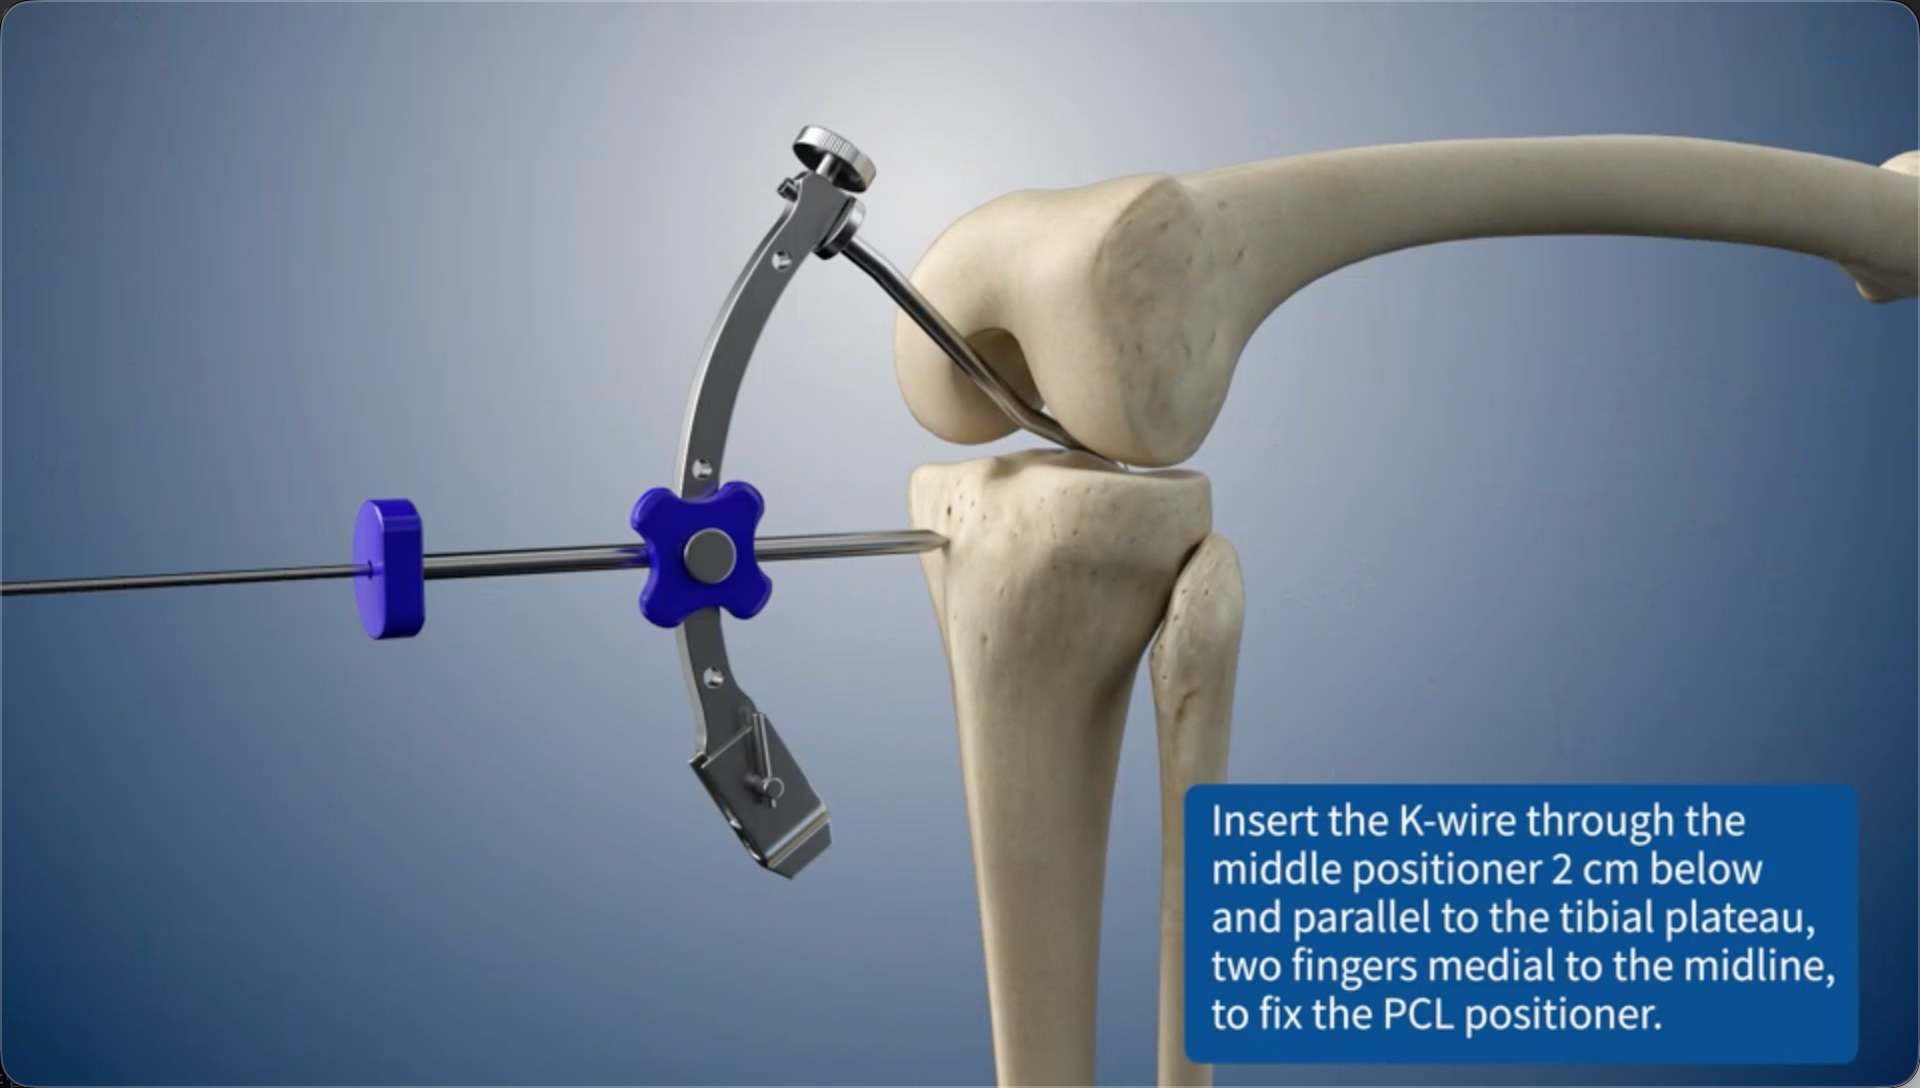
Insert the K-wire through the middle positioner 2 cm below and parallel to the tibial plateau, two fingers medial to the midline, to fix the PCL positioner.
04
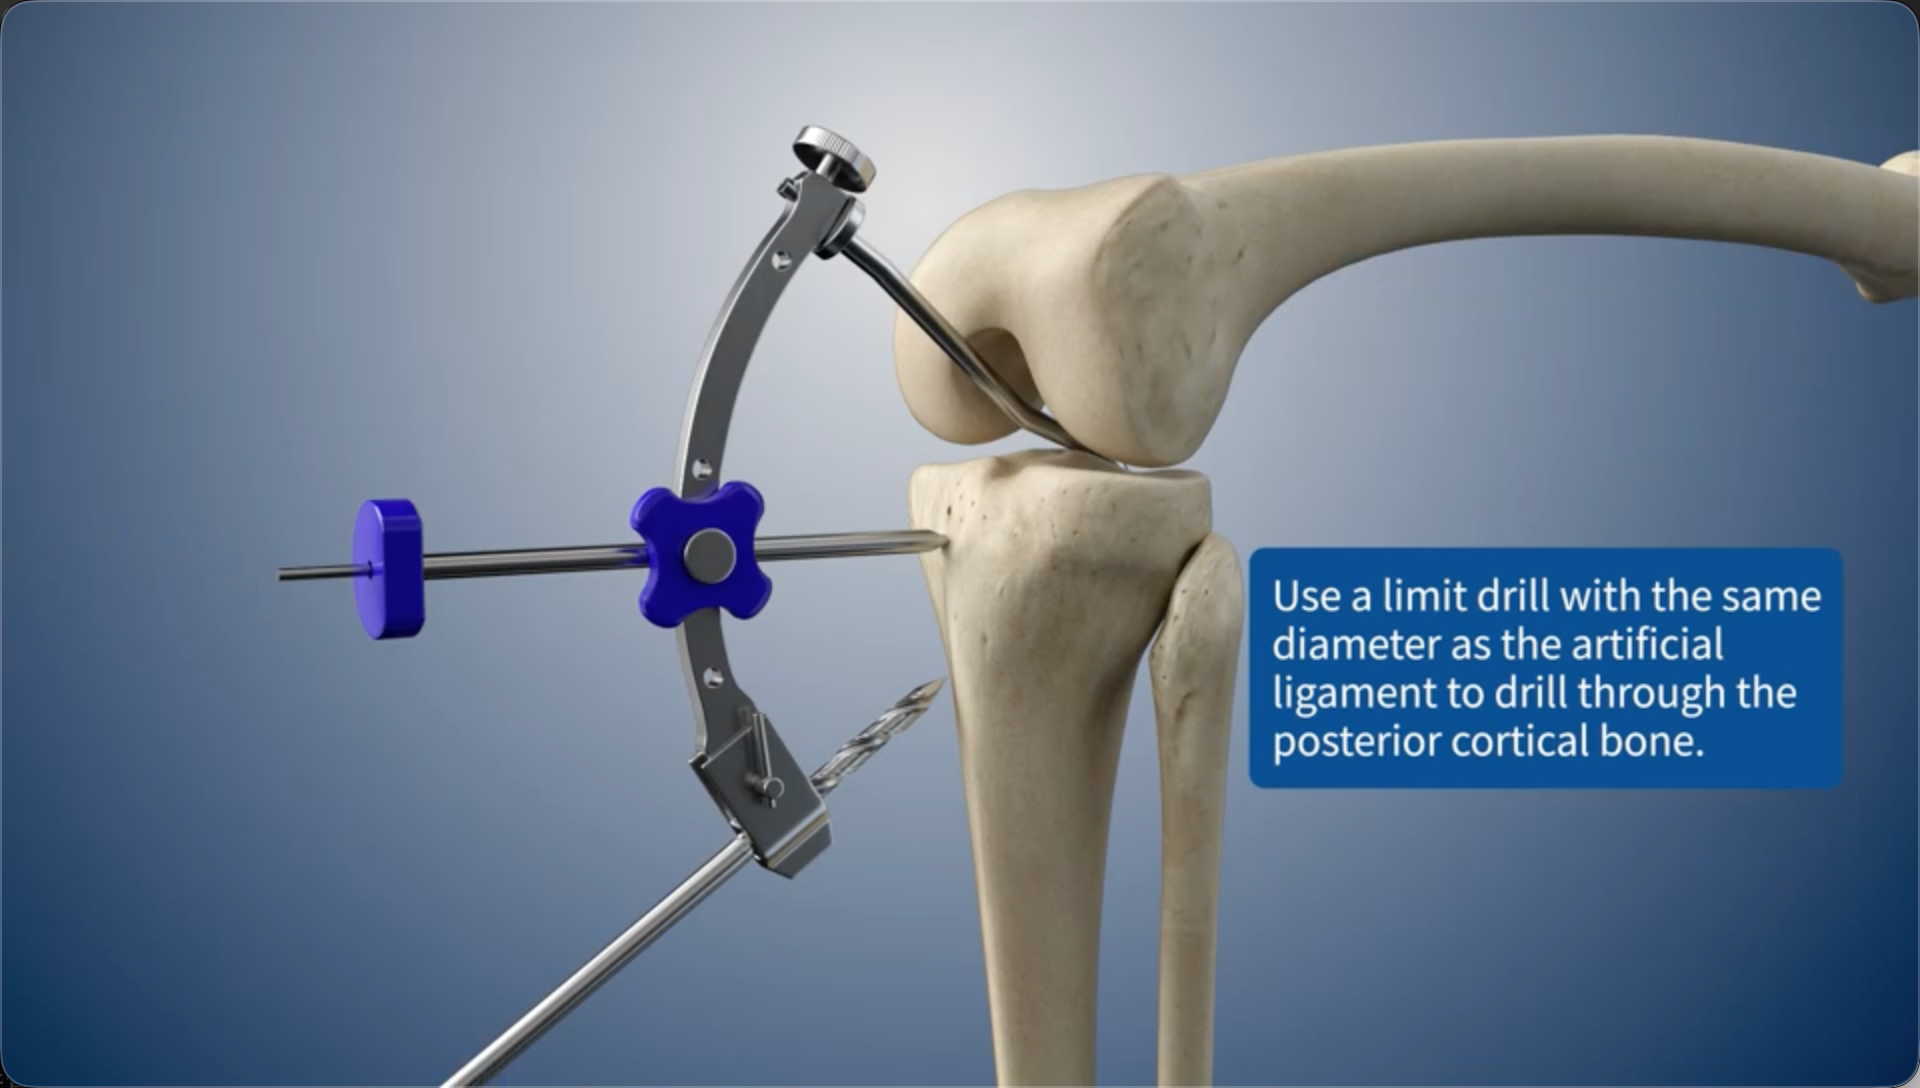
Use a limit drill with the same diameter as the artificial ligament to drill through the posterior cortical bone.
05
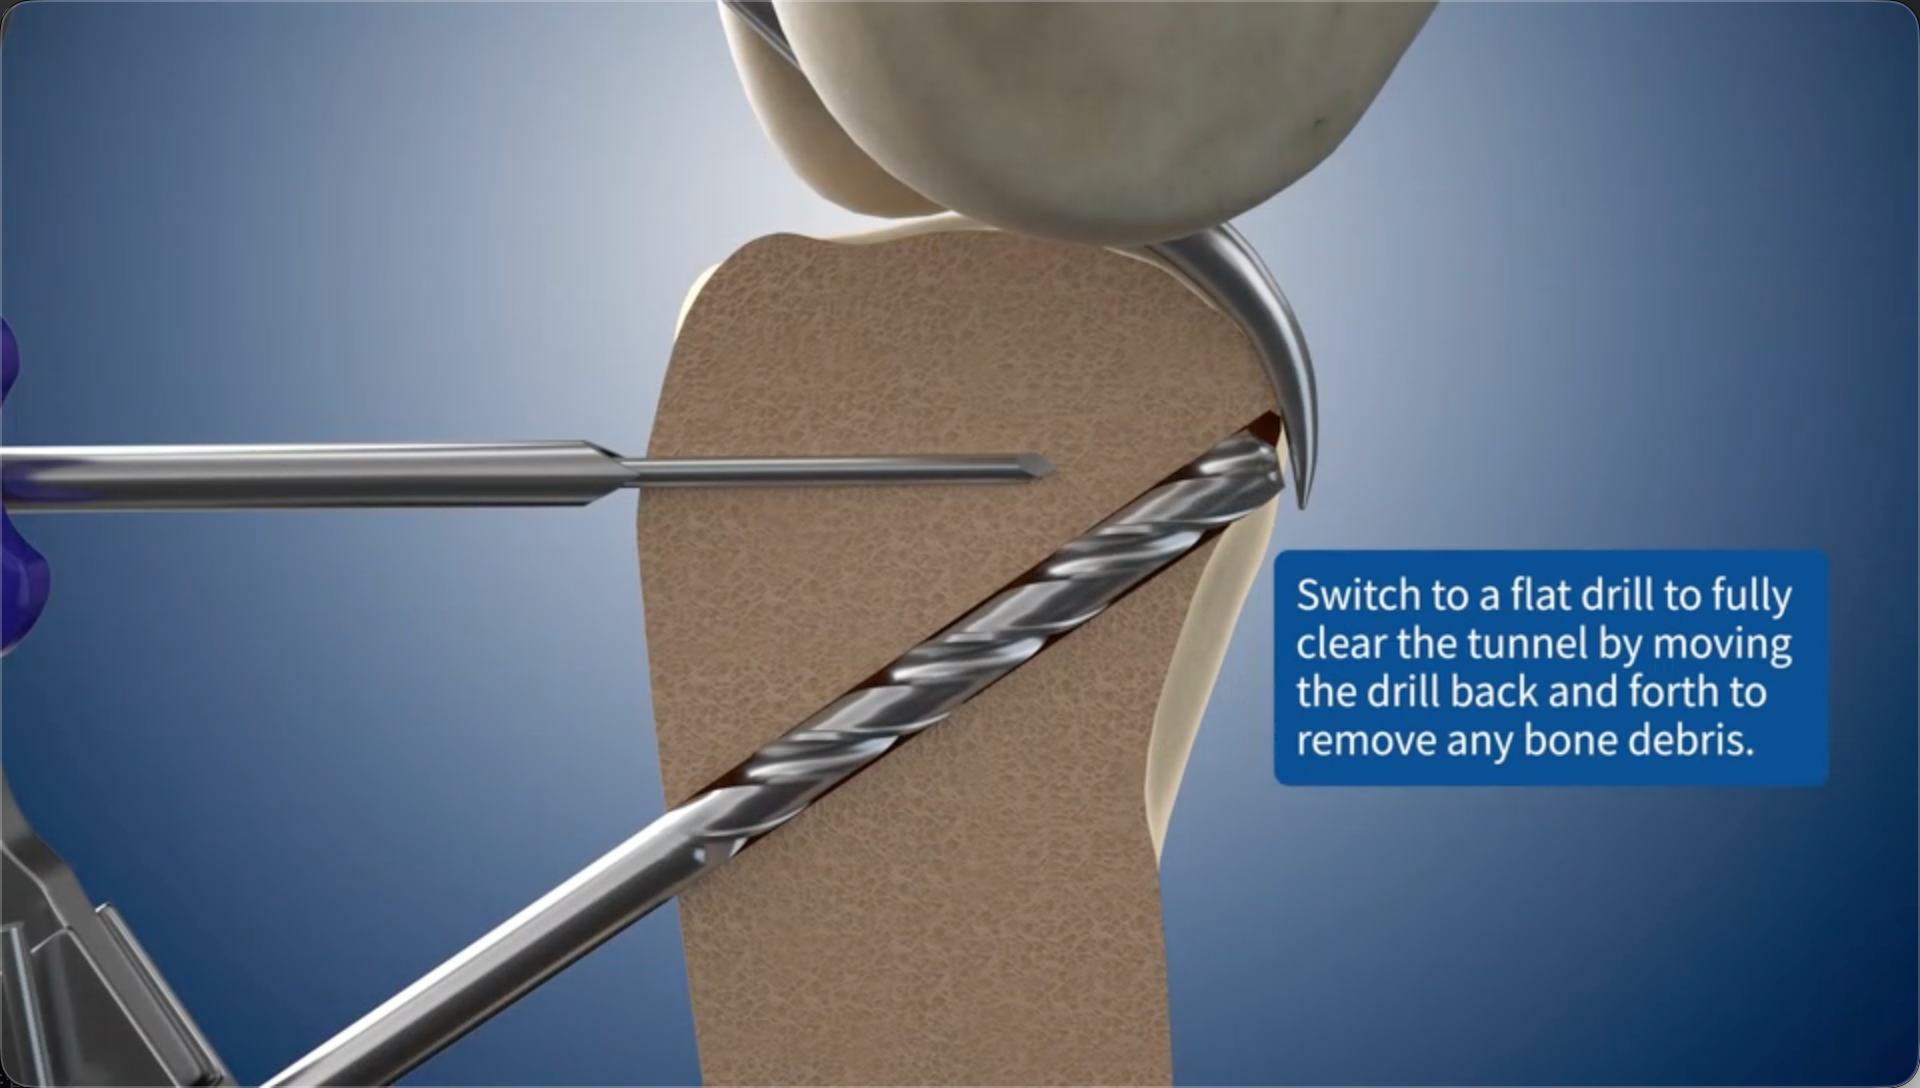
Switch to a flat drill to fully clear the bone tunnel by moving the drill back and forth to remove any bone debris.
06
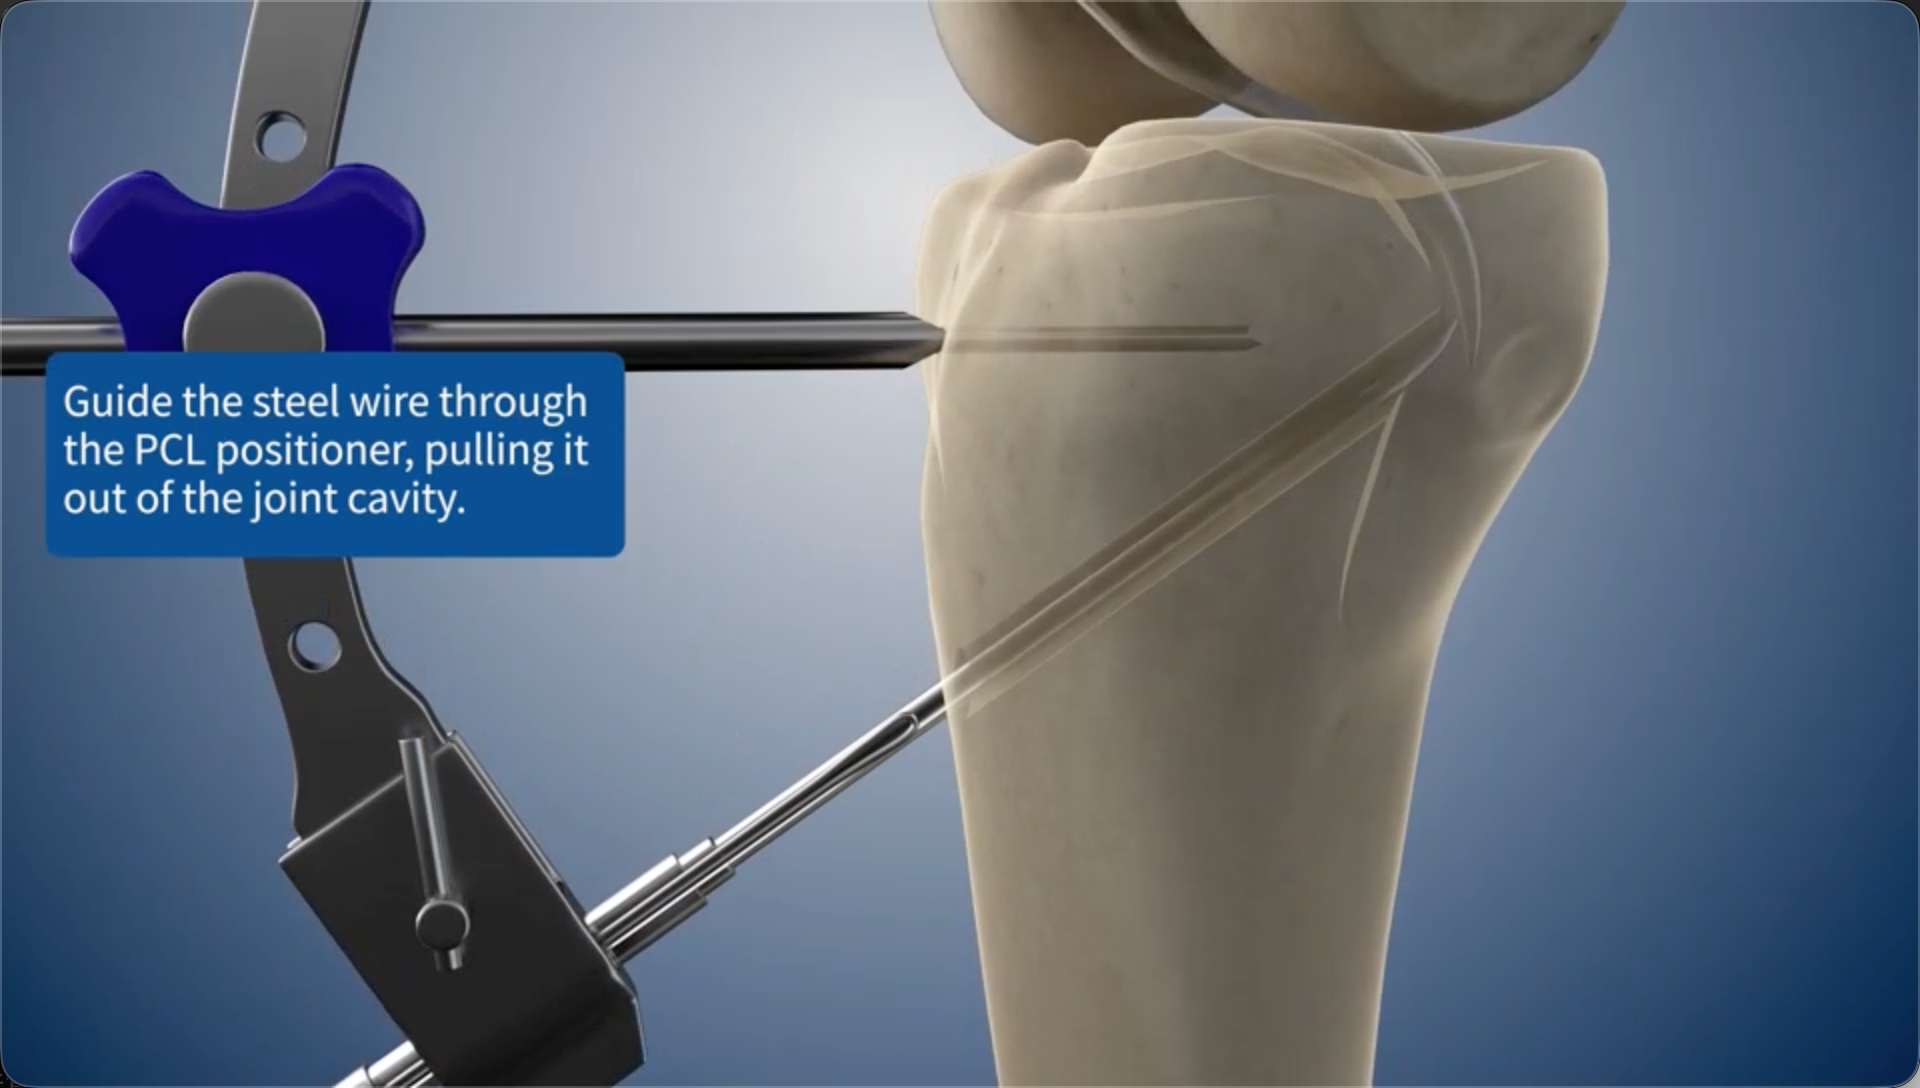
Guide the steel wire through the PCL positioner, pulling it out of the joint cavity.
07
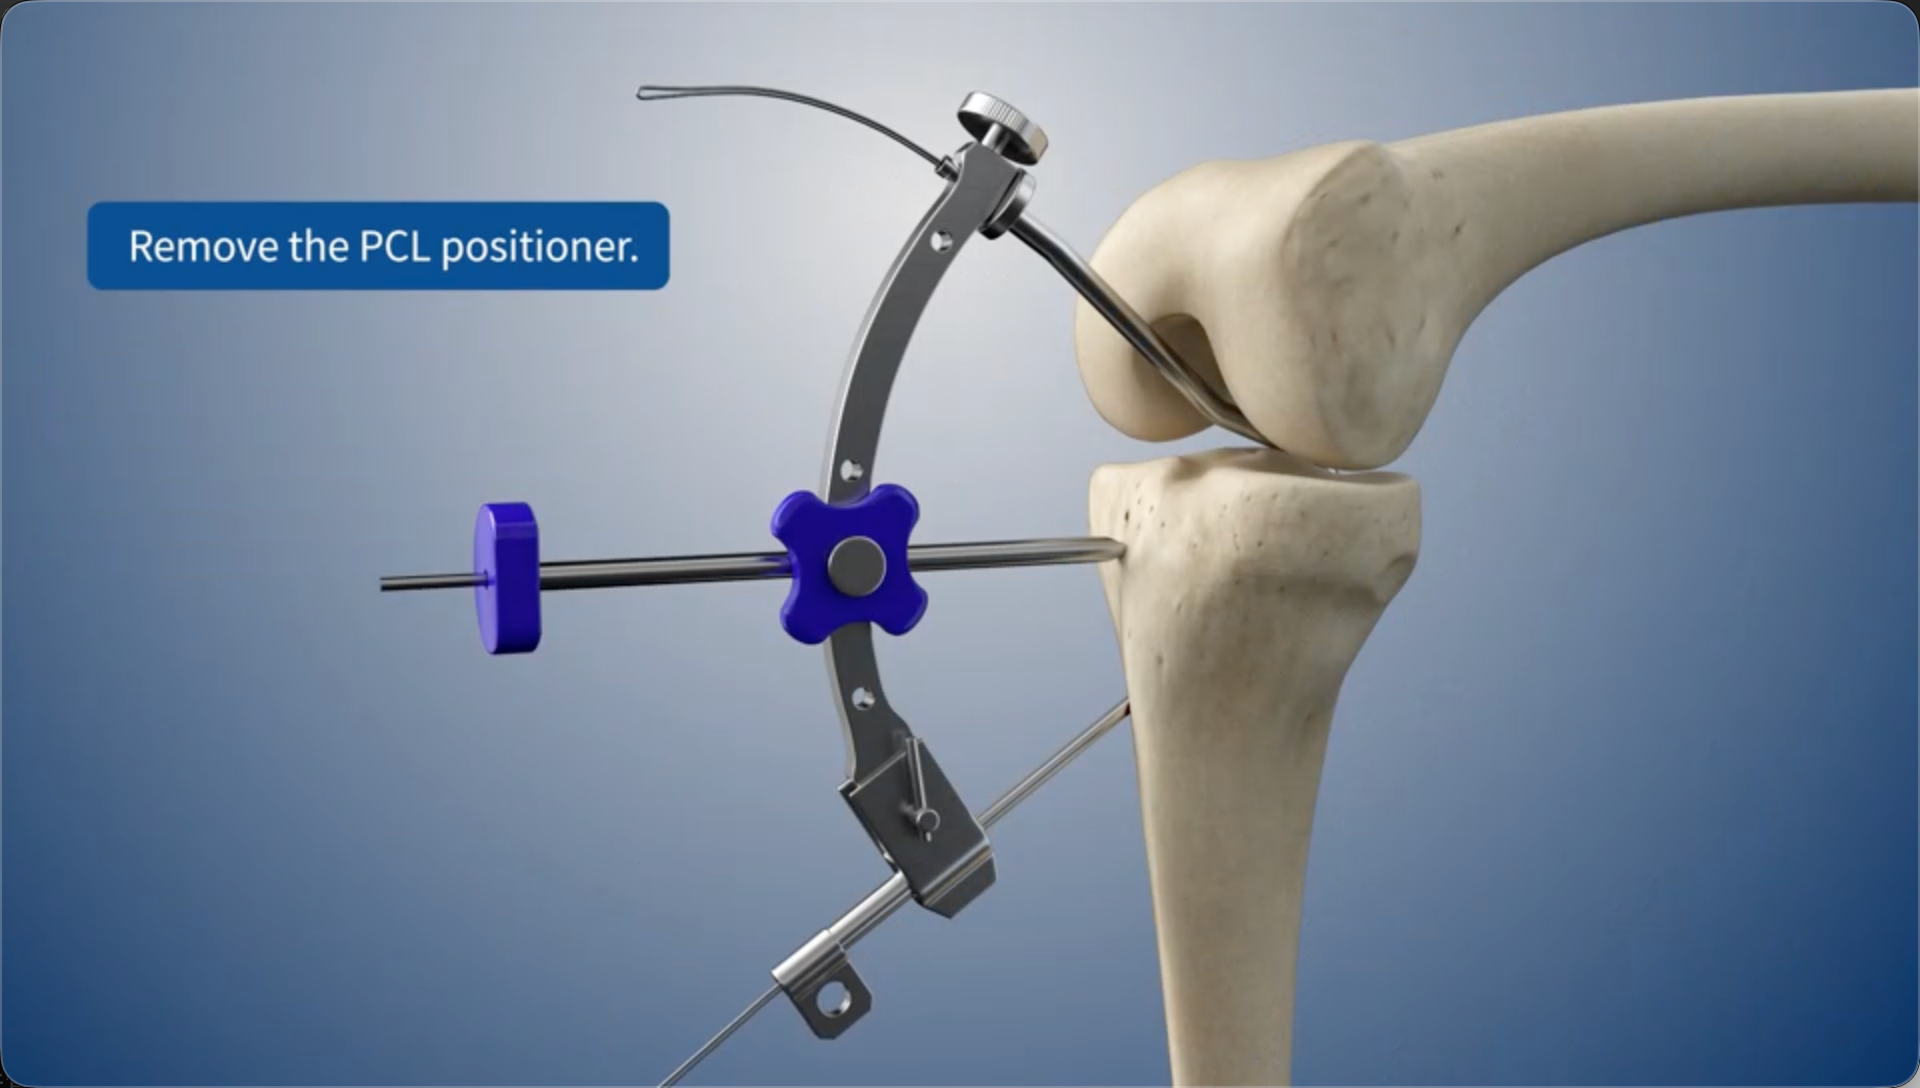
Remove the PCL positioner.
08
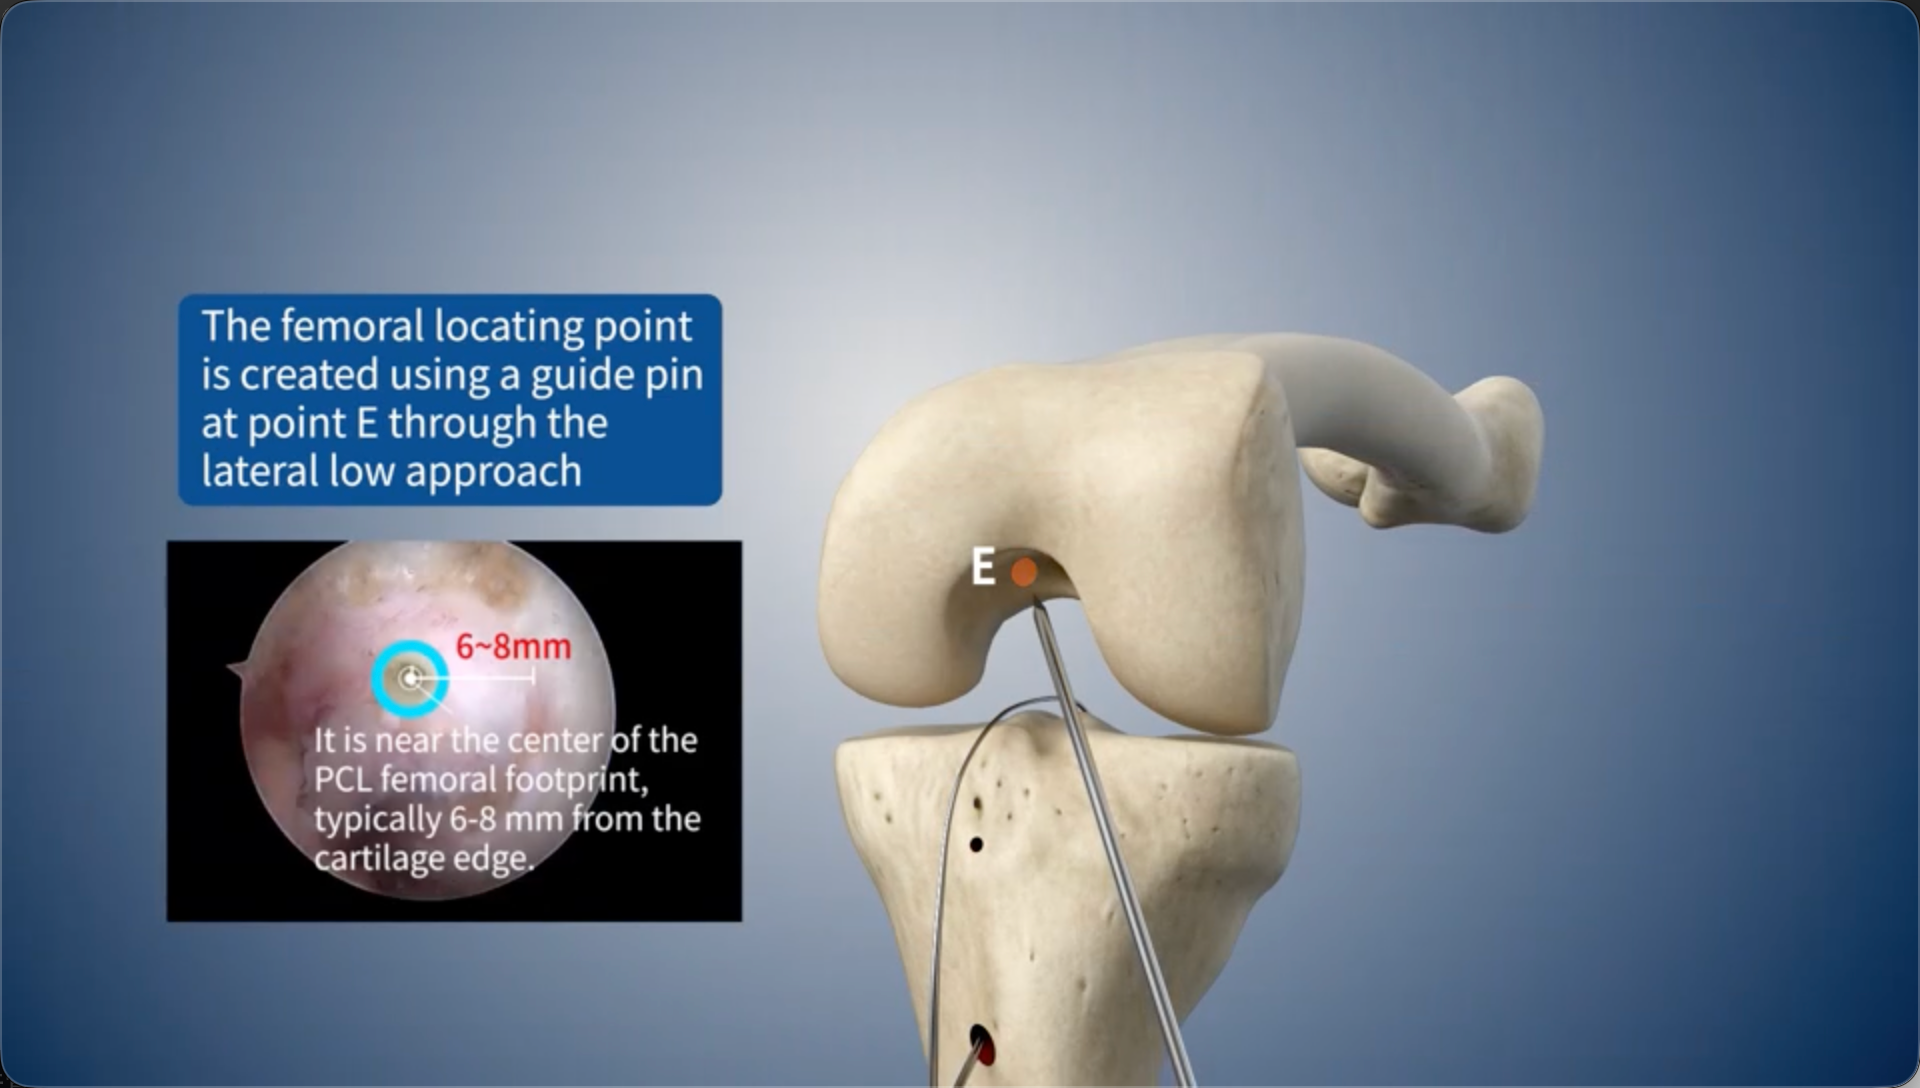
The femoral locating point is created using a guide pin at point E through the lateral low approach
09
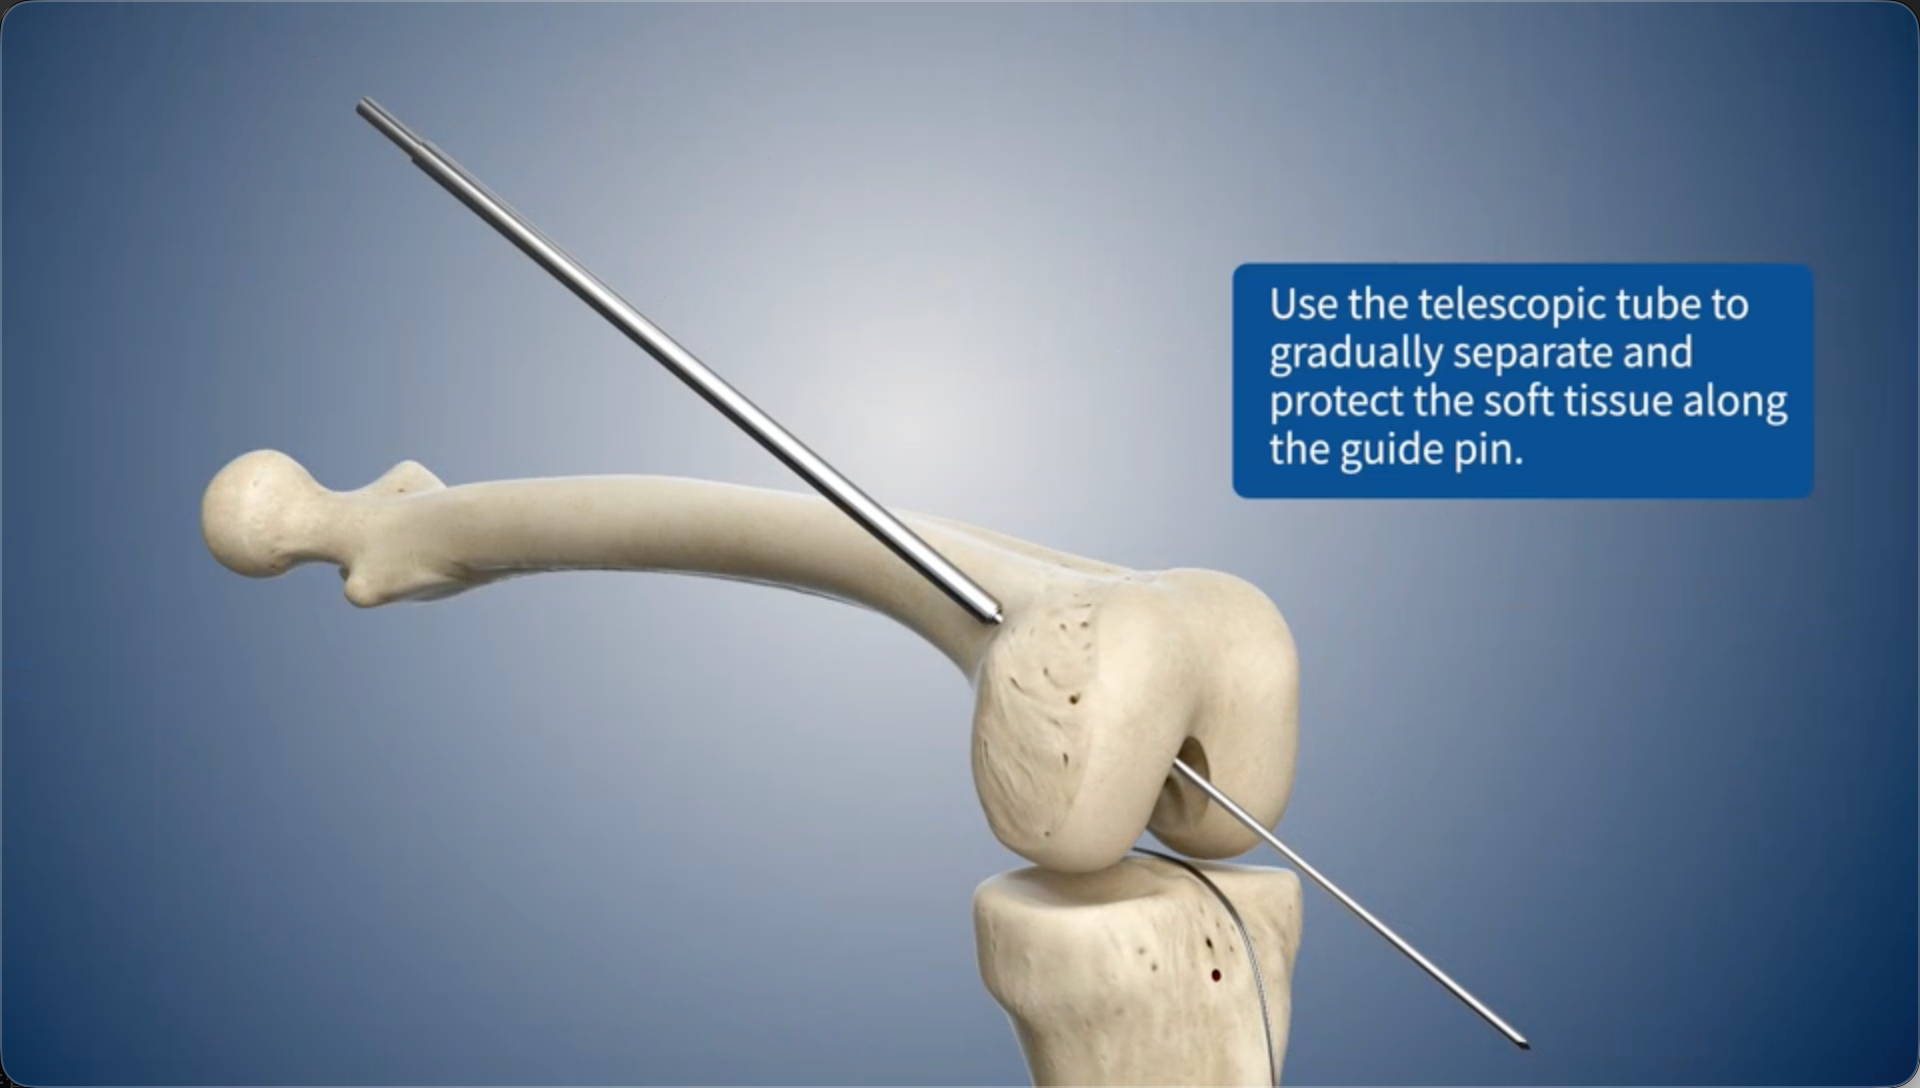
Use the telescopic tube to gradually separate and protect the soft tissue along the guide pin.
10
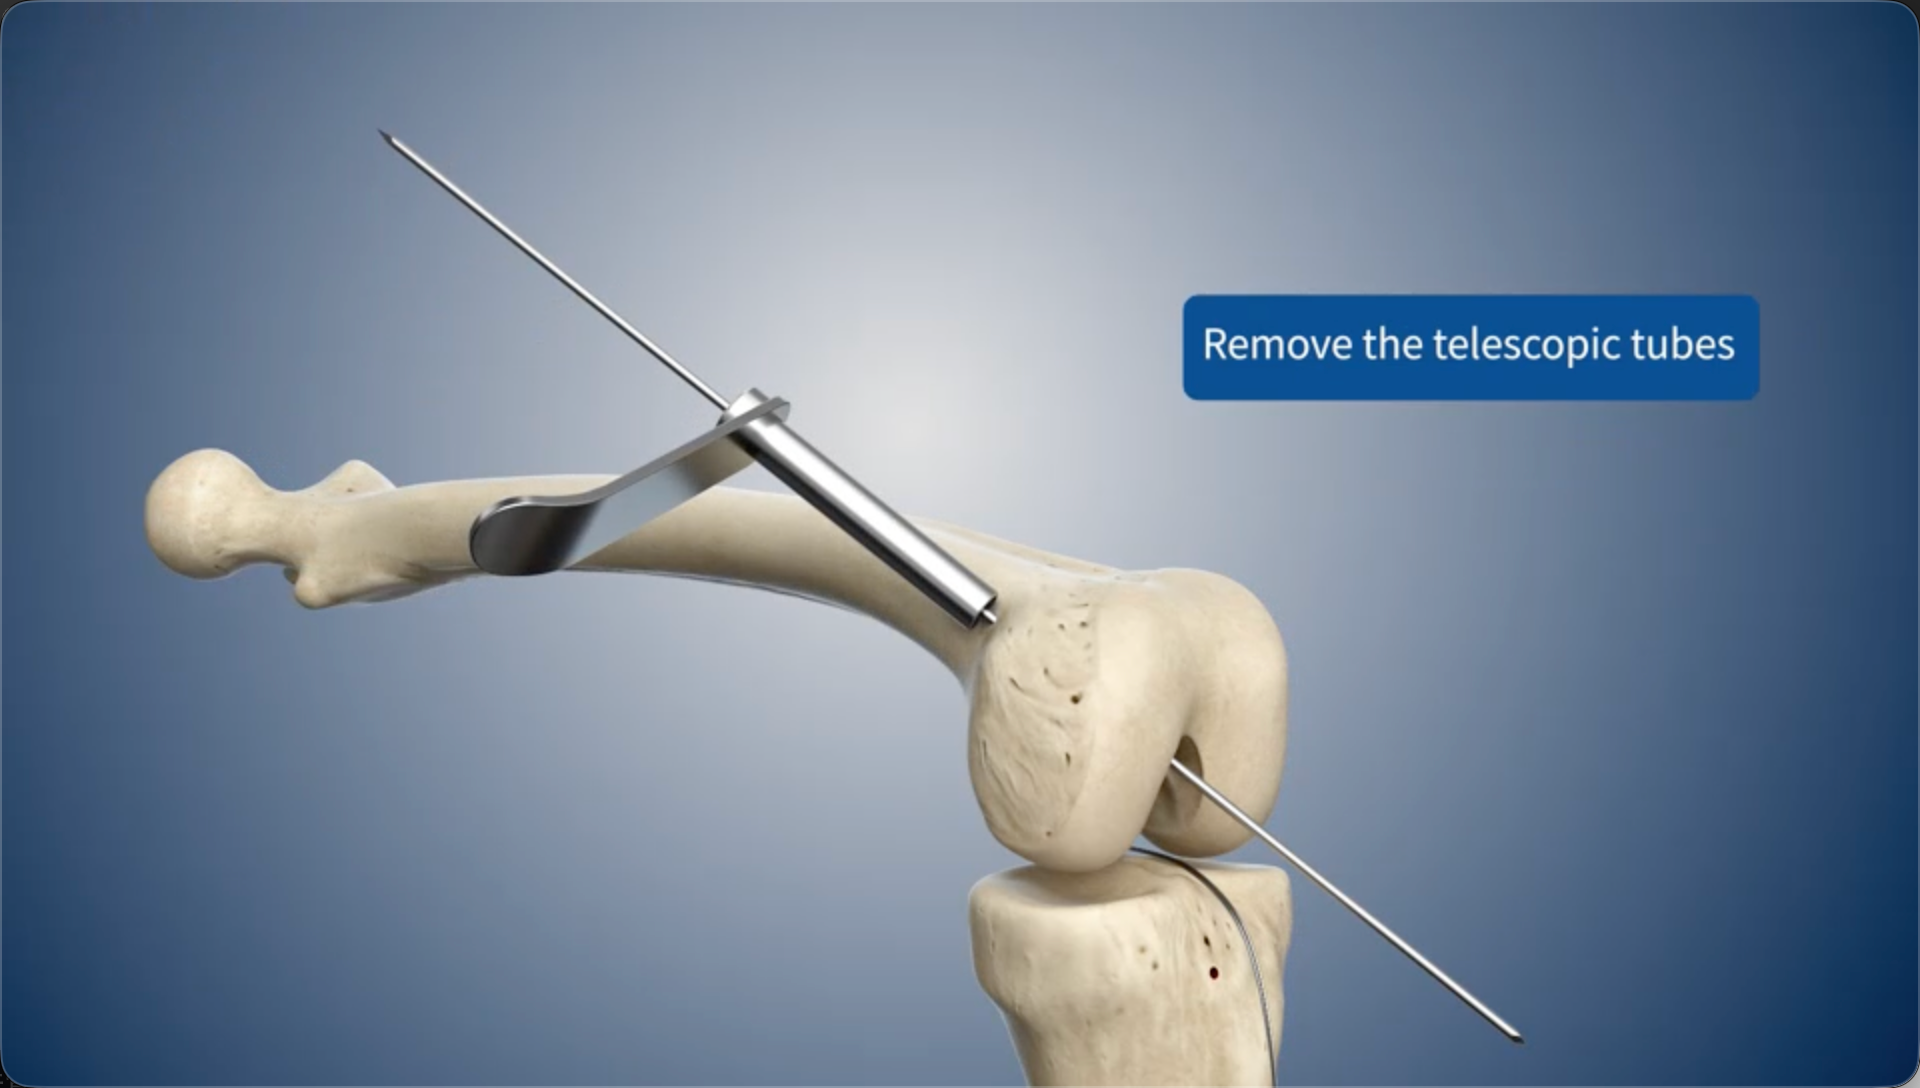
Remove the telescopic tubes
11
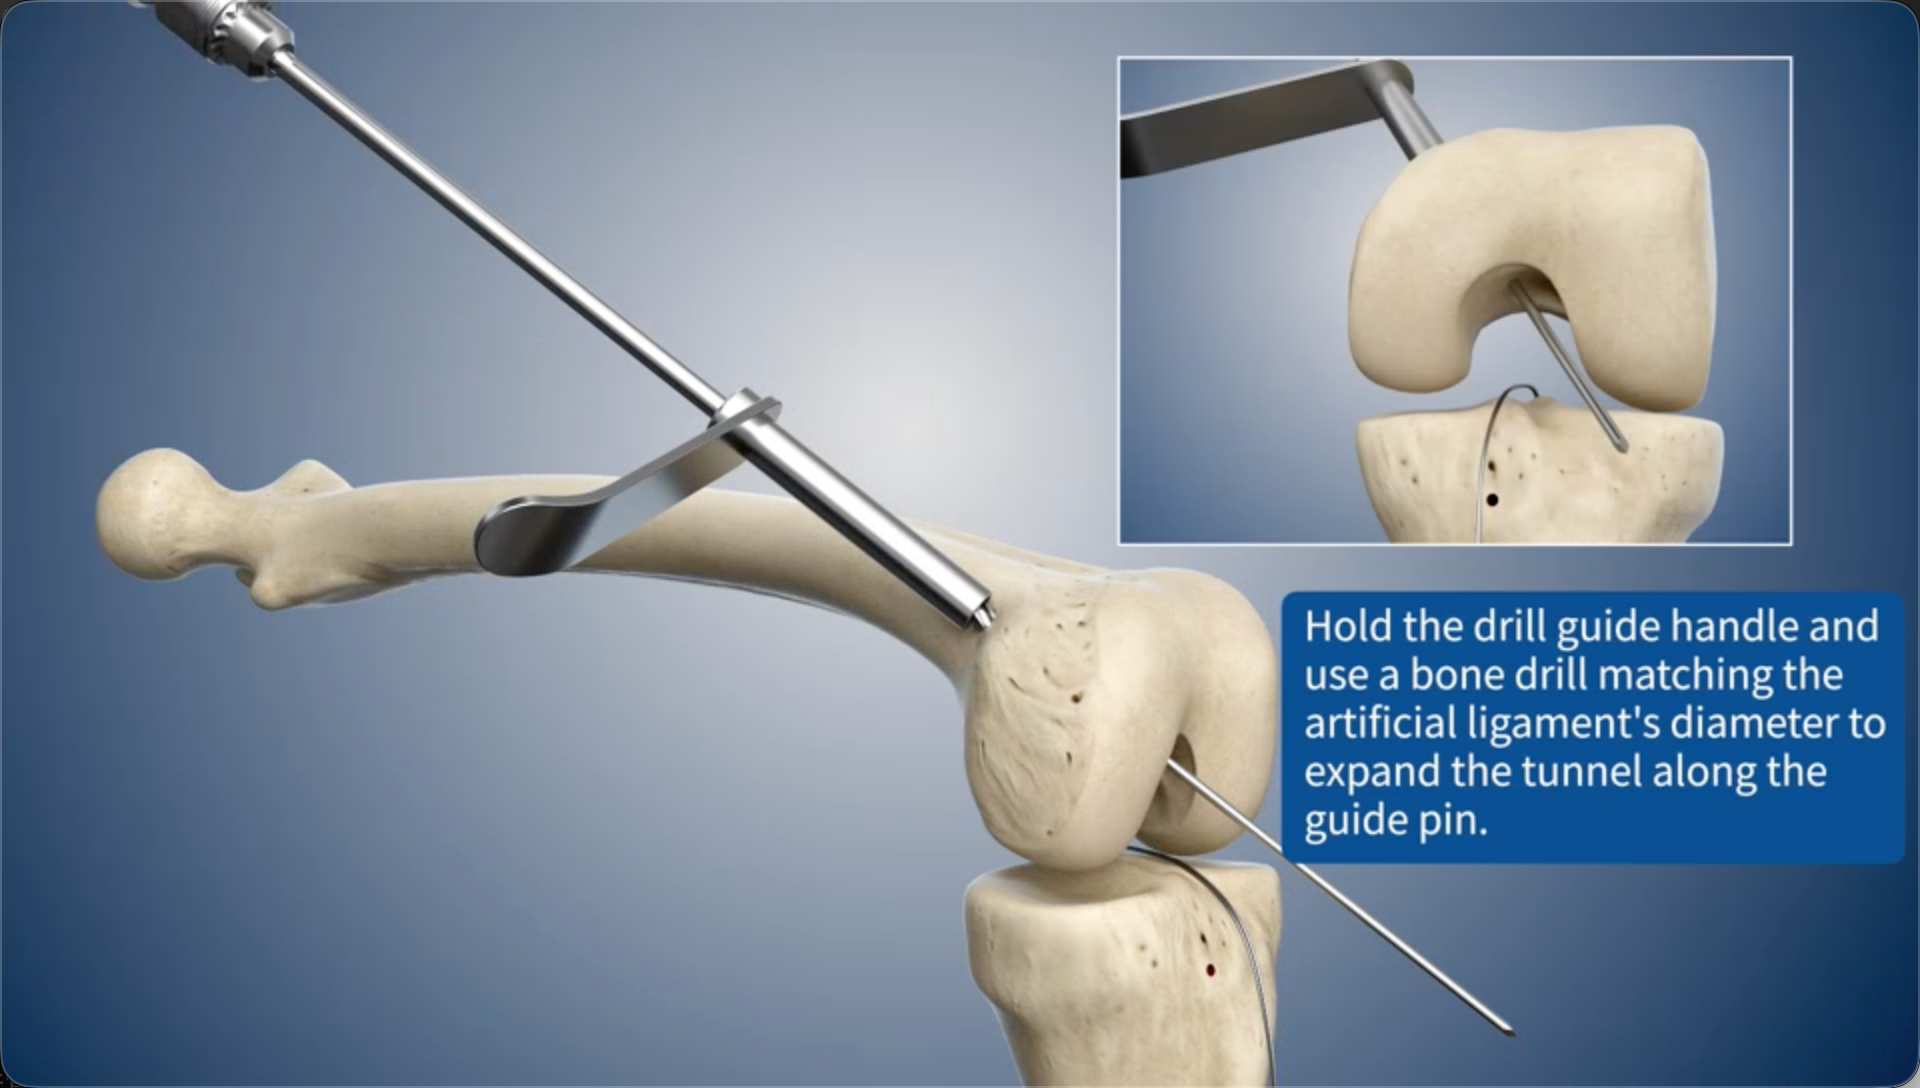
Hold the drill guide handle and use a bone drill matching the artificial ligament's diameter to expand the bone tunnel along the guide pin.
12
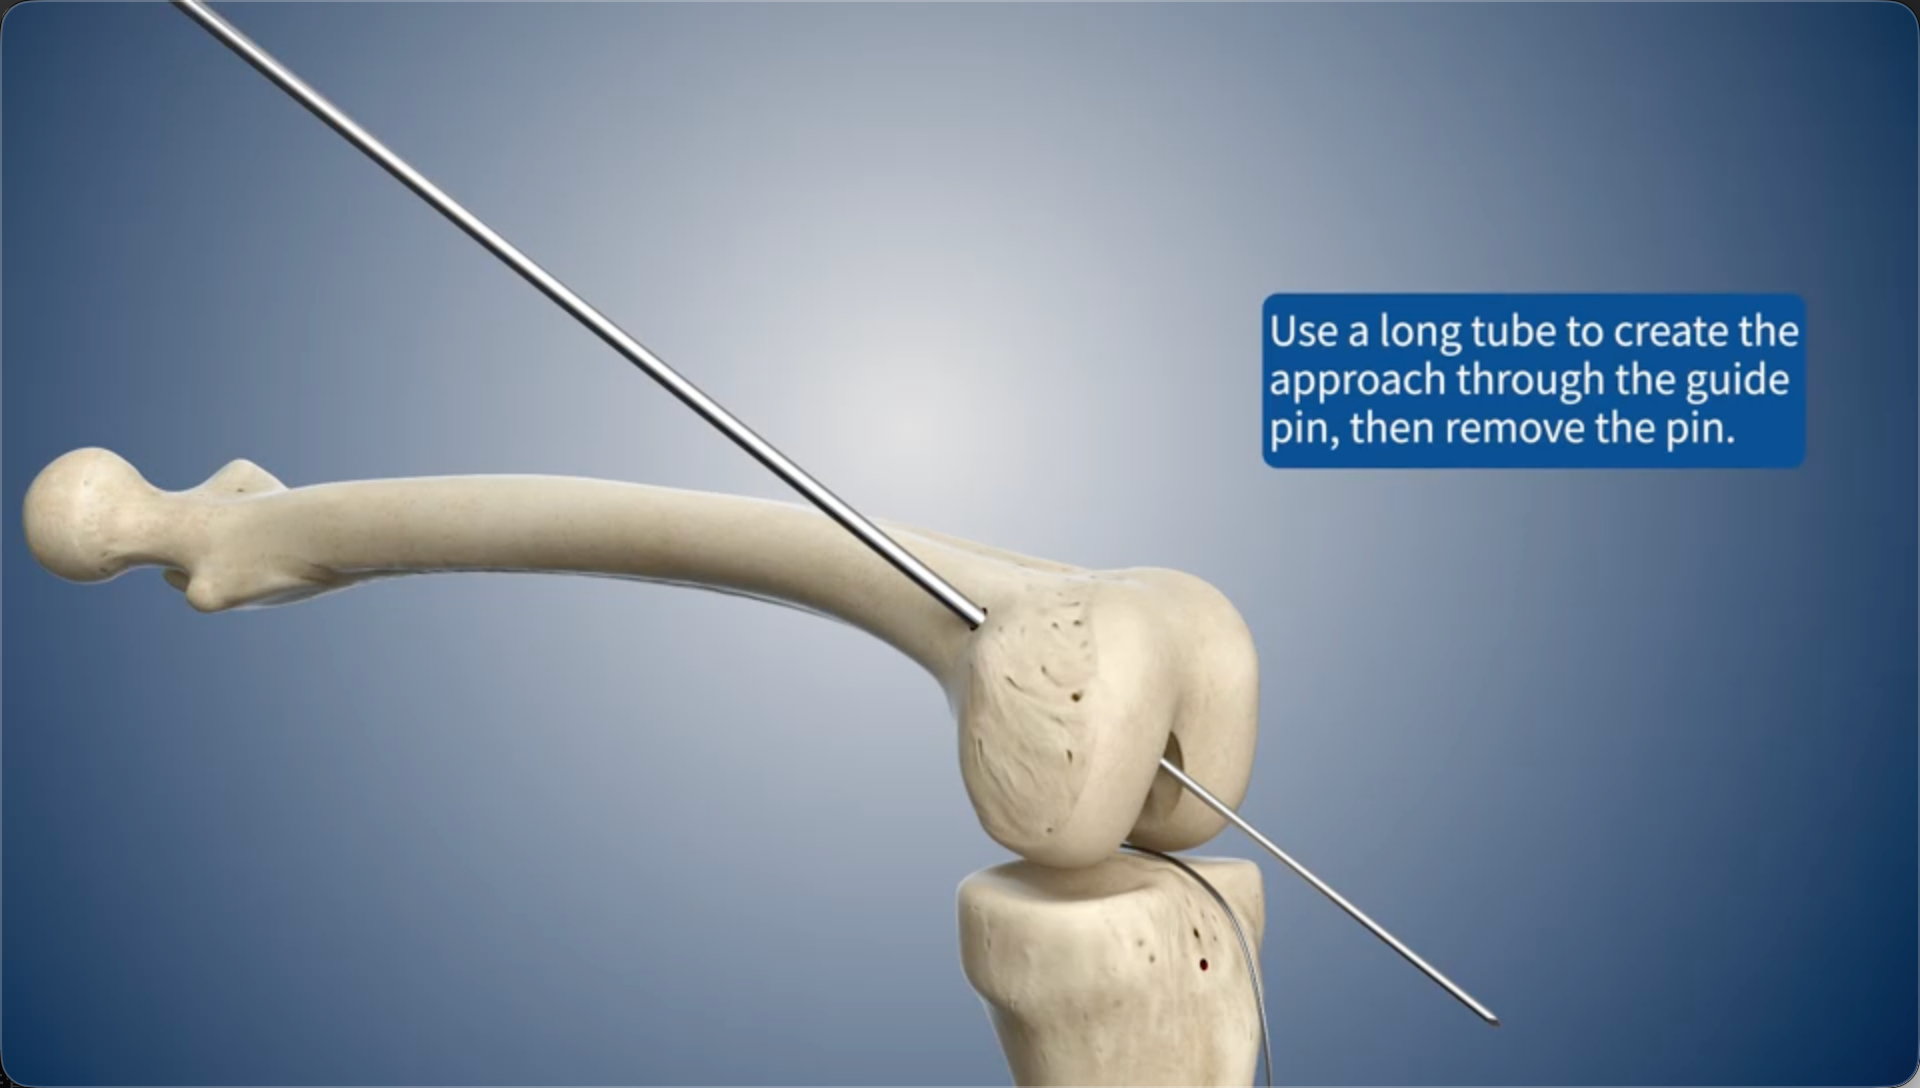
Use a long tube to create the approach through the guide pin, then remove the pin.
13
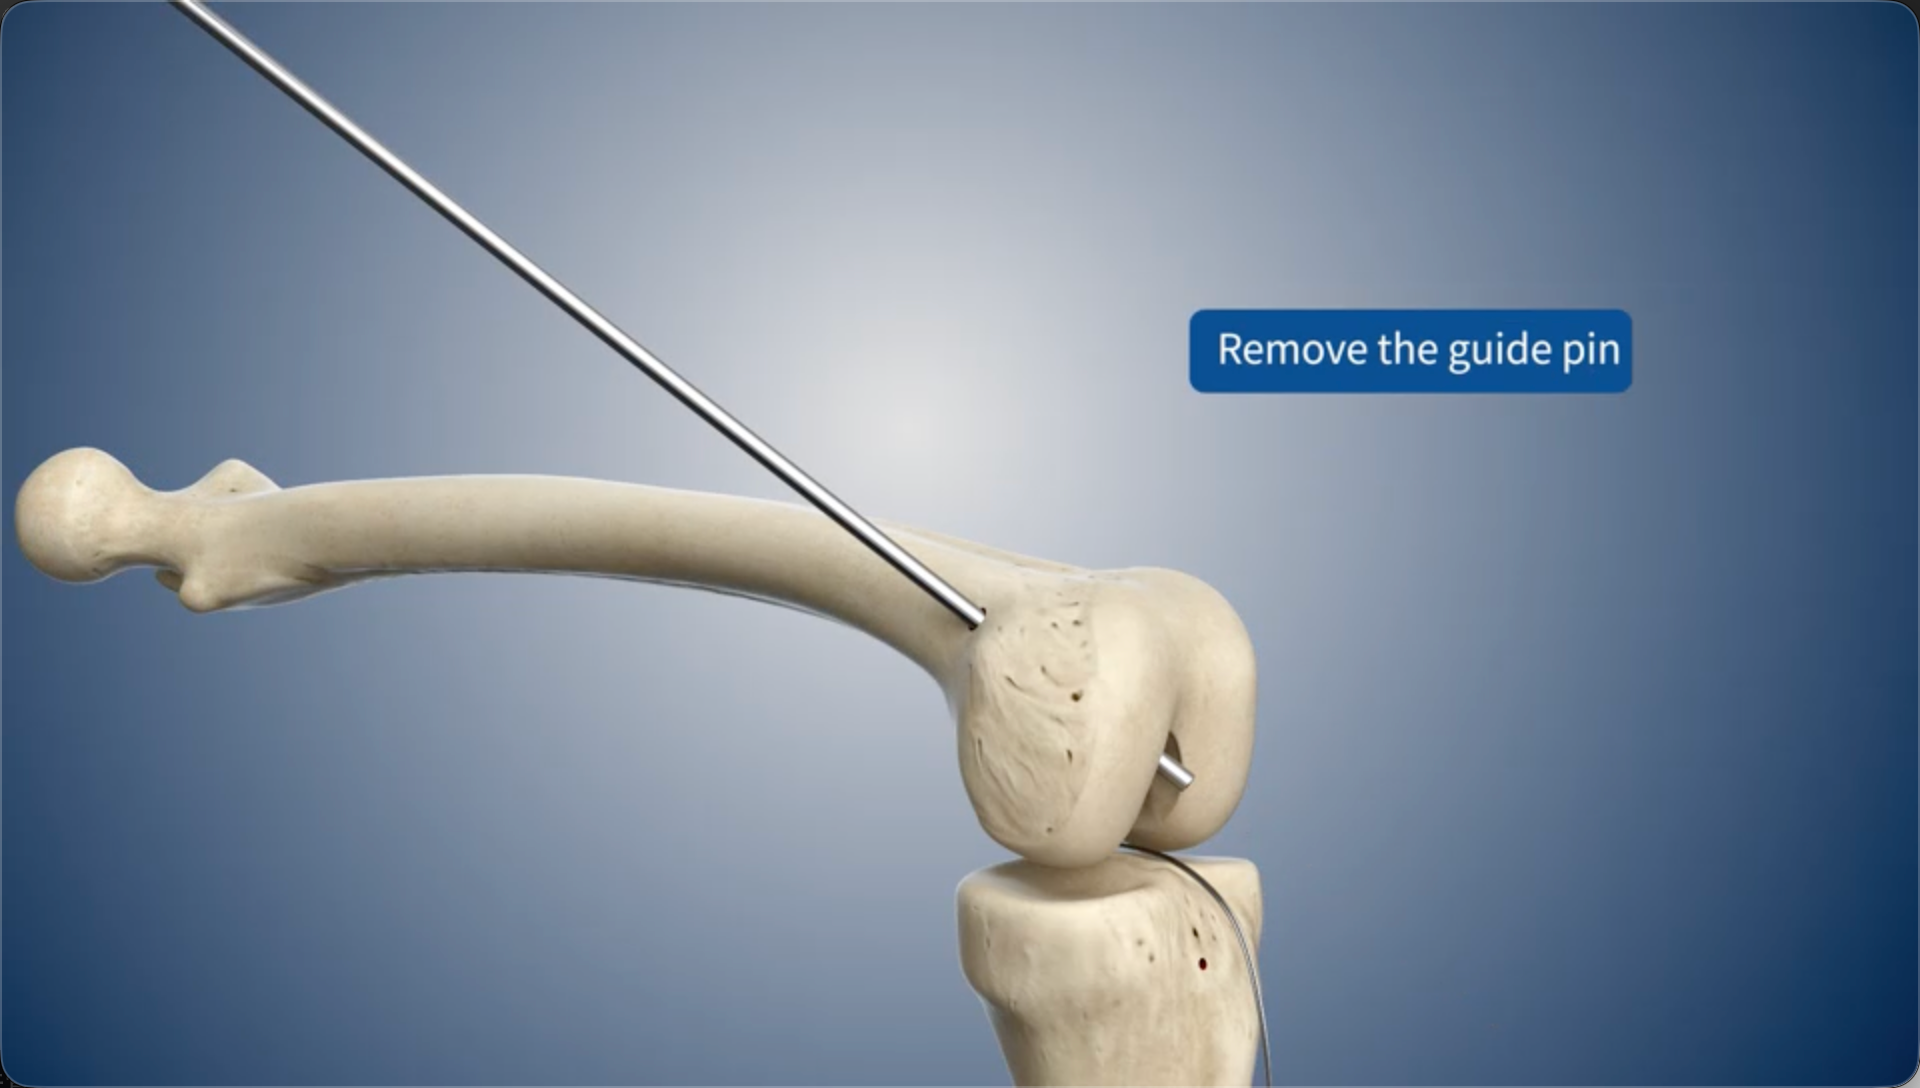
Remove the guide pin
14
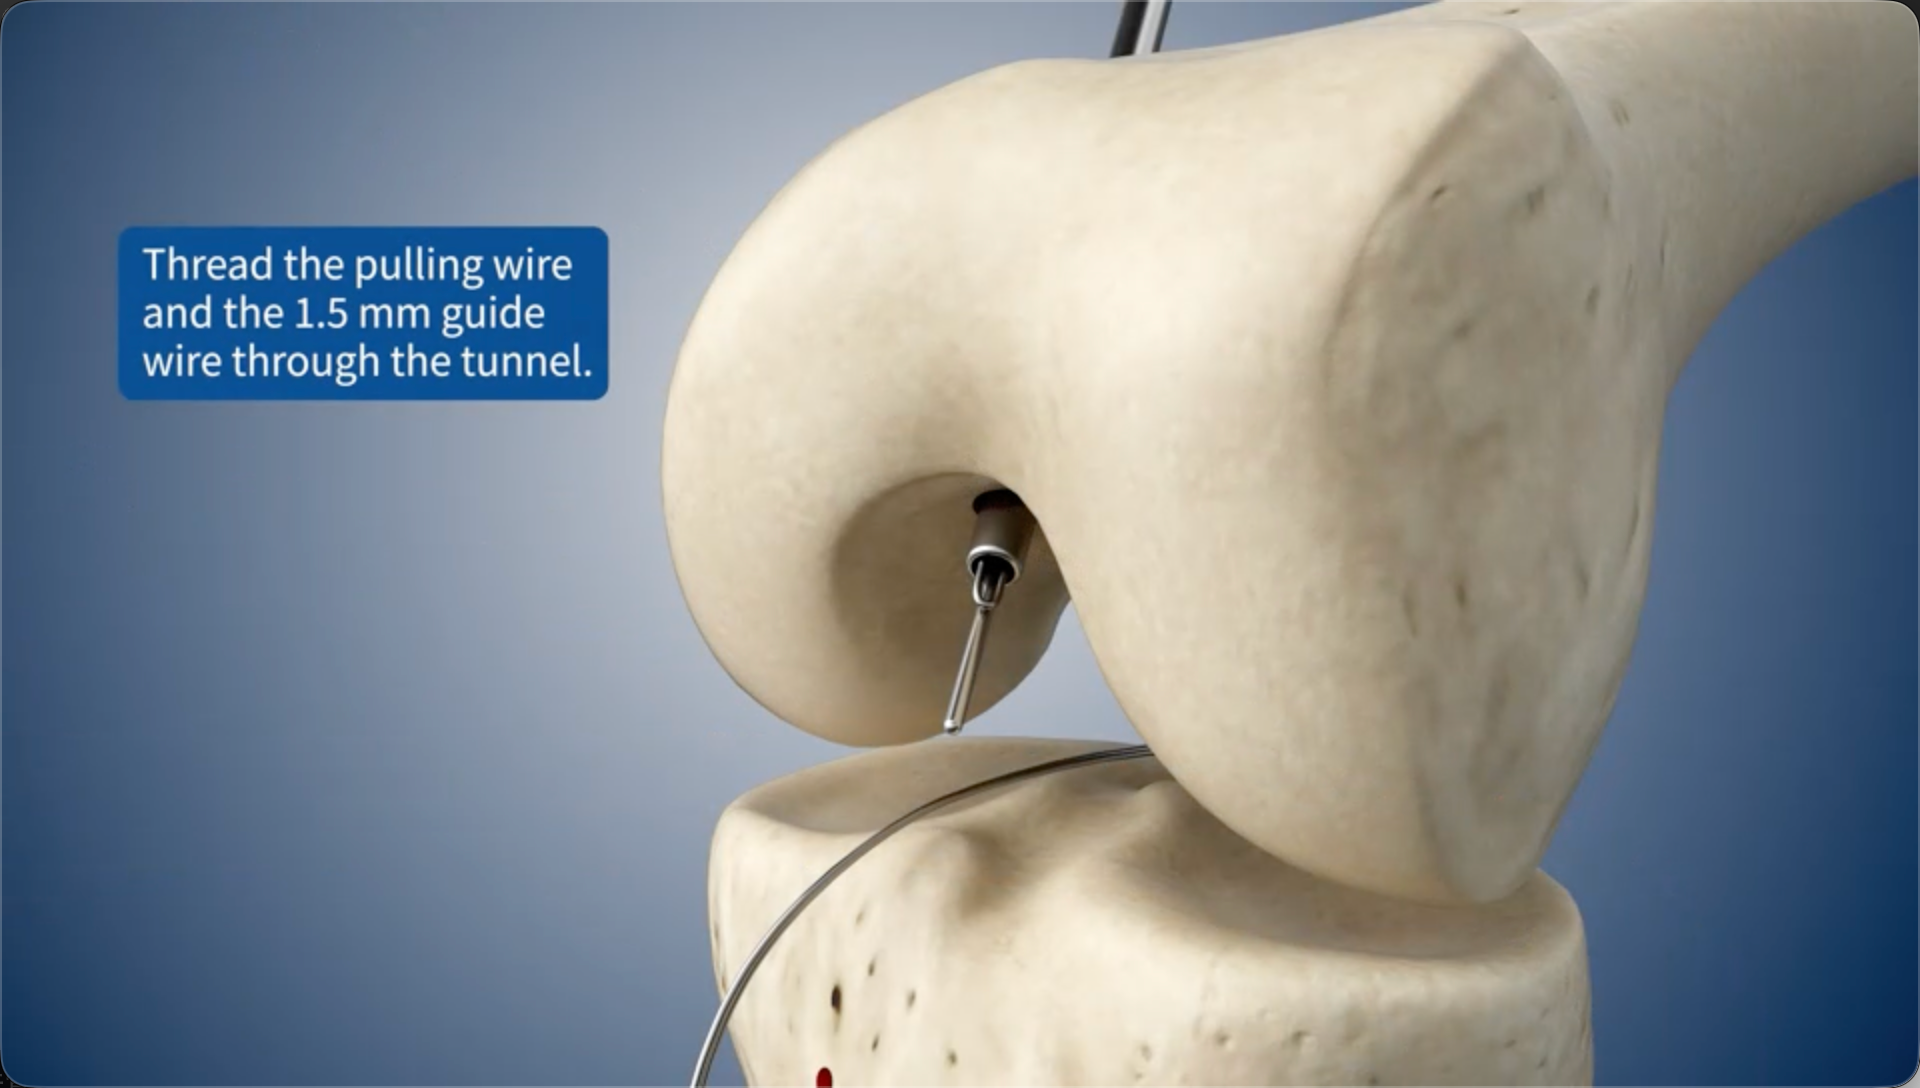
Thread the pulling wire and the 1.5 mm guide wire through the bone tunnel.
15
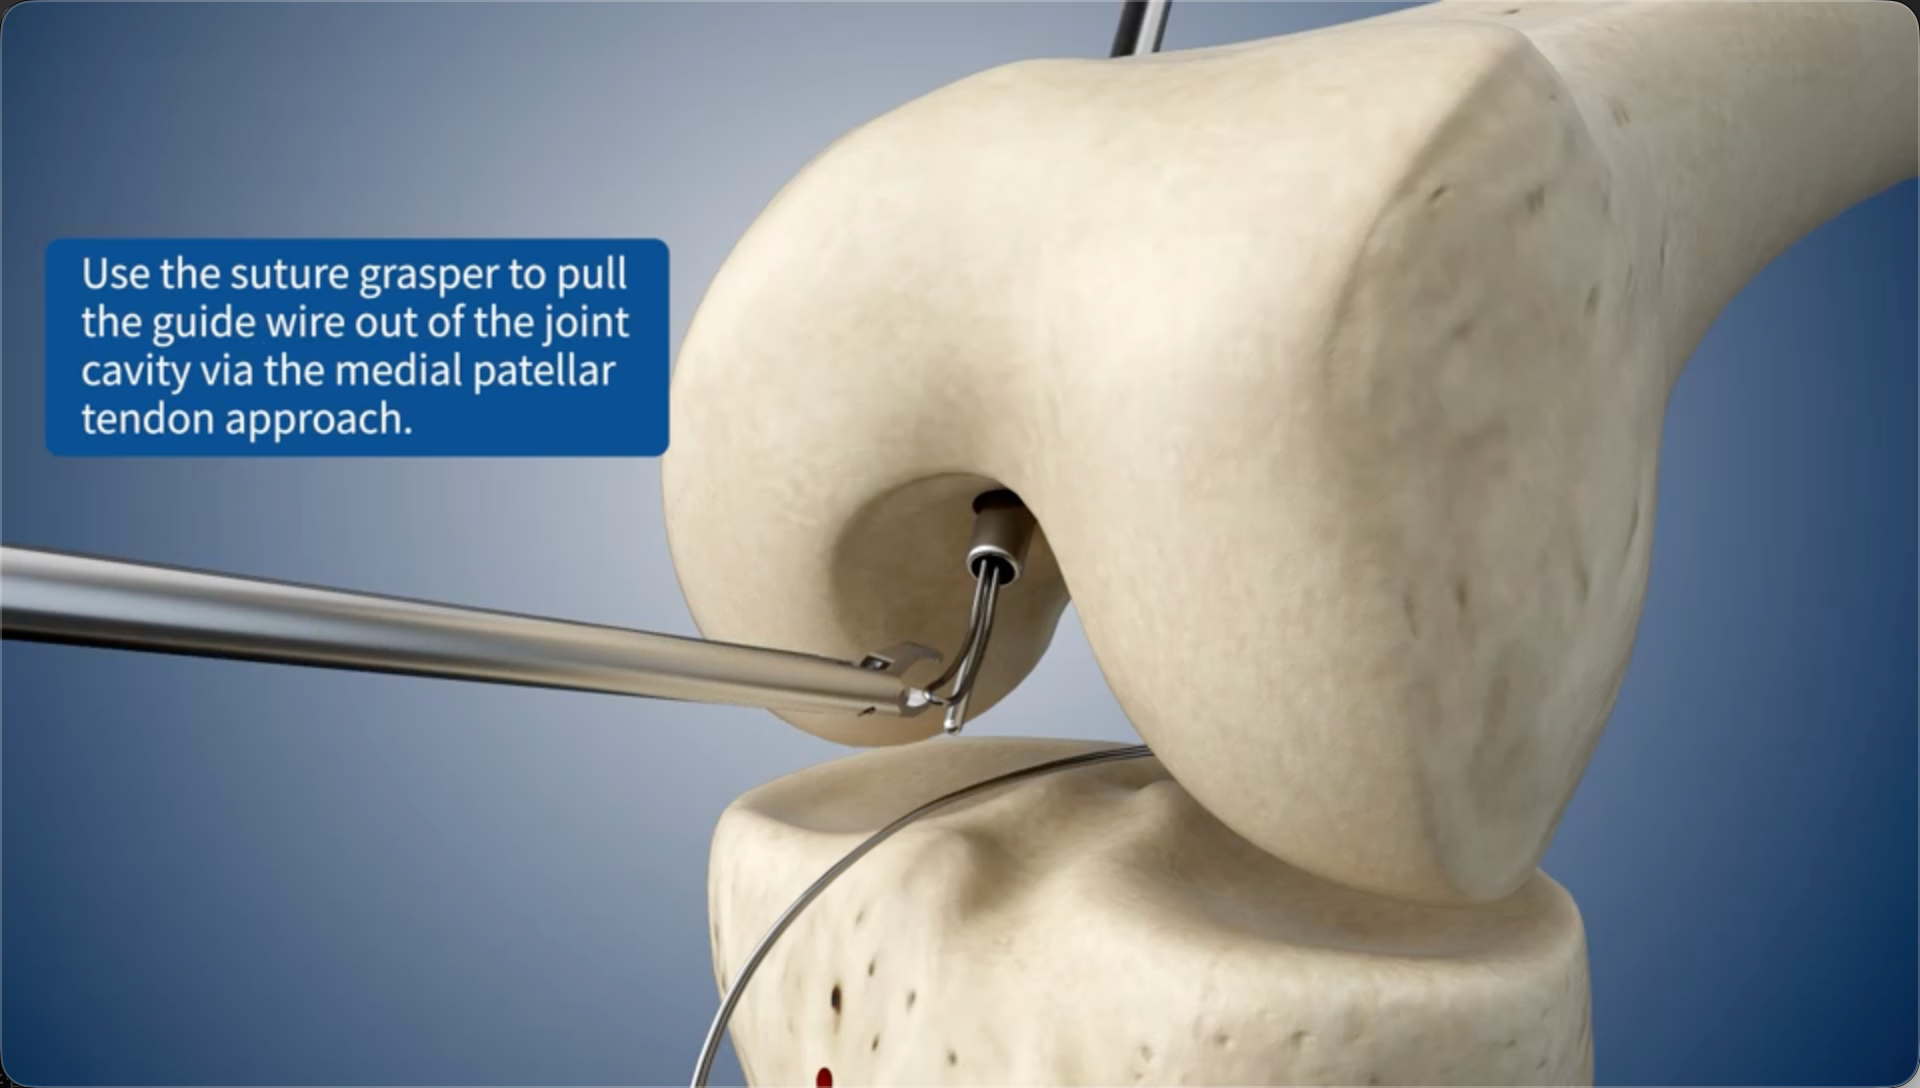
Use the suture grasper to pull the guide wire out of the joint cavity via the medial patellar tendon approach.
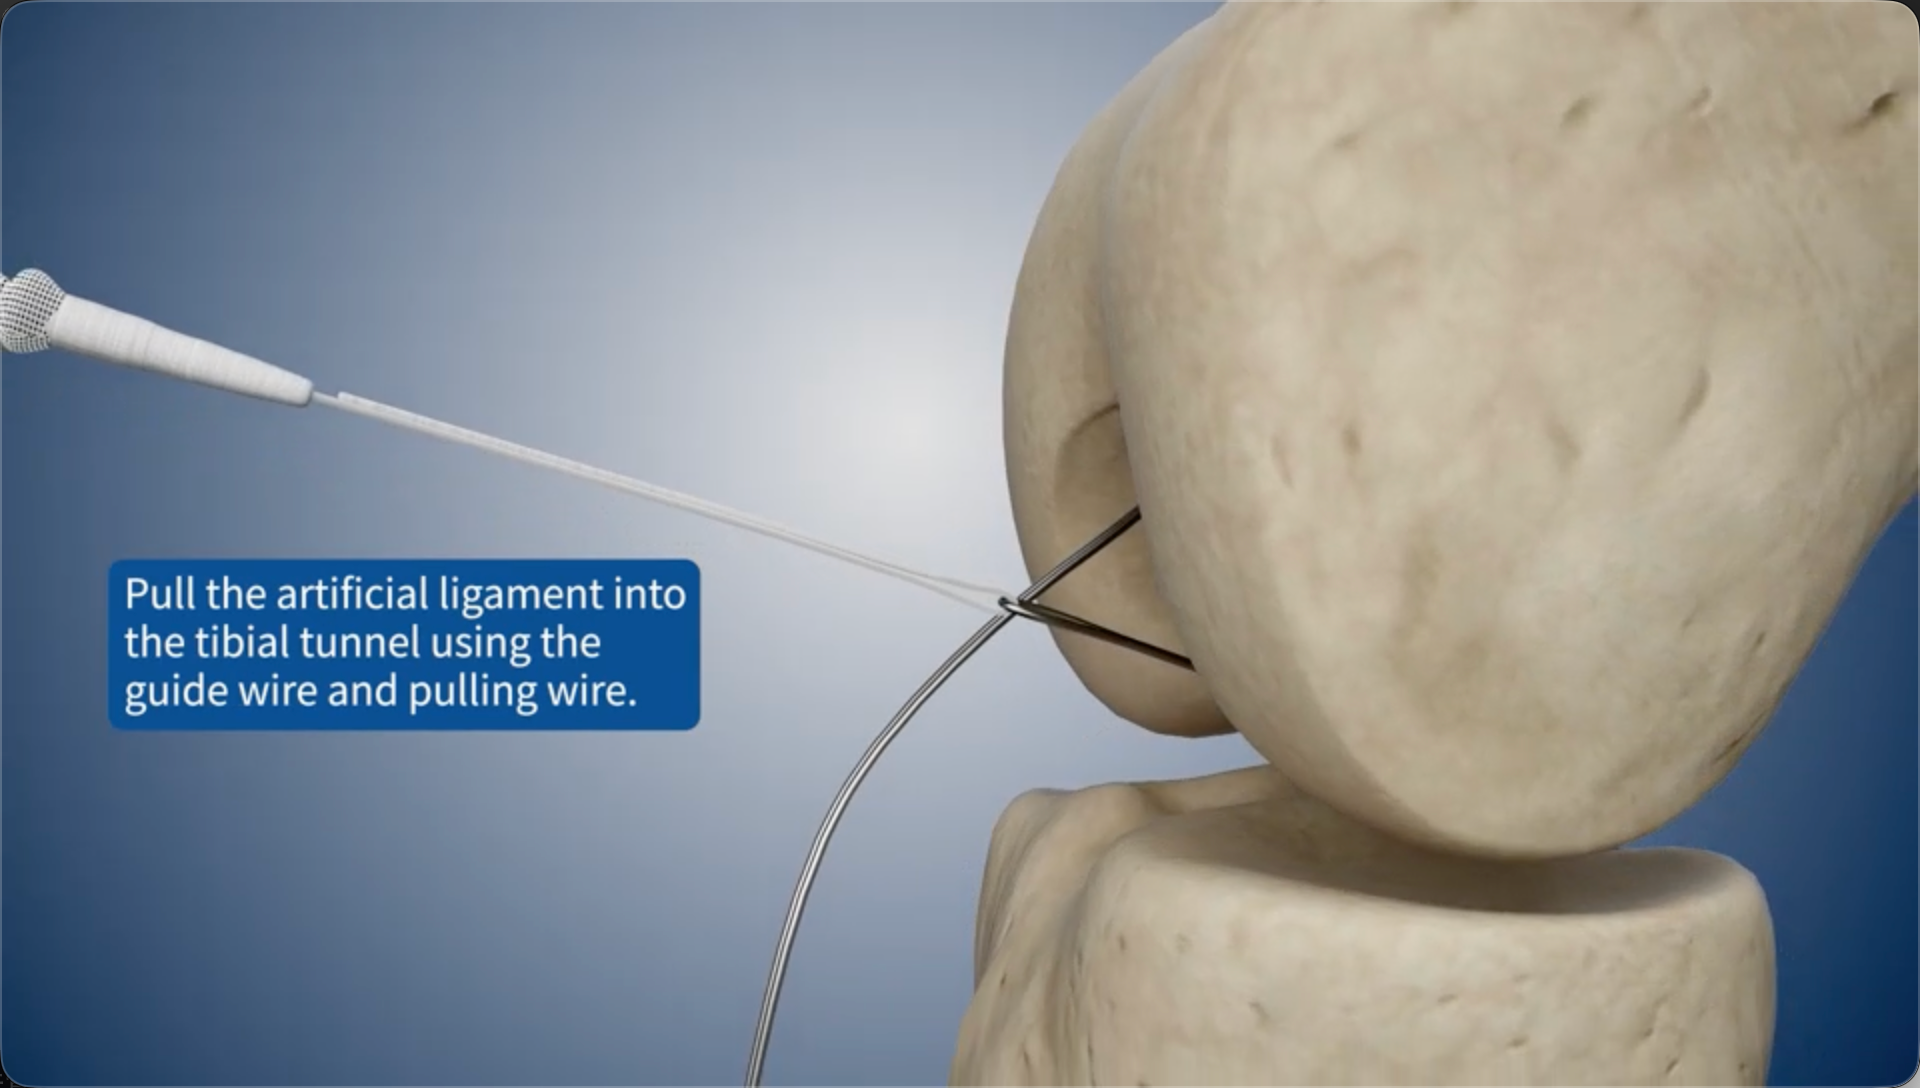
16
Pull the artificial ligament into the tibial bone tunnel using the guide wire and pulling wire.
17
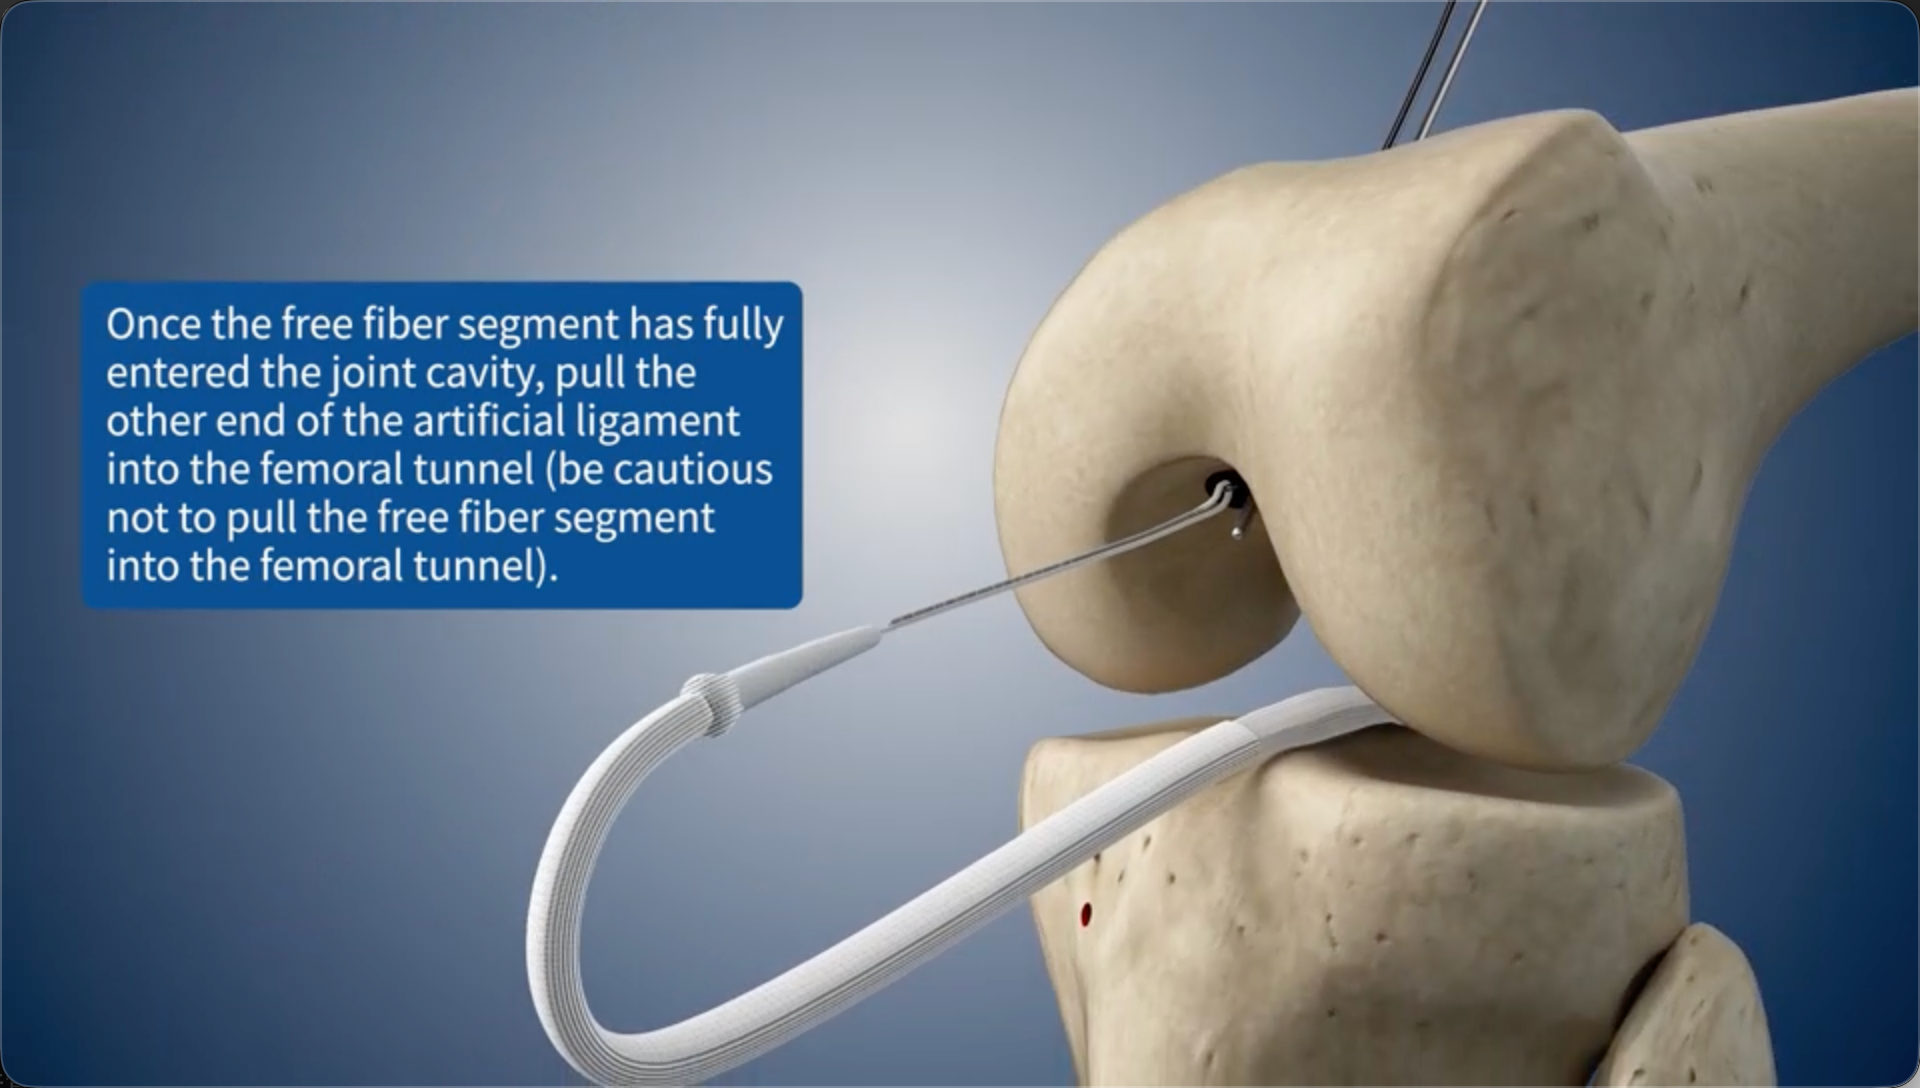
Once the free fiber segment has fully entered the joint cavity, pull the other end of the artificial ligament into the femoral bone tunnel (be cautious not to pull the free fiber segment into the femoral bone tunnel).
18
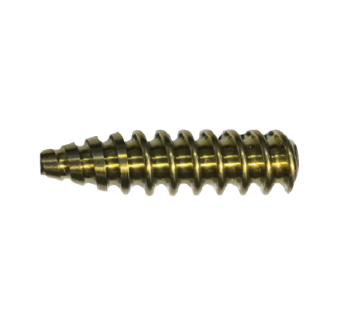
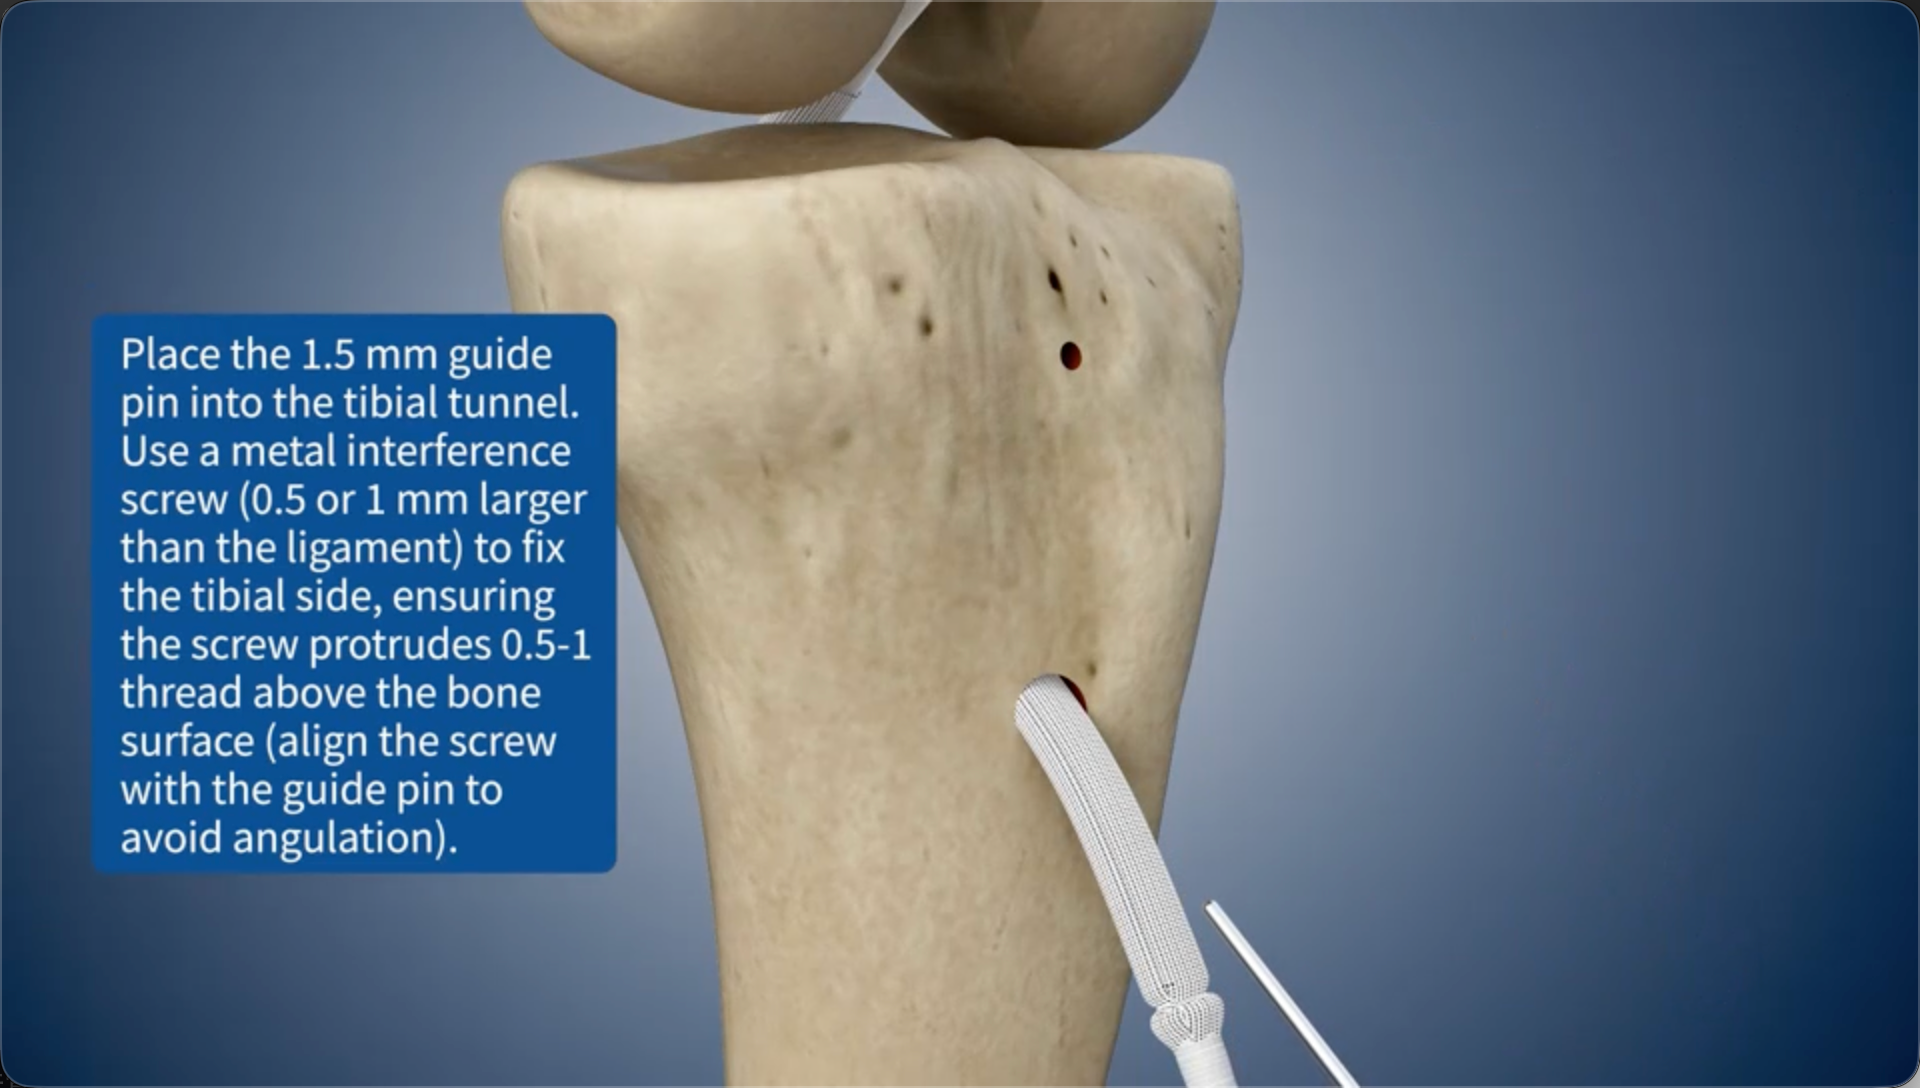
Place the 1.5 mm guide pin into the tibial bone tunnel. Use a metal interference screw (0.5 or 1 mm larger than the ligament) to fix the tibial side, ensuring the screw protrudes 0.5-1 thread above the bone surface (align the screw with the guide pin to avoid angulation).
19
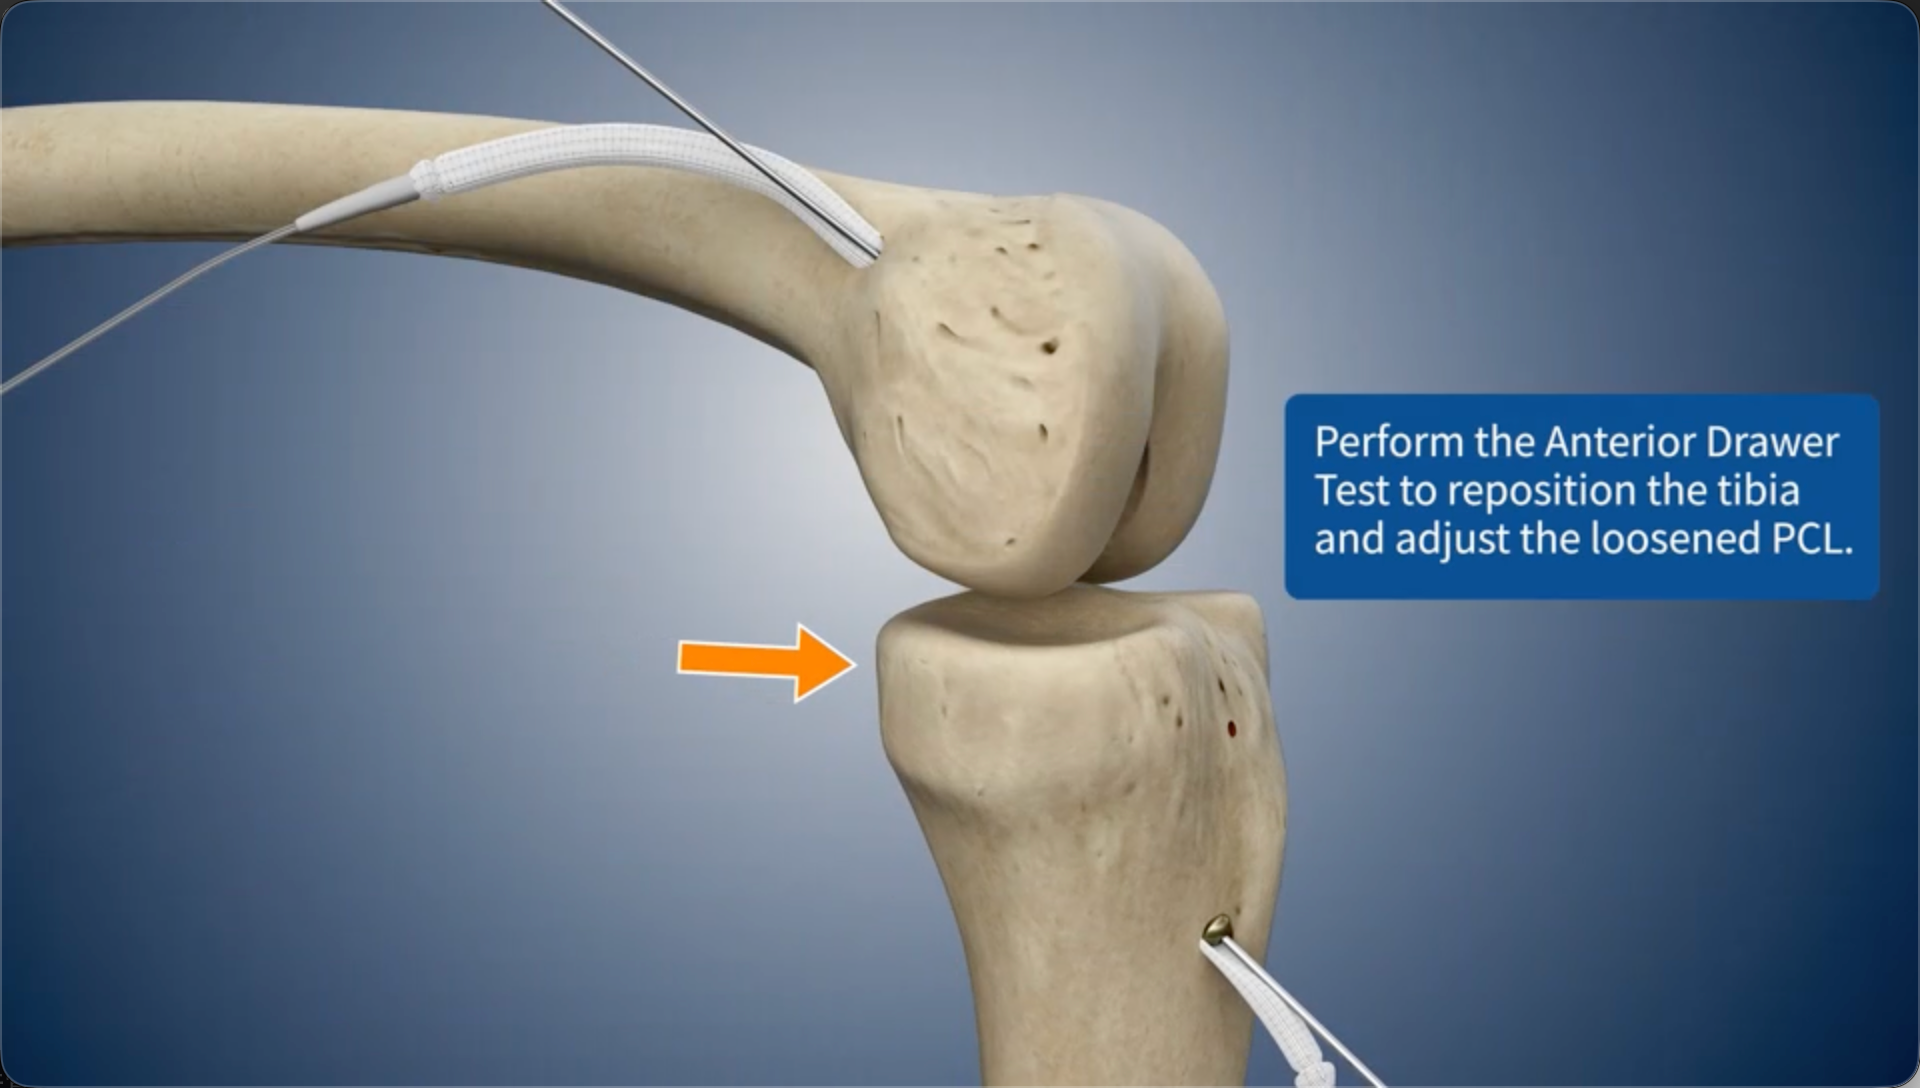
Perform the Anterior Drawer Test to reposition the tibia and adjust the loosened PCL.
20
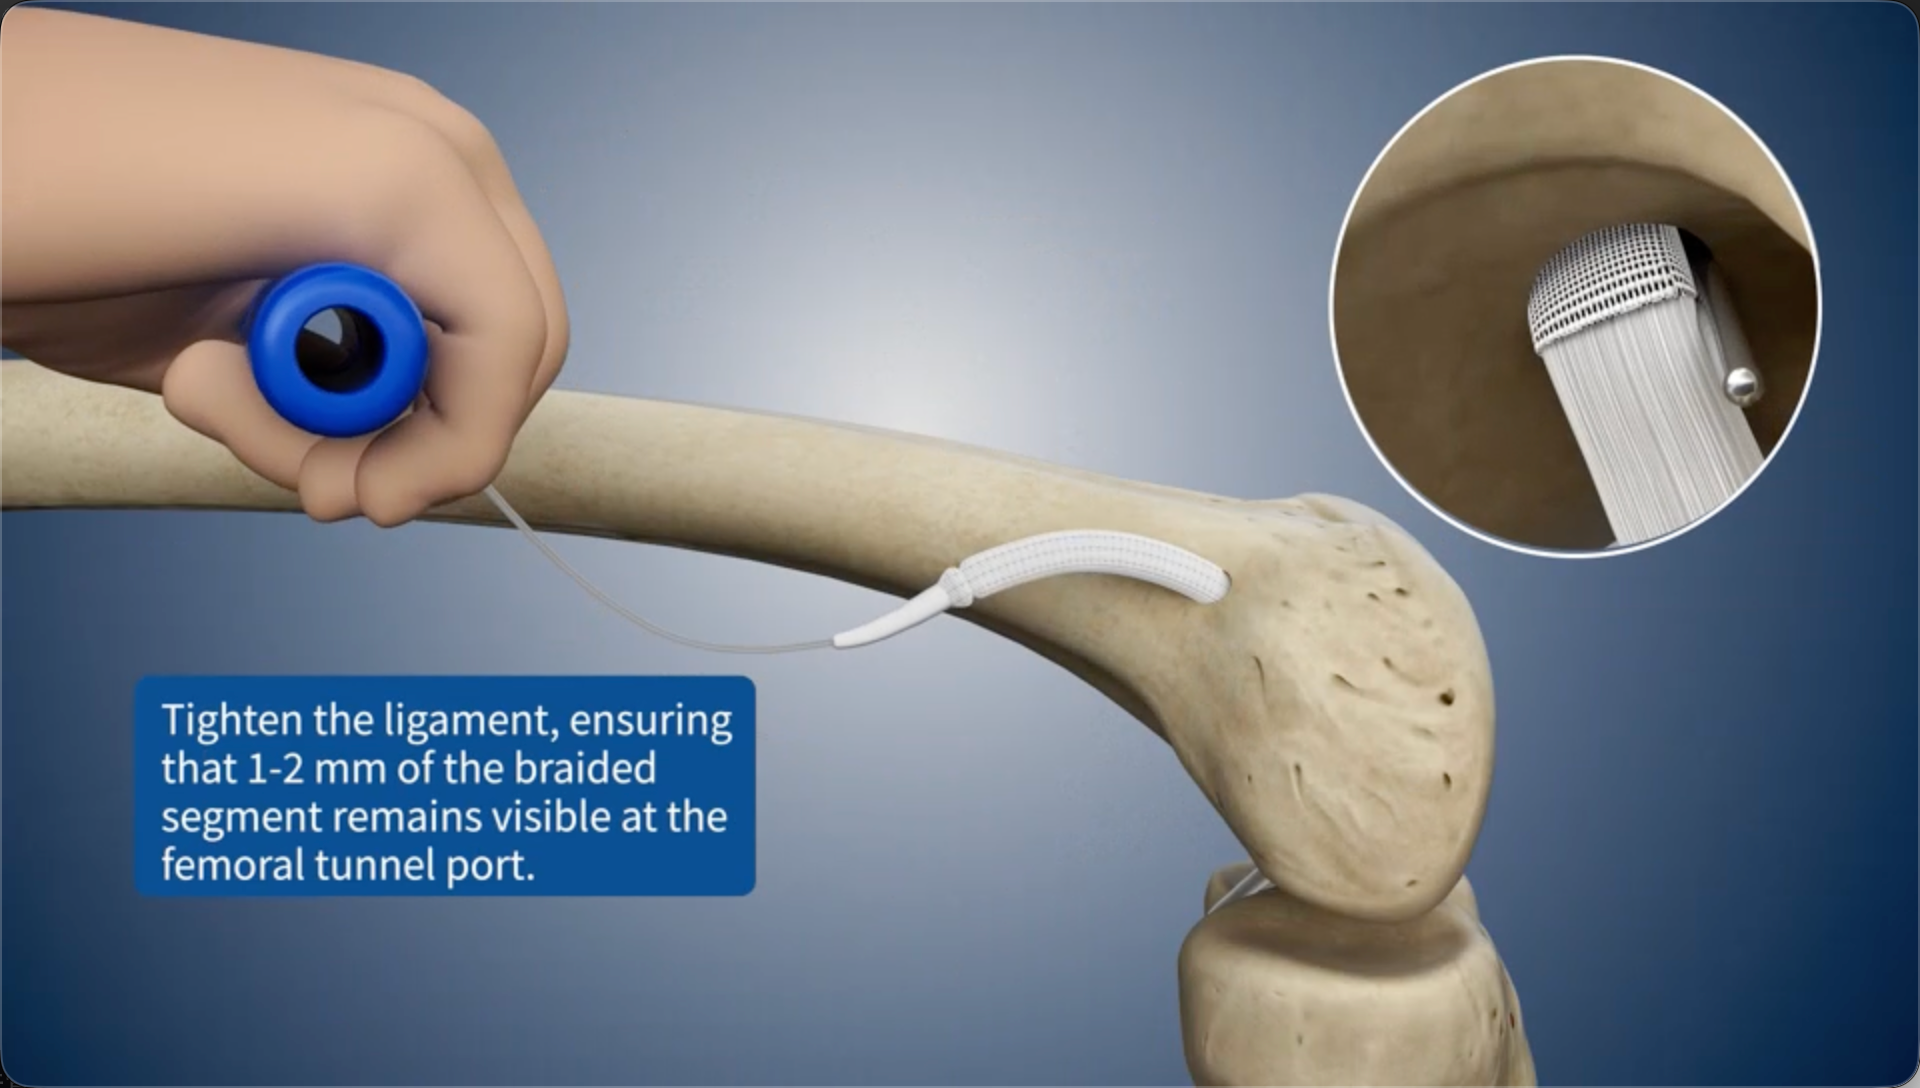
Tighten the ligament, ensuring that 1-2 mm of the braided segment remains visible at the femoral bone tunnel port.
21
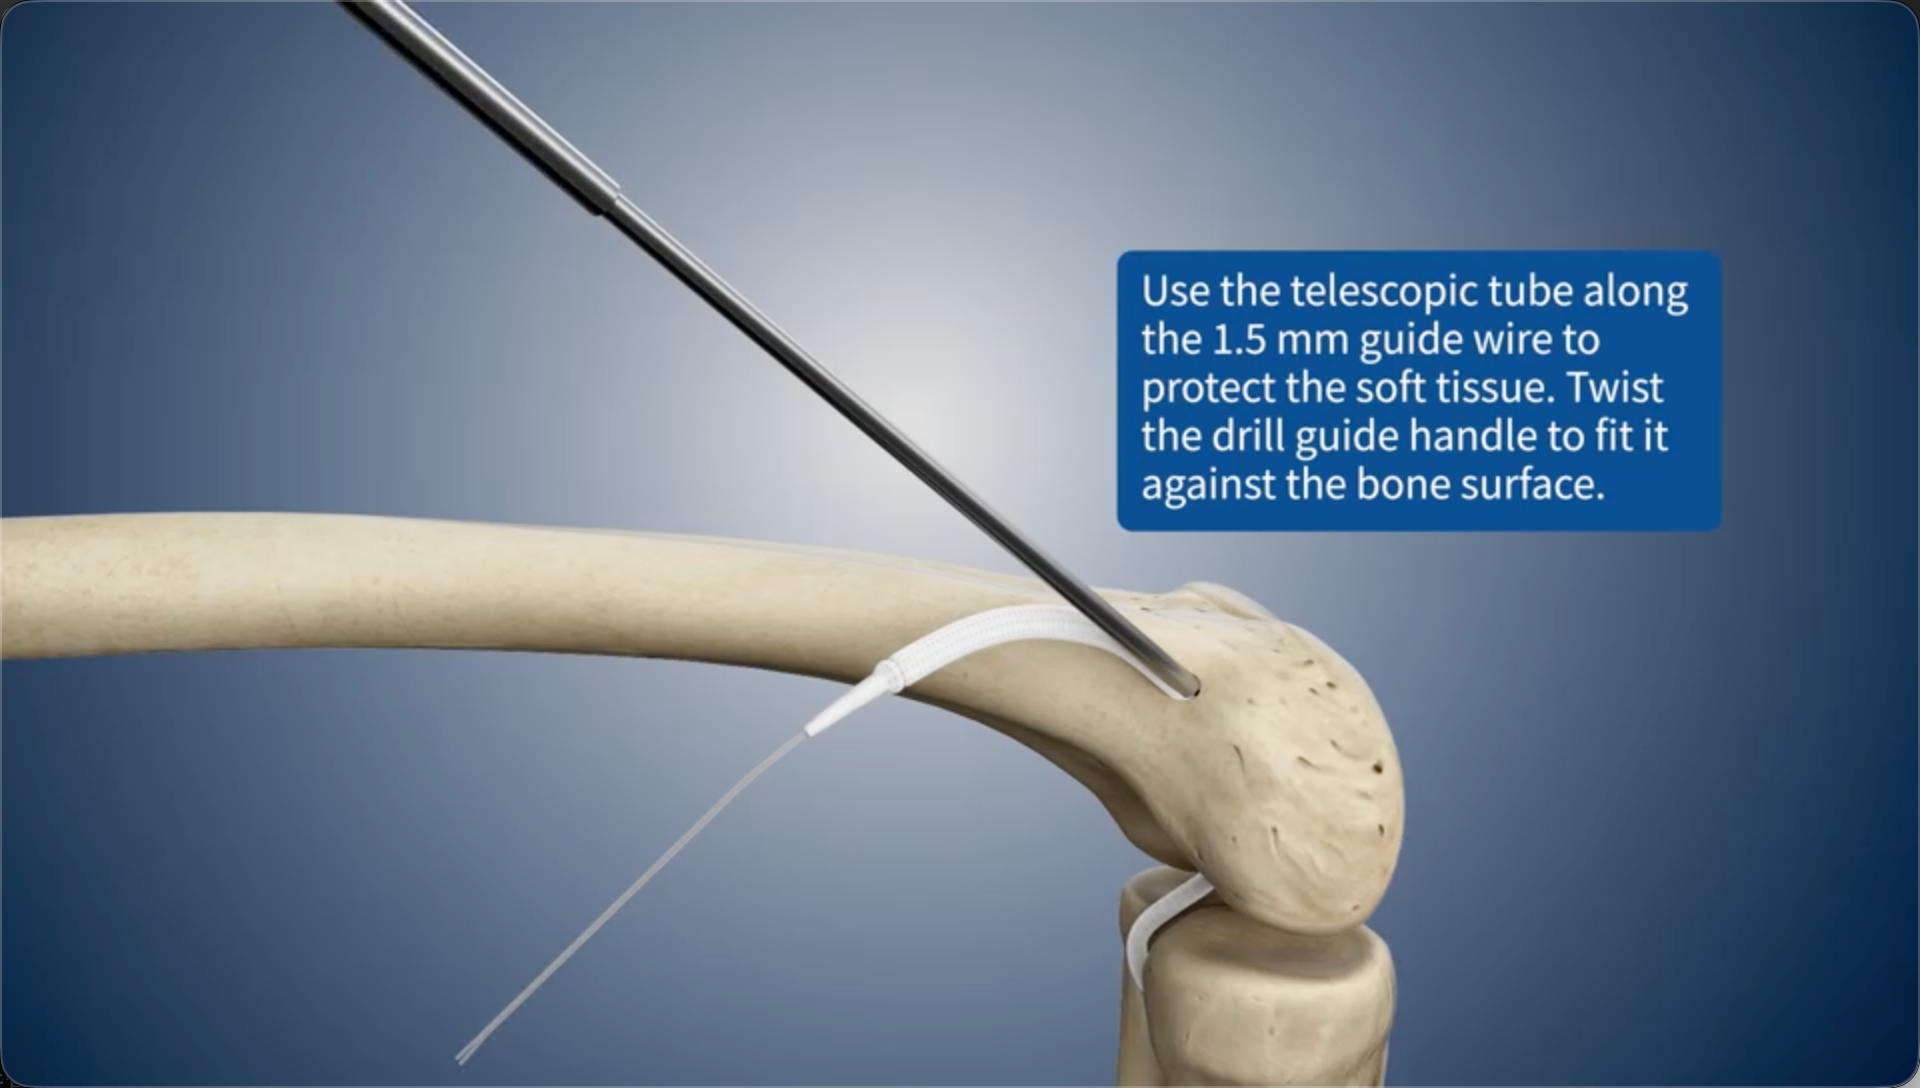
Use the telescopic tube along the 1.5 mm guide wire to protect the soft tissue. Twist the drill guide handle to fit it against the bone surface.
22
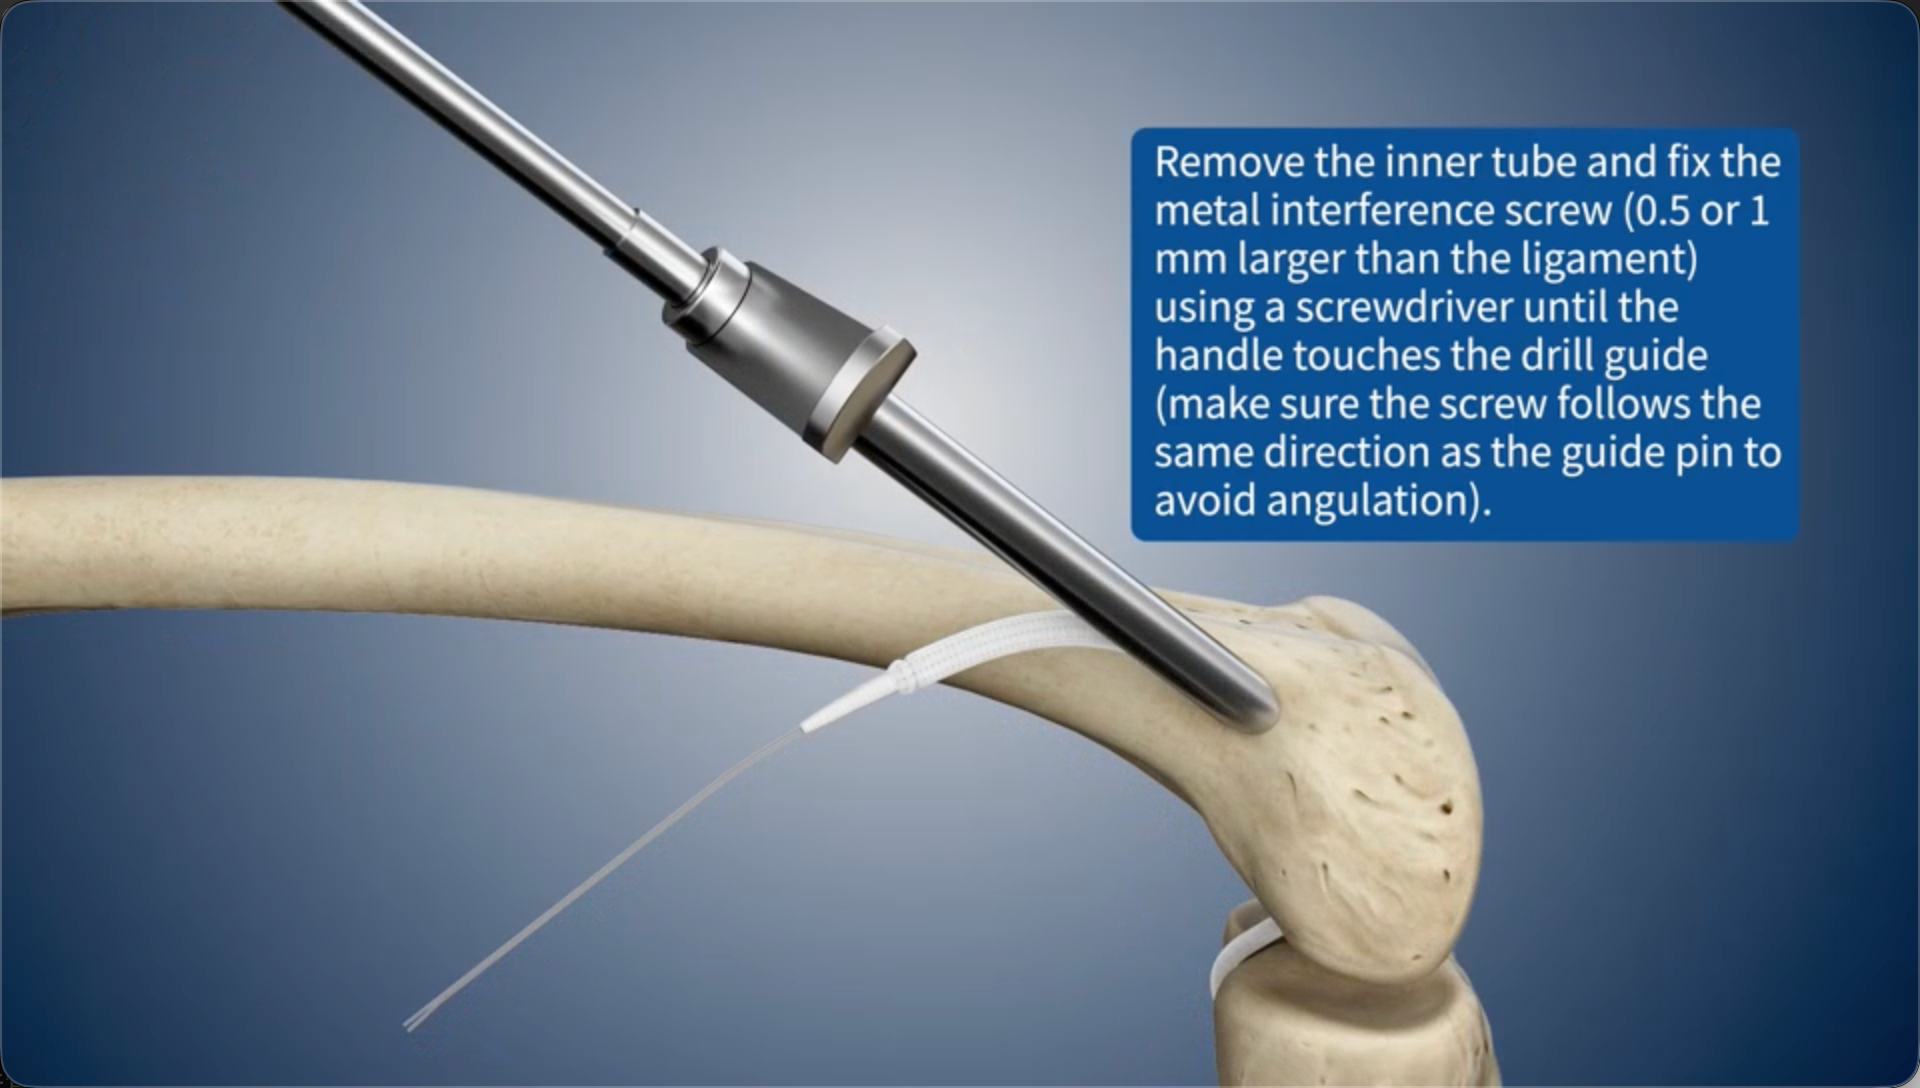
Remove the inner tube and fix the metal interference screw (0.5 or 1 mm larger than the ligament) using a screwdriver until the handle touches the drill guide (make sure the screw follows the same direction as the guide pin to avoid angulation).
23
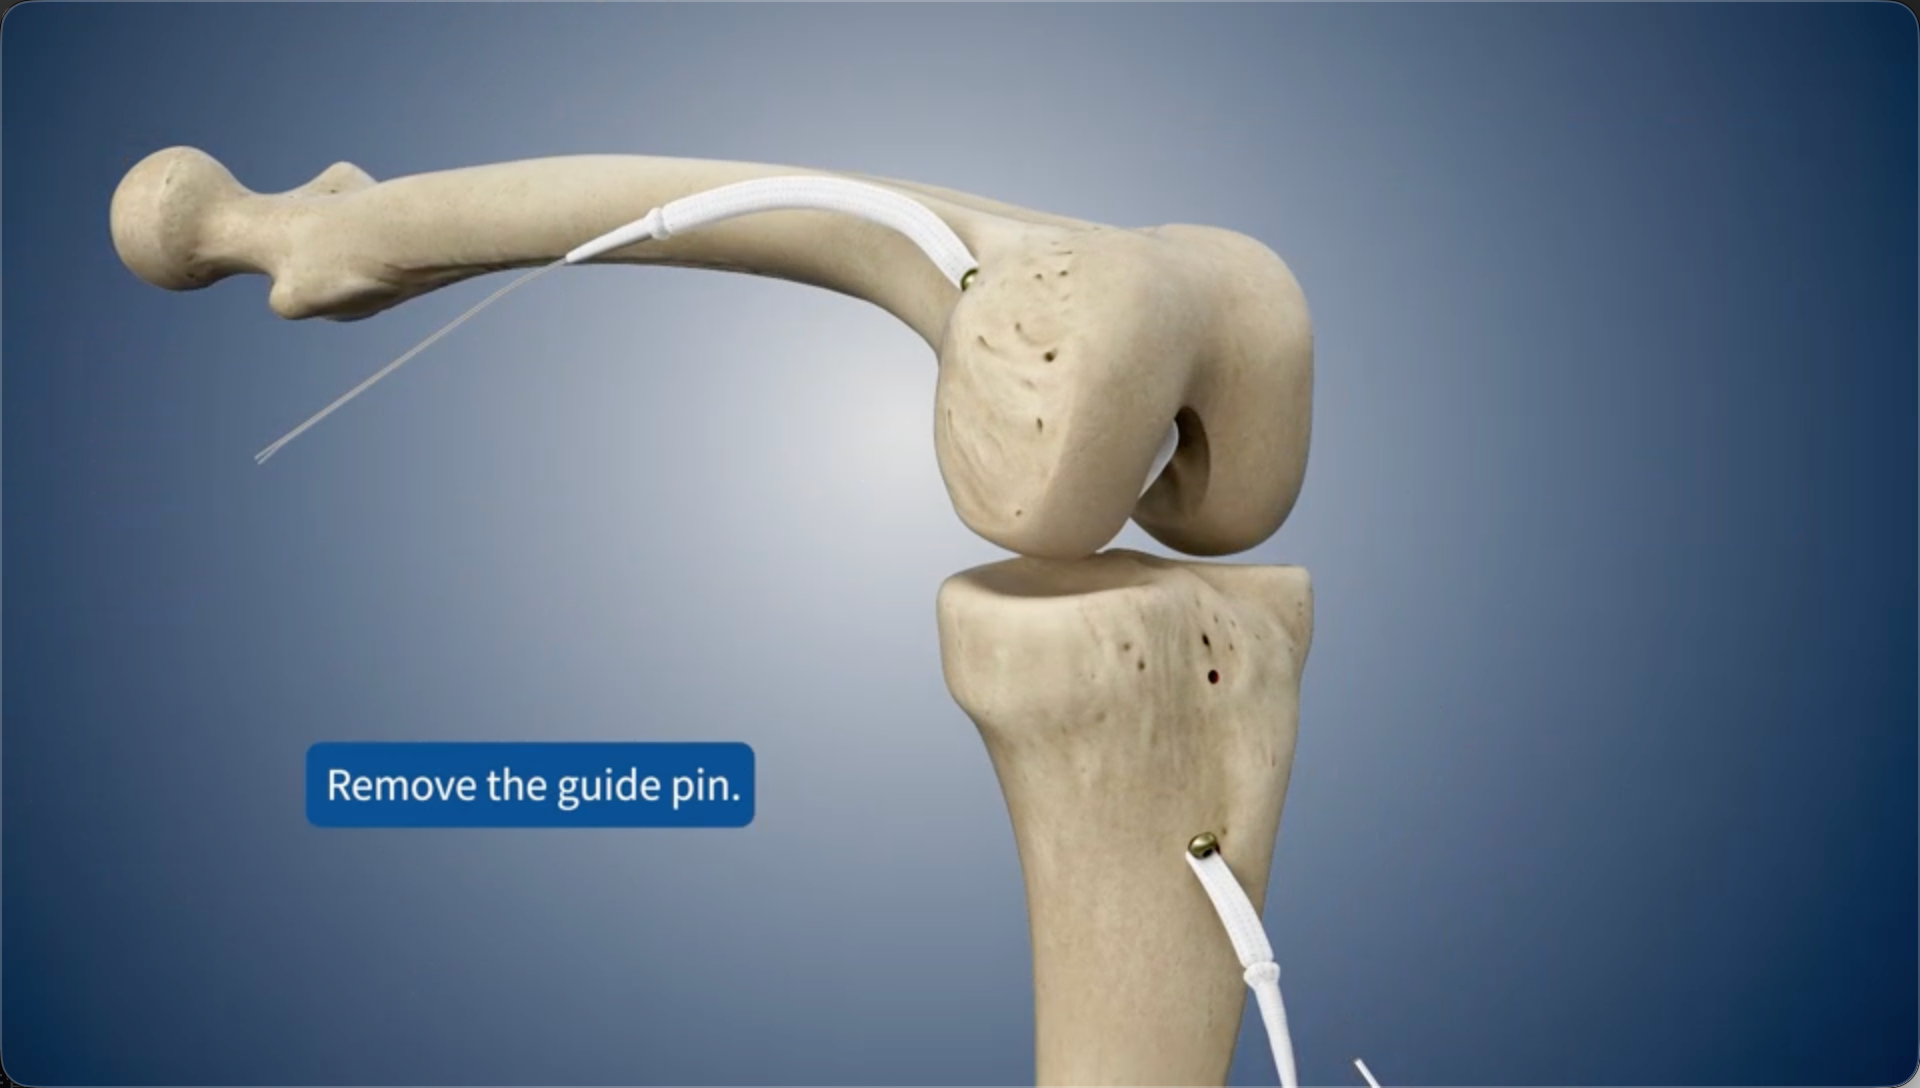
Remove the guide pin.
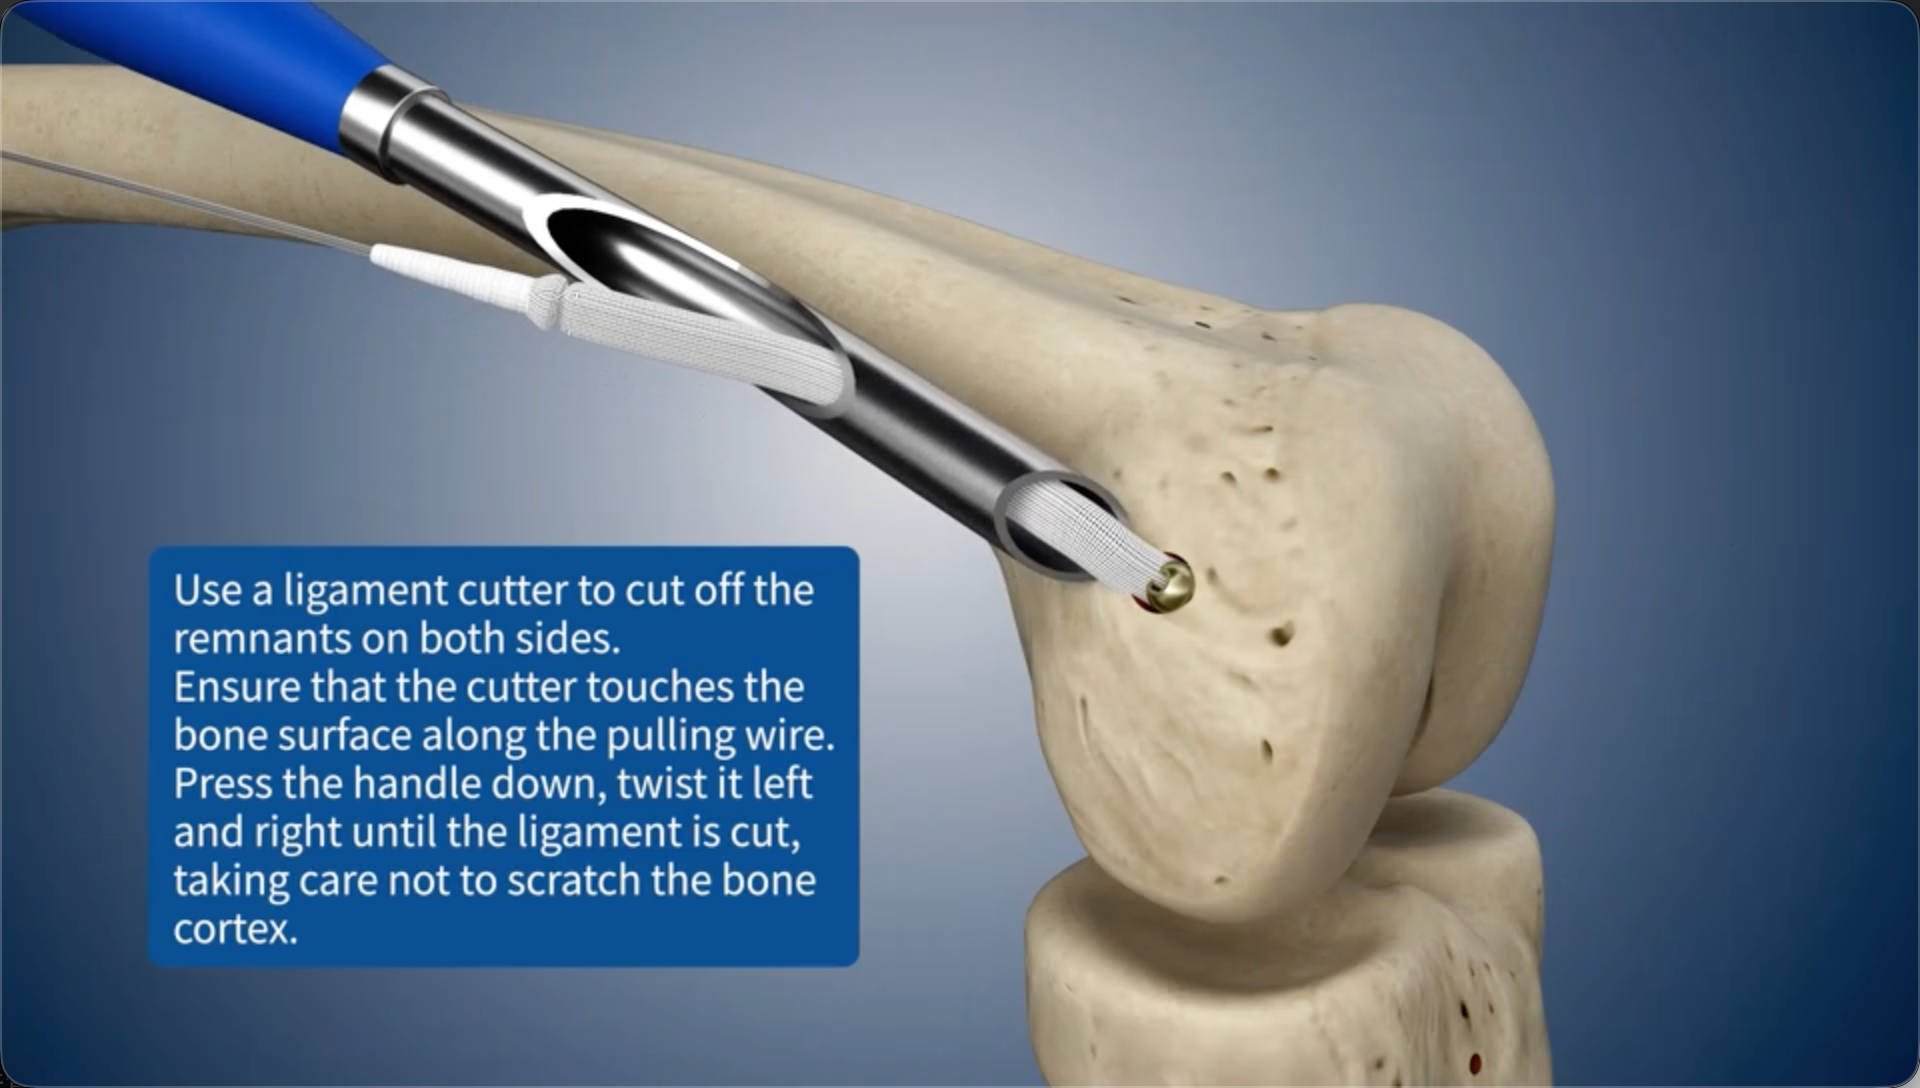
24
Use a ligament cutter to cut off the remnants on both sides.Ensure that the cutter touches the bone surface along the pulling wire. Press the handle down, twist it left and right until the ligament is cut, taking care not to scratch the bone cortex.